

The new Mule Transport for Warpath and Firefight looks great and as a Plague player, I think the parts for the Plague version look superb, making it look even better than the GCPS version.
The lack of any instructions threw me a little, but after some head scratching and lots of dry fitting I seem to have it all worked out and thought I’d share how I made progress, in case it’s helpful to any other Plague players out there.
So, here’s my instructions on how to assemble the Plague Mule Transport.
Here’s all the Plague bits you’ll be needing.
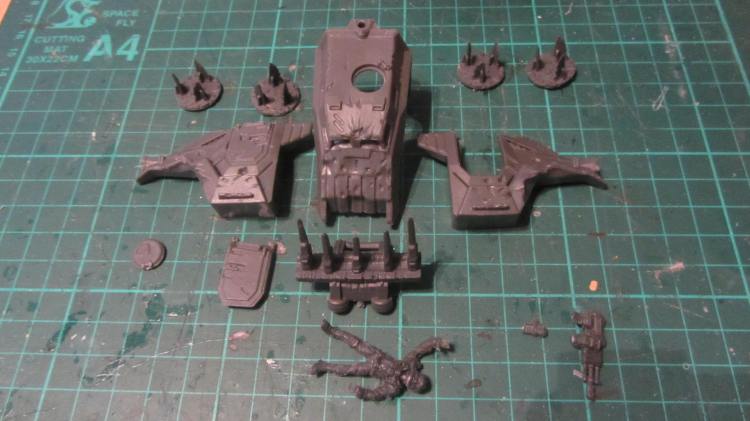
Some of these are hard plastic and others a softer PVC, so I used both polystyrene cement and superglue to get the best results. When reading the guide below, the norm is that you will be using polystyrene cement unless I specifically mention using superglue instead.
To begin, I connected the handle of the pintle-mounted heavy gun, as it’s a small piece and would be easy to lose. I was having ideas about what to do with this weapon, so I didn’t glue the handle in place yet. More on this later.
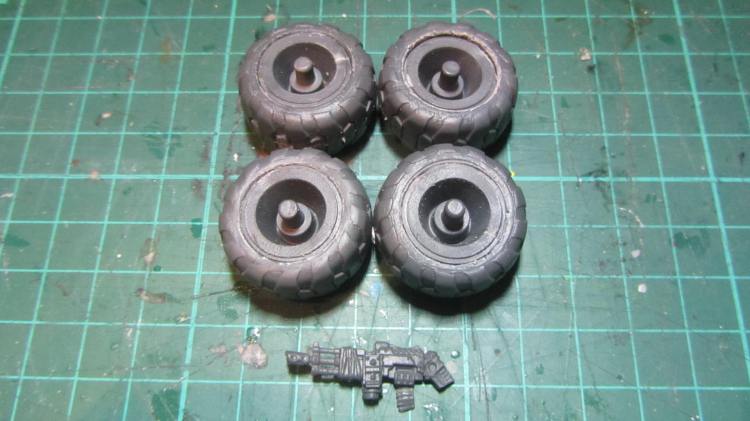
I assembled the wheels to get them out of the way. Remove flash from inside tyres with sharp modelling knife and file down the edge of the wheels so they’re easier to slide into the tyres. Try dry fitting before you add glue and use superglue when you do.
These are a very tight fit, so be careful to push them into place levelly. It’s easy for one side of the wheel to end up at an angle inside the tyre, making it hard to push the wheel all the way flush down to the bottom of the inside of the tyre.
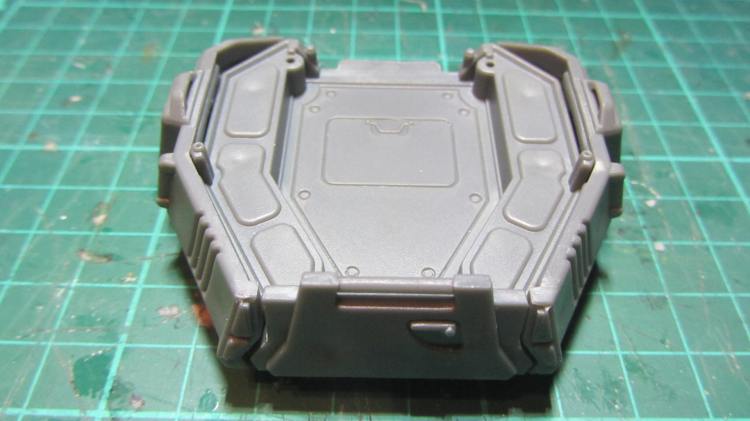
Next up; the flatbed section of the Mule, with sides, tailgate and main chassis.
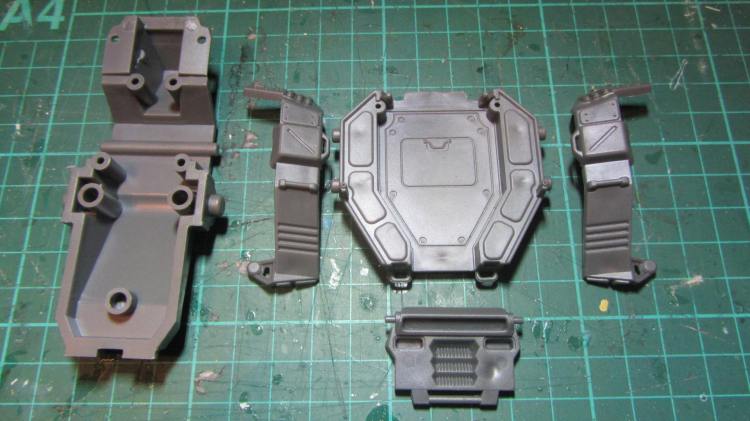
Glue just one side panel into place. Do not glue them both in place, as the tailgate has pins that fit into side panels, so that the tailgate can be lowered and raised.
Do not add glue to these pins.
Slot the tailgate’s pin into the loose side panel, position the pin on the other side of the tailgate into place in the panel you’ve already glued t the flatbed, then glue the second panel in place. The tailgate should still move down…
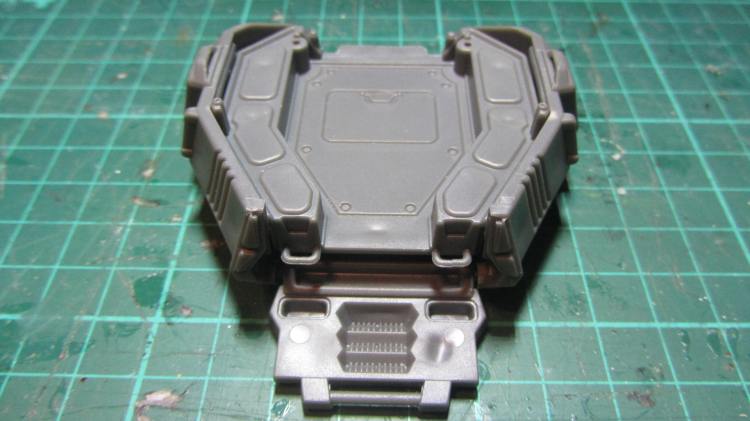
…and back up again. I like the steps modelled into the inside of the tailgate.
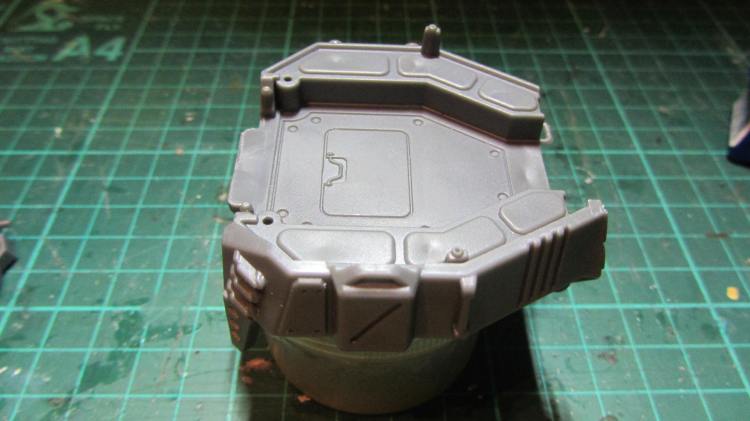
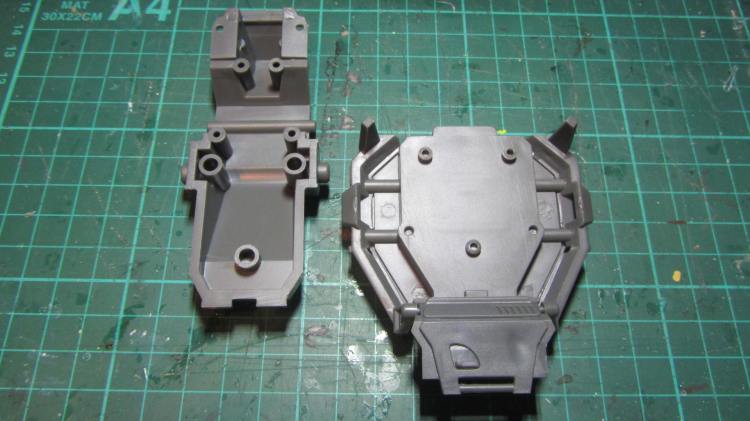
Now to glue this flatbed assemble onto the chassis. Turn the flatbed over and you’ll see three pins on the bottom of it that fit neatly into the holes on the chassis. Glue them together.
Now for the large rear suspension. This piece fits nicely in place as shown below, just be sure to fully push the larger of the two connections (on the right of the photo below) into place, so it’s flush against the chassis, then before the glue sets; rotate the left side downwards and pop the peg in to place in the hole in the chassis. Repeat with the other rear suspension piece on the other side of the chassis.
The two, smaller front suspension come in three parts each, small, medium and large. Group them together like this. At the top you have a small piece, in the middle a medium-sized piece and at the sides a large piece. You need to glue these together to form a sub-assembly, before gluing this sub-assembly to the chassis. Here’s how I did it.
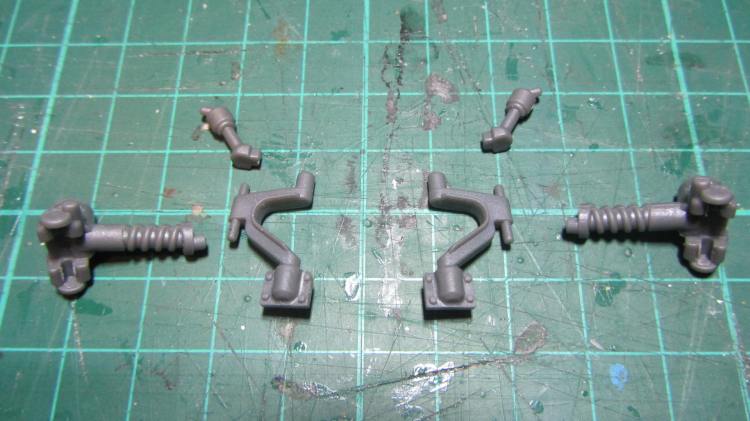
The smallest parts of the front suspension have an oblong end and a round end. Glue the oblong end into the corresponding hole on the medium sized piece, as shown below. Work on the next step quickly, before these two parts you’ve just glued have had time to set.

Grab the chassis and turn the front suspension sub-structure upside down. You’ll see an oblong hole on the chassis where the oblong tab on the suspension fits and a small round hole where the round end of the smallest part of the sub-assembly will fit.
Have a quick practise dry fit so you see how they go together then glue the sub-assembly into place on the chassis. As you have worked quickly, the joints of the sub-assembly should still have some flexibility to them, making it a little easier to fit everything in place.
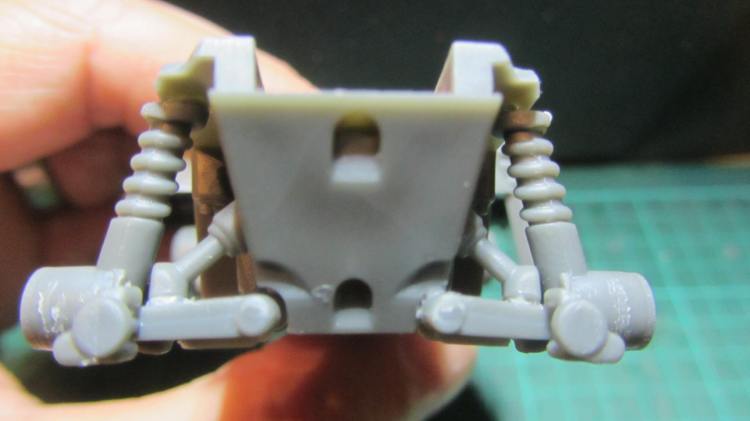
Now look at the last, large piece. On the opposite side to the big hole there are two grooves that correspond to the two pins on the sub-assembly. These go together and the round peg at the other end of the large piece fits into the hole on the chassis. This is a bit fiddly, but persevere and you’ll get it right:
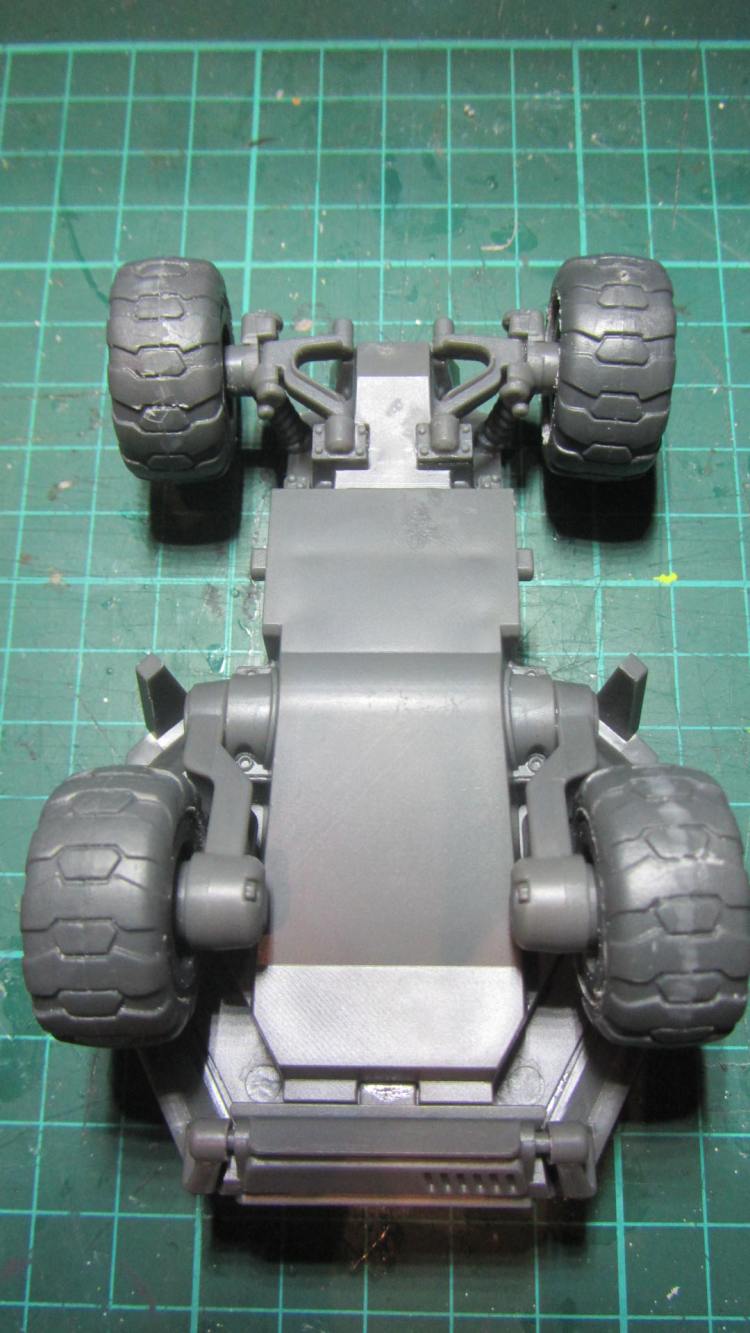
Repeat to fix the suspension on the other side of the Mule and when viewed right way up and from the front, it’ll look like this (don’t worry about those ‘floating’ pins at the very front of the suspension – you’ll be adding the spiked battering ram to these shortly):
Next – gluing the wheels in place. Give the suspension time to dry, especially the more fragile front suspension, 10 minutes should do it. Go and put the kettle on.
Enjoying our cuppa? Good, now dry fit each wheel, one by one, to make sure each wheel fits all the way down onto the suspension, so you can get a good fit. I used superglue to glue the wheels in place instead of polystyrene cement as I found it gave a stronger hold. (I think the wheels are made from pvc rather than hard plastic, but am not 100% sure).
I’m going to leave adding the Ben Hur-style hubcap blades until later, to make the Mule easier to handle for the remainder of the assembly. Which isn’t too much, now.
Here’s how everything looks so far with the Mule upside down.
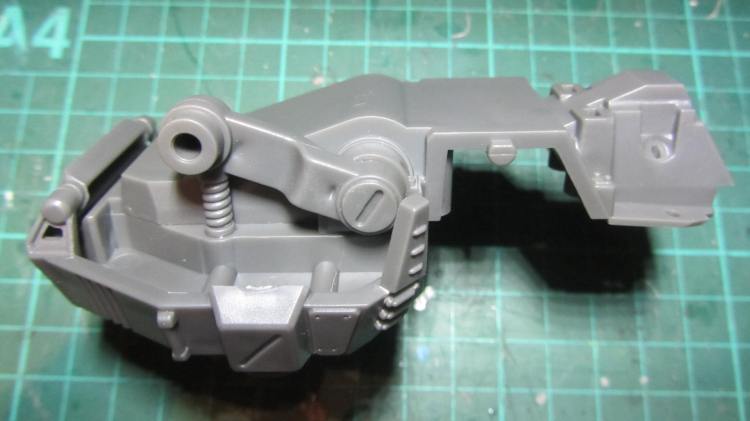
Stop making vroom vroom noises and pushing the Mule around your work top and grab these bits to assemble the Mule’s cab.
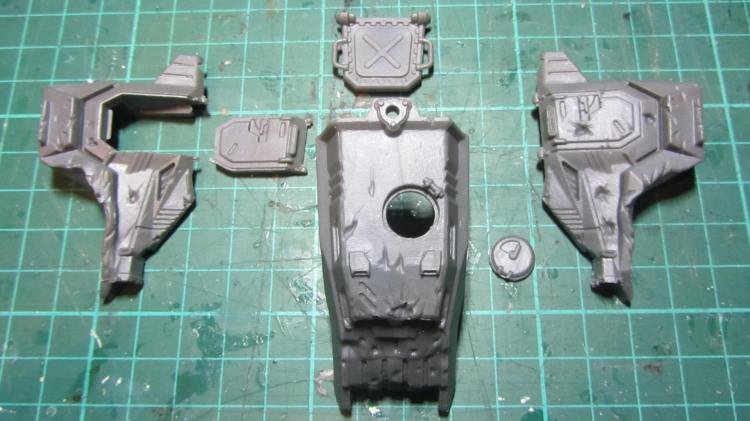
As you can see, you have a couple of choices to make here. Do you leave the side door and the circular top hatch open or closed? I decided to go with open, but more on this later.
For now, the main part of the cab has four pins that very obviously fit into four holes on the chassis. Glue these two pieces together.
Next, glue on the left side of the cab, the piece without the missing door.
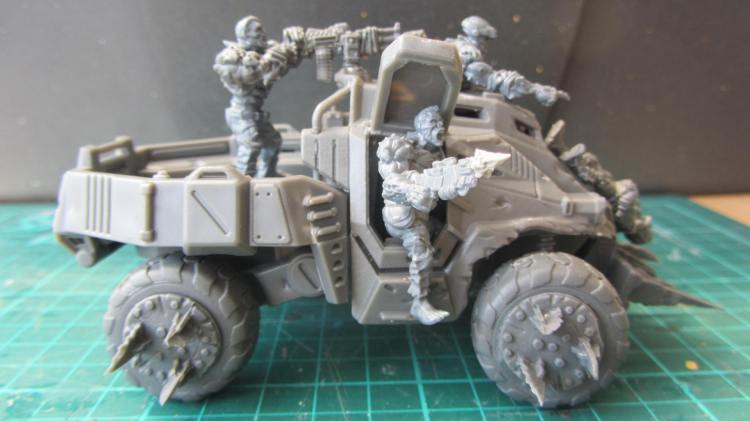
Now for the other side. The door can be fitted so it’s closed or open. If you’re wanting to model a Plague 3A leaning out of the open door blazing away with a rifle (as I had in mind) you’ll leave the door off.
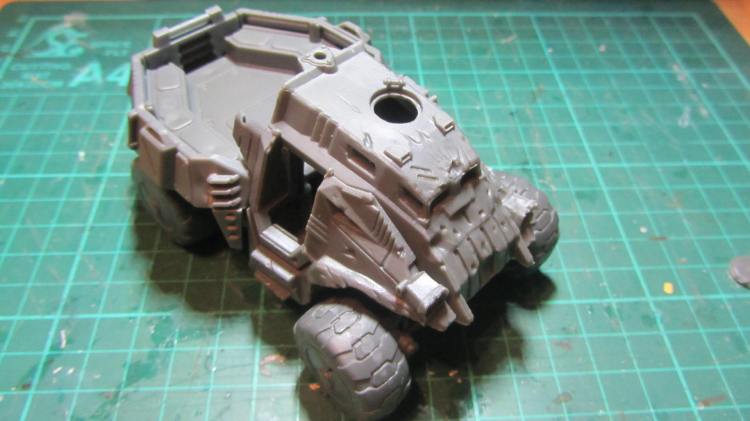
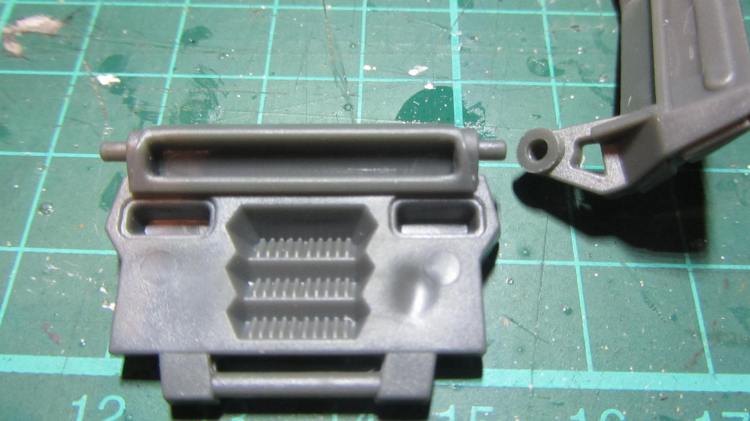
Now glue the hatch at the rear of the cab (with the x on it) in place.
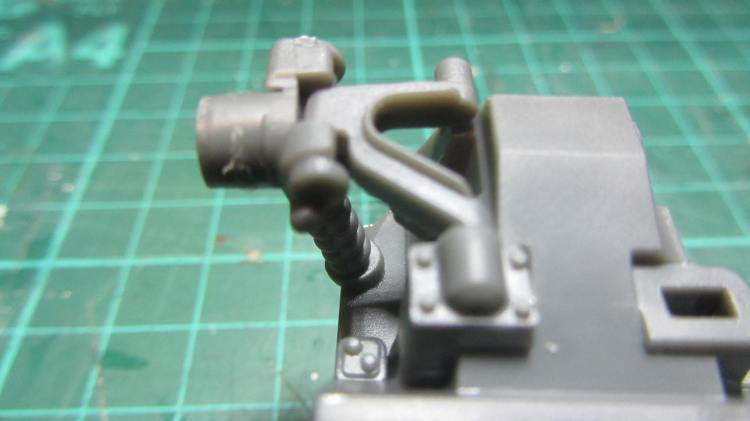
These two grab rails fit into place either side of the hatch.
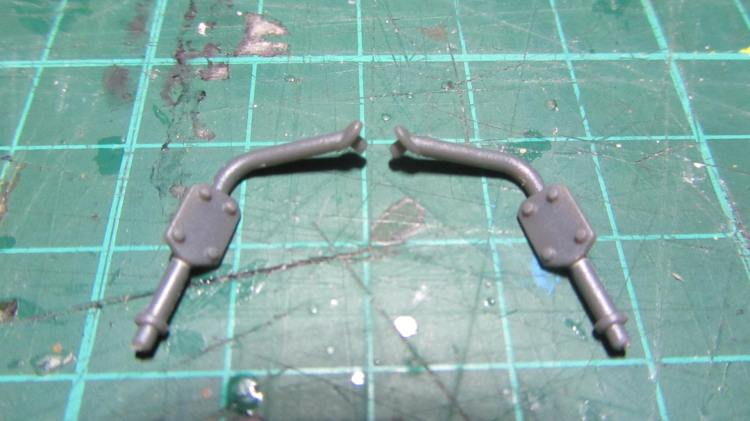
Here’s the left one of these glued in place:
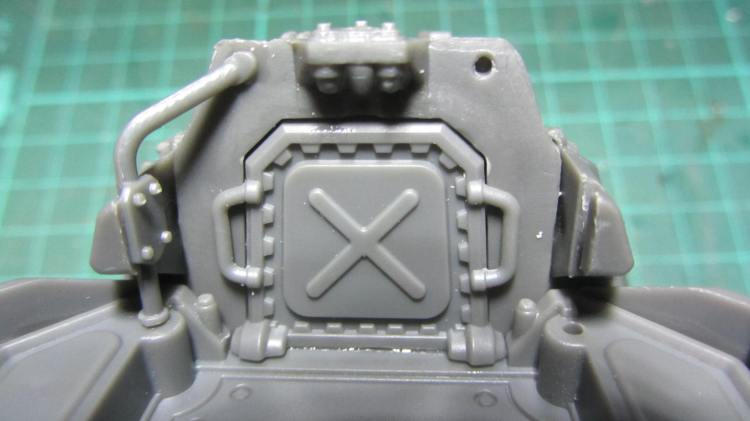
These are a bit fiddly, but put a dab of glue at the top, bottom and on the rear of the oblong plate with the four studs, push the bottom peg in first, then press the oblong plate into place and you should be able to neatly pop the top peg in too. Repeat for the other side.
That just leaves the pintle mounted weapon, battering ram and wheel spikes, dead GCPS dude (and the side door and top hatch) . All of these are manufactured in a softer pvc plastic, rather than the hard plastic that the rest of the Mule is comprised of, so use super glue rather than polystyrene cement to fix them in place.
I may be wrong about this, but I don’t think the Plague weapon option is designed to fit with either of the gun shields provided, so I haven’t bothered. It’s certainly possible to glue/greenstuff them into place if you really want them, but I’ve left mine off. Also, note that the peg on the Plague weapon (that fits into the pintle mount on the cab) is very short, possibly making it a little fiddly to glue in place.
The spiked battering ram fits on the front of the cab easily, with the two pegs on the front suspension fitting the holes at the bottom of the ram and the bar going uppermost against the cab. Use super glue for this PVC piece.
I added the ‘Ben Hur’ hubcaps next, which fit on very easily. Again, these are PVC, so use your super glue.
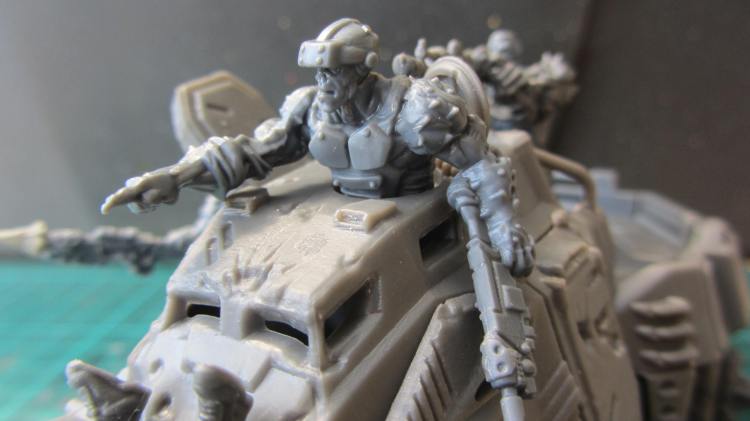
Now, I decided I wanted to model a Stage 3A popping out of the circular hatch at the top of the Mule, ‘Oddball” style (if you’ve seen the film Kelly’s Heroes, then you’ll understand what I mean) and to have another leaning out of the open side door blazing away with a rifle. I pinned the circular hatch in place to make sure it was a strong joint and the doorway has (so far) stayed in place with just super glue.
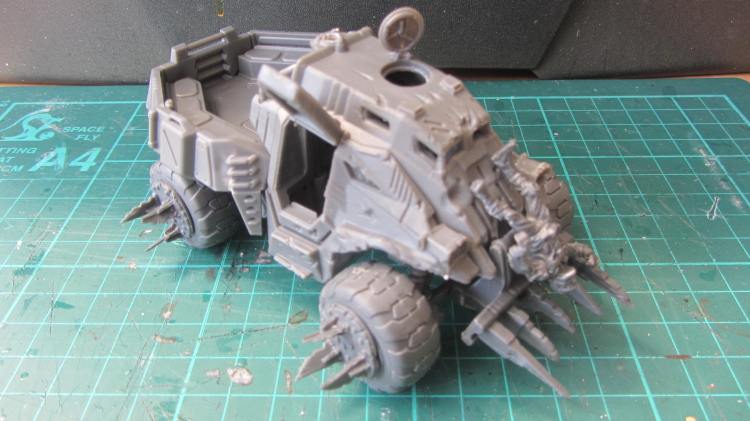
I will paint the dead GCPS dude separately to the Mule and glue him in place at a later date. As far as I can tell, from the position of his (I assume dangling) right arm, he goes in place something like this, but there’s no real right or wrong here, just where you think he looks coolest. So at this stage, with the Mule pretty much done, here’s how it looks:
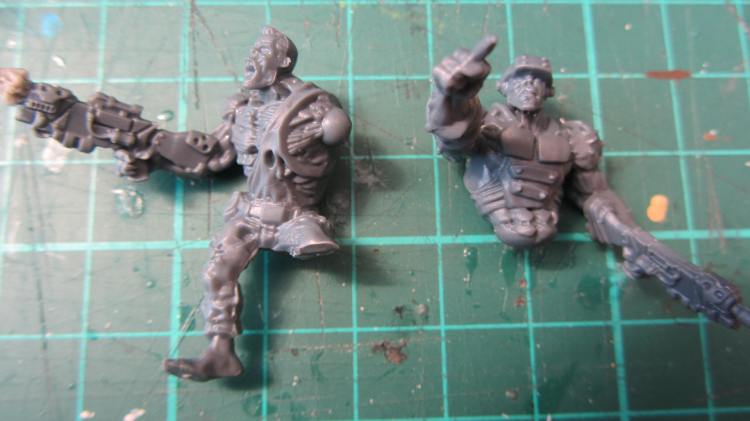
My Oddball 3A for the top hatch was an easy build. I just left the legs off a hard plastic Stage 3A, blu-tacked the body in place on/in the cab and then glued the arms on so that they both practically fitted and looked quite natural – one arm is pointing and the other is holding his rife in a relaxed position, against the cab of the Mule.
The “Rargghhh blam-blam-blam-blam” 3A was a bit more of a faff. I selected the pair of legs that I thought would fit best and soon realised I needed to lop off the left leg at the knee, so the 3A will stand low enough on the Mule’s cab to fit under the open door.
I faffed about with several options for his left arm, before realising it’s far simpler to leave it off. I can stand the 3A in place in the door so you can’t see his left arm at all. It doesn’t look like he’s missing a limb and it helps to physically fit the model in place. Here they both are:
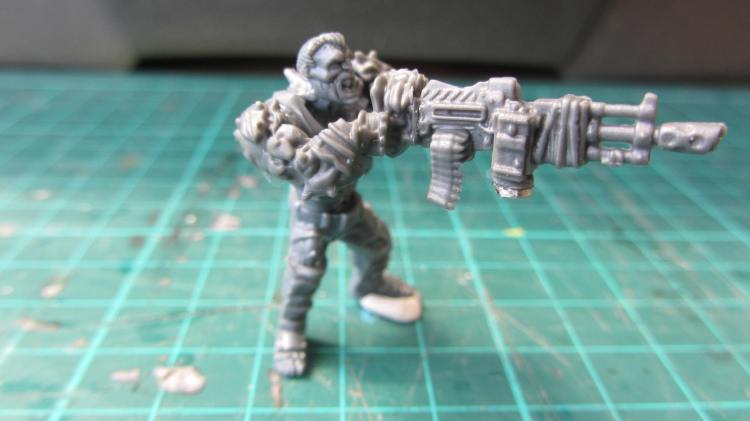
I decided to go all in and create a 3A to man the pintle-mounted weapon too. To create this I used a pair of arms that comes with the Plague Hornet kit, so you won’t get these arms in the Plague Mule kit. Of course, I also used more hard plastic Stage 3A parts. I magnetised the bottom of the gun and the pintle mount, so the gunner is removable. Here he is, with implied budda-budda-budda heavy weapon noises:
Put ’em all together and what have you got? A ‘Vroom Vroom Rargghhh blam-blam-blam-blam budda-budda-budda’ battered hunk of a vehicle, bouncing across the war zone at full tilt towards the enemy, guns blazing!
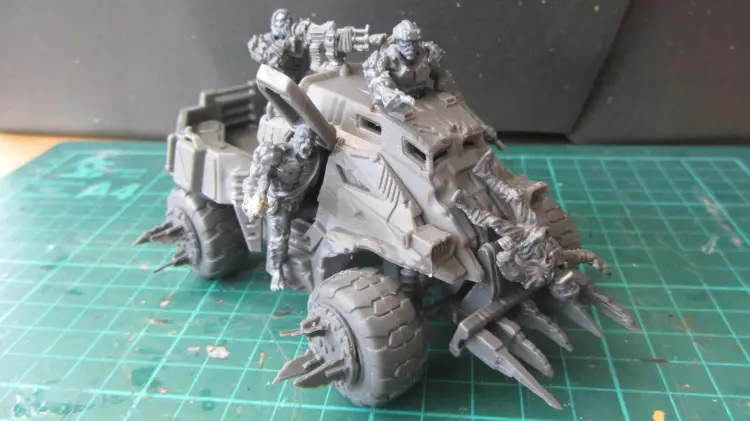
Yeah, I know that the pintle-mounted weapon couldn’t be firing without turning Oddball into a fine red mist from the waist up, but Rule of Cool and all that. I think it looks great and as far as I’m concerned, Oddball would duck back down into the cab before ordering the gunner to start blazing away (and we’ll just ignore the fact that Oddball’s physically bigger than the actual opening in the top of the cab. ‘K? ‘K).
Here’s a closer look at ‘Rargghhh blam-blam-blam-blam’ so you can see that his missing arm and half leg aren’t really noticeable. The eagle-eyed amongst you may have noticed the muzzle flash piece I’ve pinned to the end of his rifle, for extra blam-blam effect when painted.

And one last look at the whole motley crew.
Thanks for reading!

I wish I’d got some of the uninfected mules for my GCPS. Lovely model and useful instructions
LikeLiked by 1 person
Thanks 🙂 It’s available from retail now, so you can always treat yourself at a future date. I hope we get a Lancer battle tank (with gribbly Plague options) in the future.
LikeLike
Great tutorial on how to put this together. I have referred to this post in today’s post https://wordpress.com/post/phillipislandgamingsociety392176732.wordpress.com/25662 and will do so again in a few days time when the mule is finished.
Thanks again. I am now following as we seem to have a few interests in common!
LikeLiked by 1 person
You’re very welcome. I’m pleased you’ve found it helpful 🙂
LikeLike