

By far my favourite part of the Deadzone V2/ Infestation Kickstarter was the launch of the Industrial scenery. I pledged for two packs of this and have had great fun seeing what I could come up with.
Here’s what I initially built with the two sets (plus three or four spare tiles I had left over from Urban Battlezones):
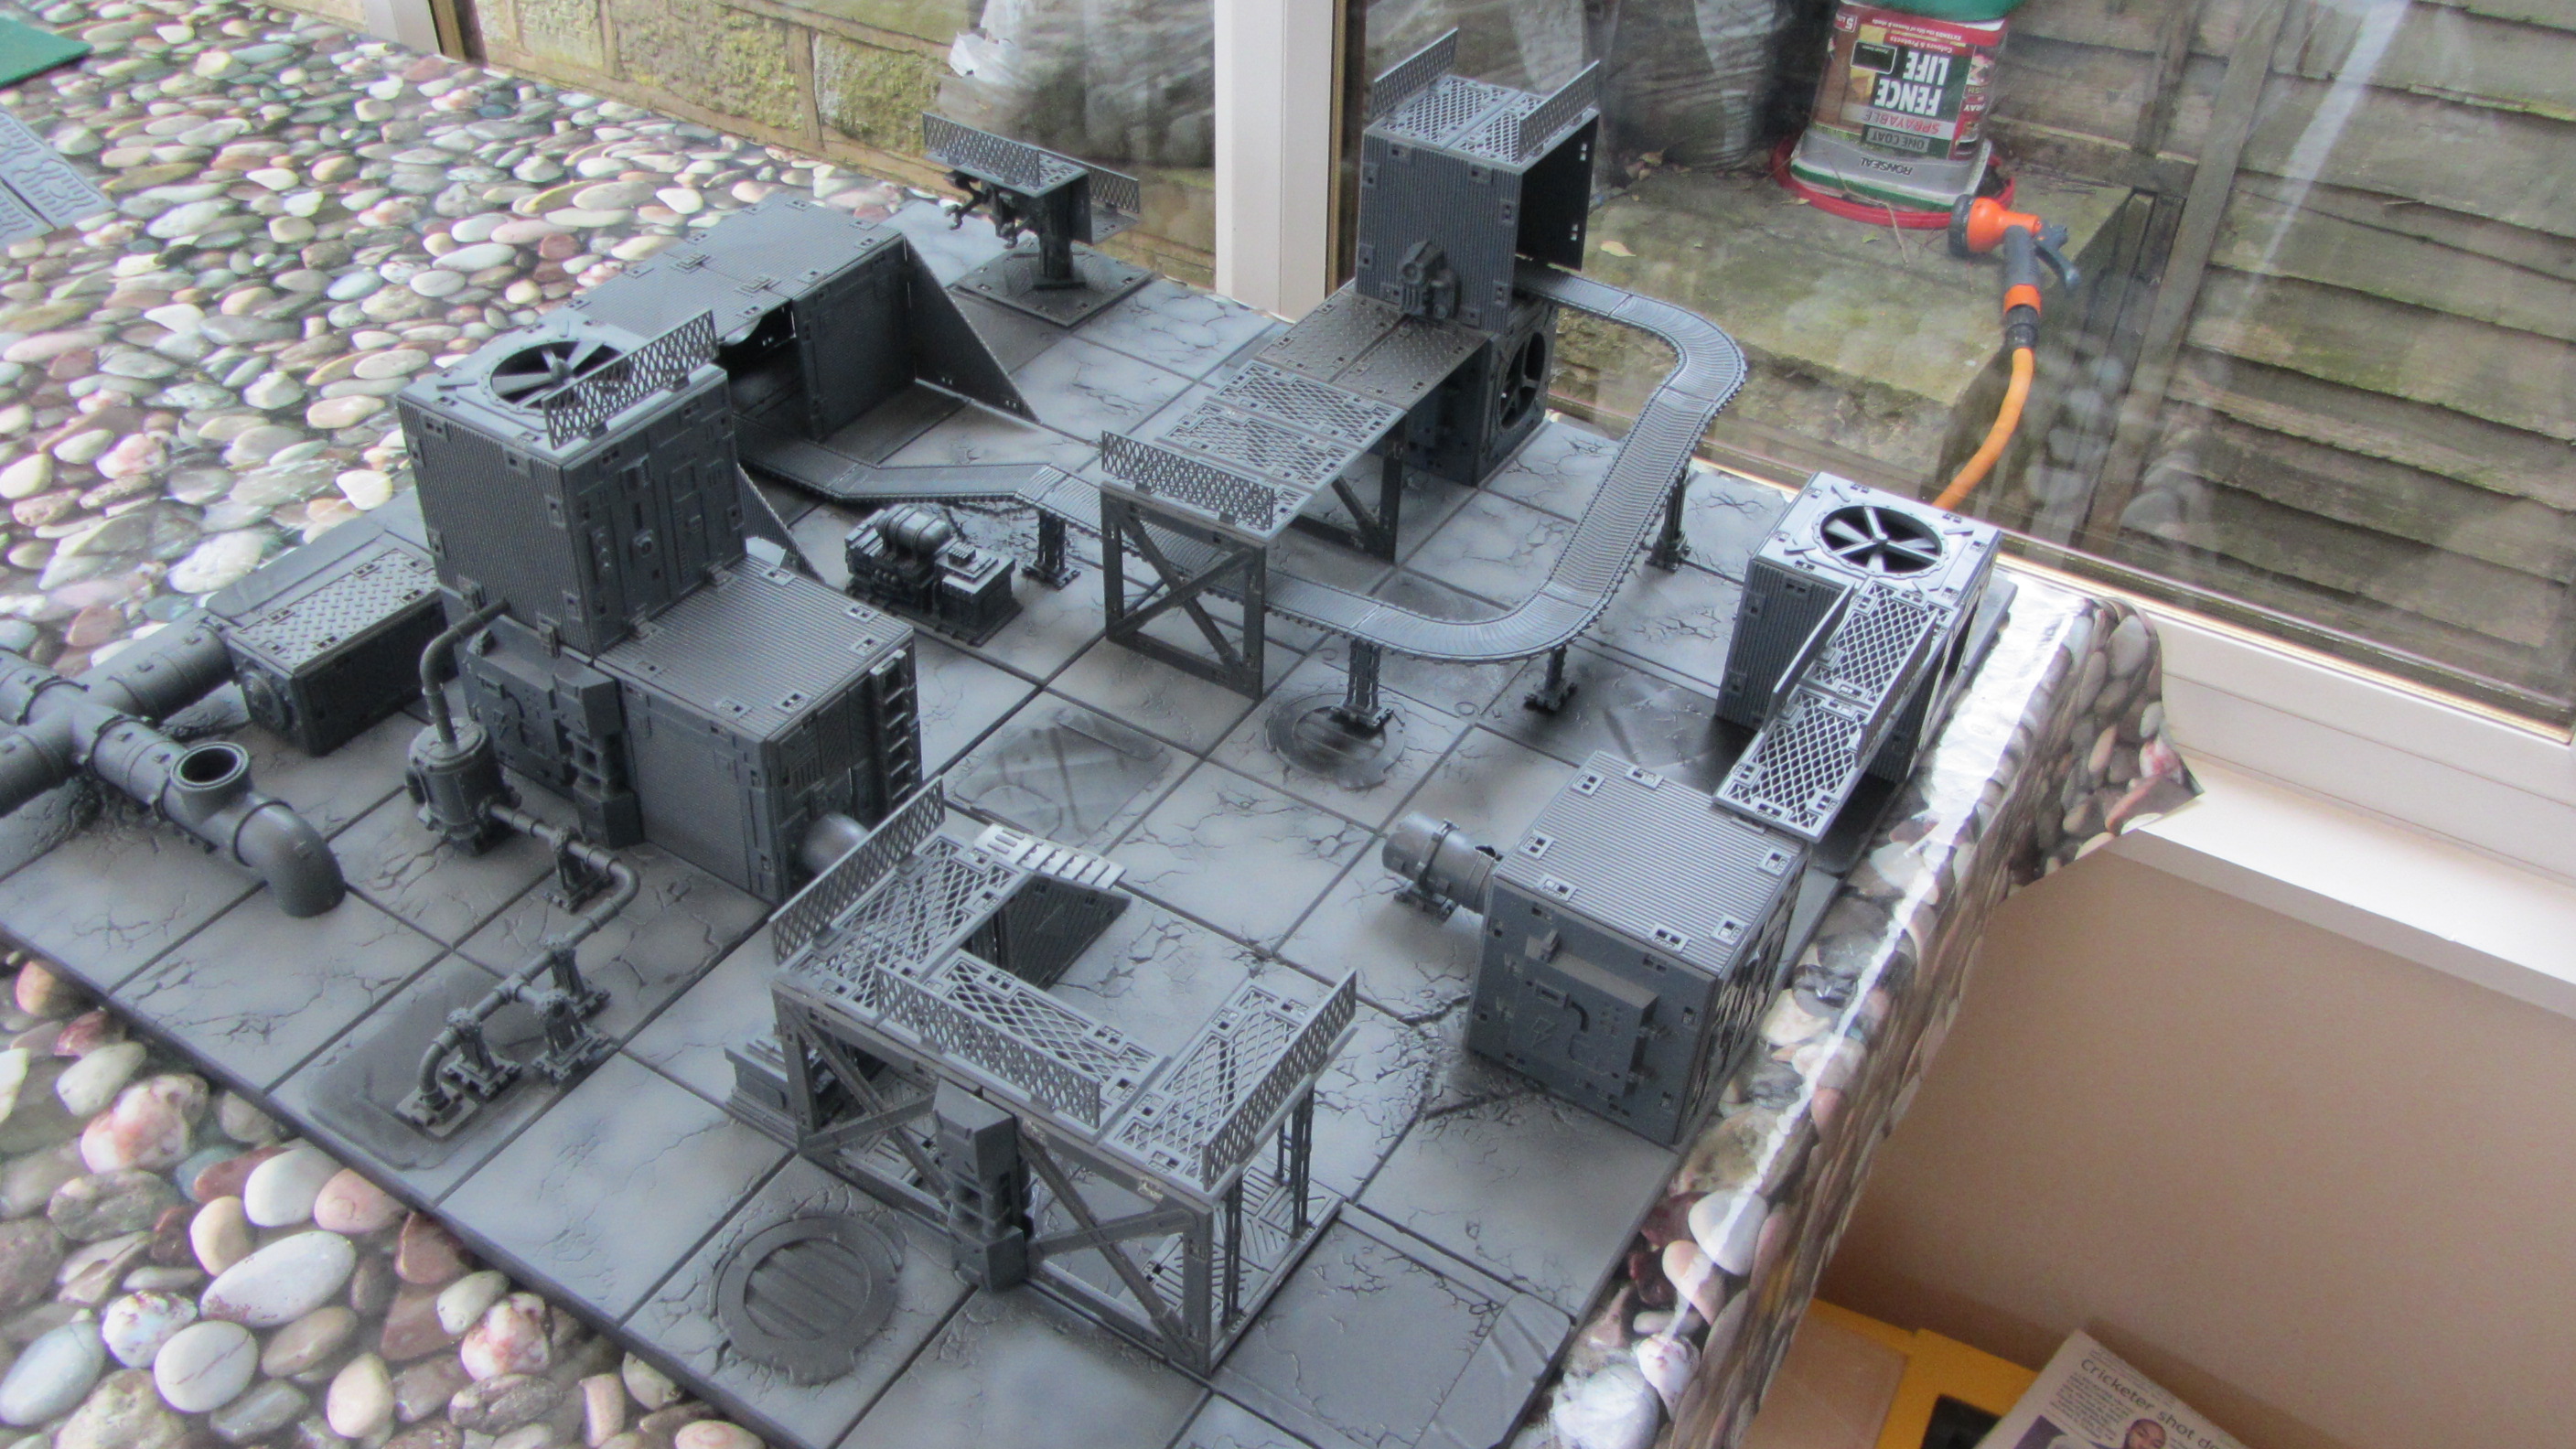
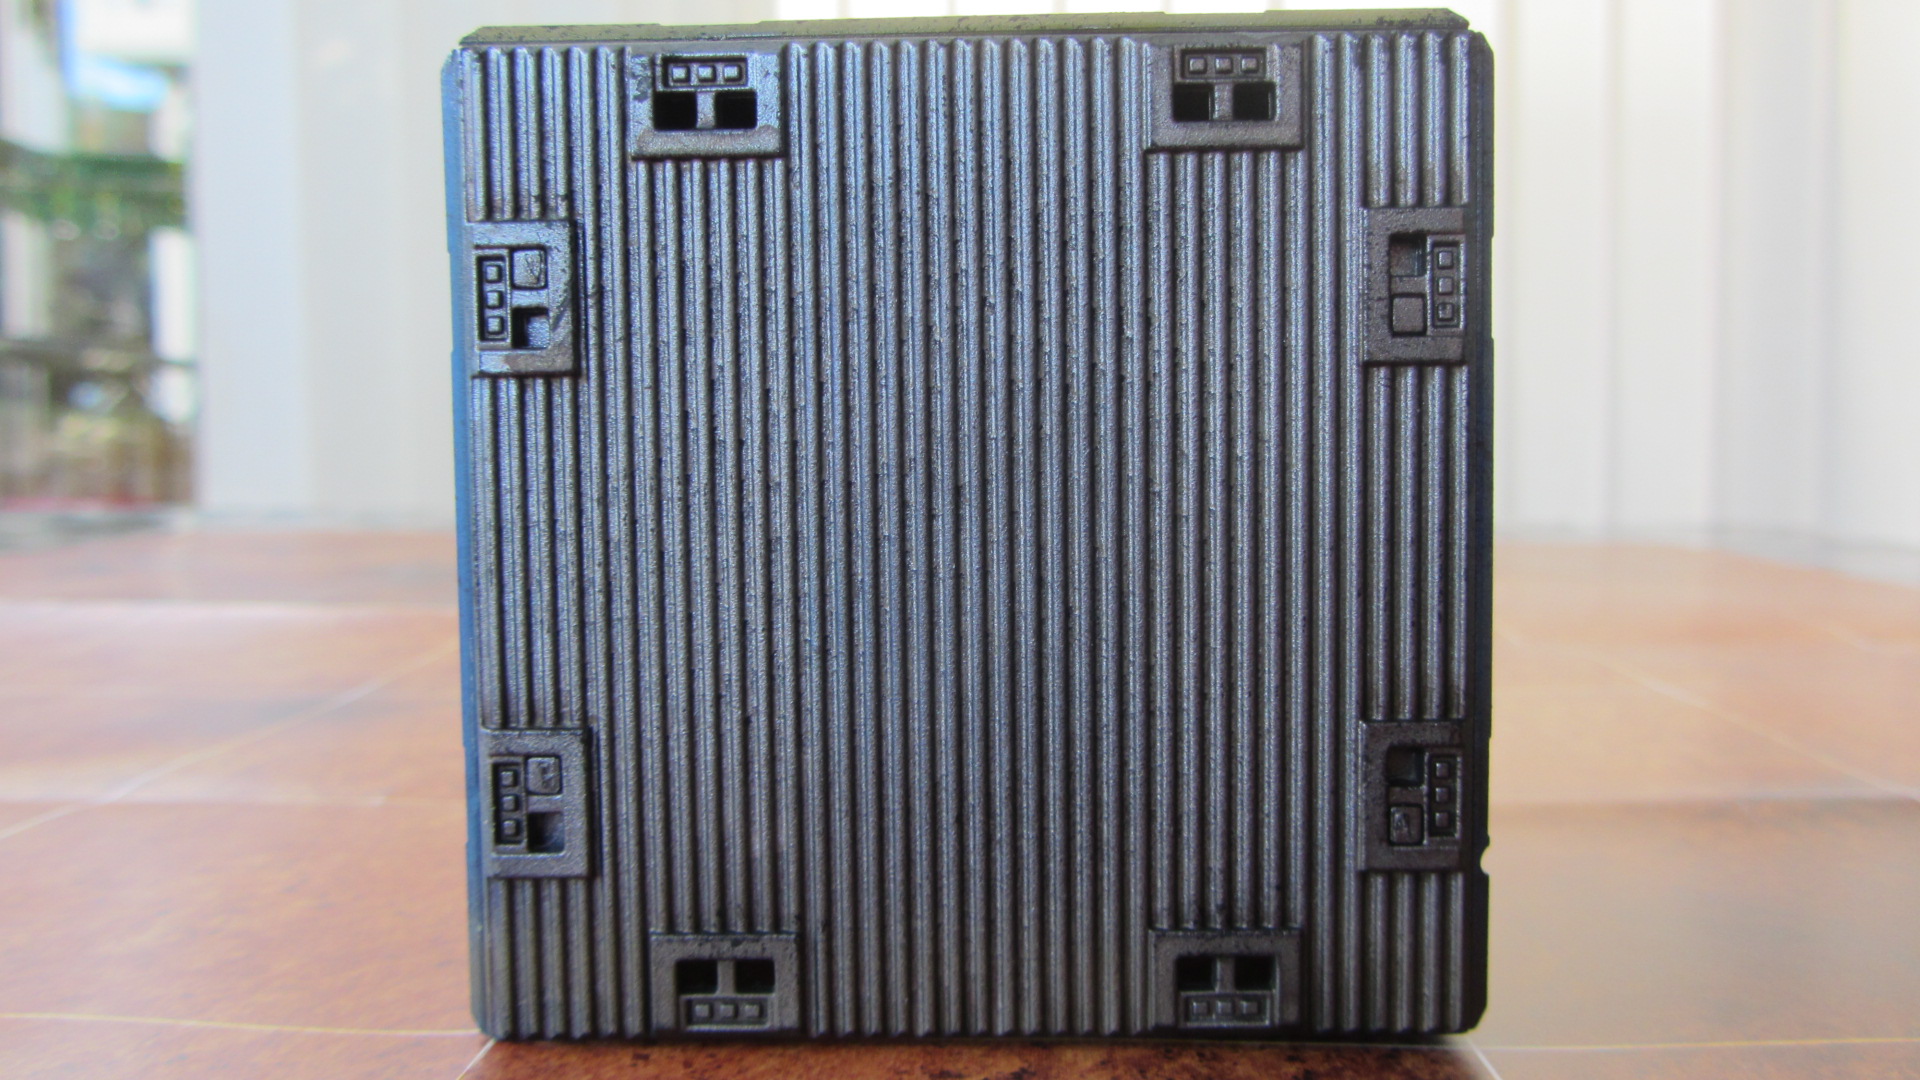
The boards in the photo above are the hard plastic Deadzone set created by Secret Weapon. In these pictures they’re only undercoated black with a first layer of grey airbrushed on. The link above takes you to a post showing the finished pieces. It’s areal shame that Secret weapon’s Tablescapes range never took off the way it deserved to, with problems with the manufacturer affecting supply.
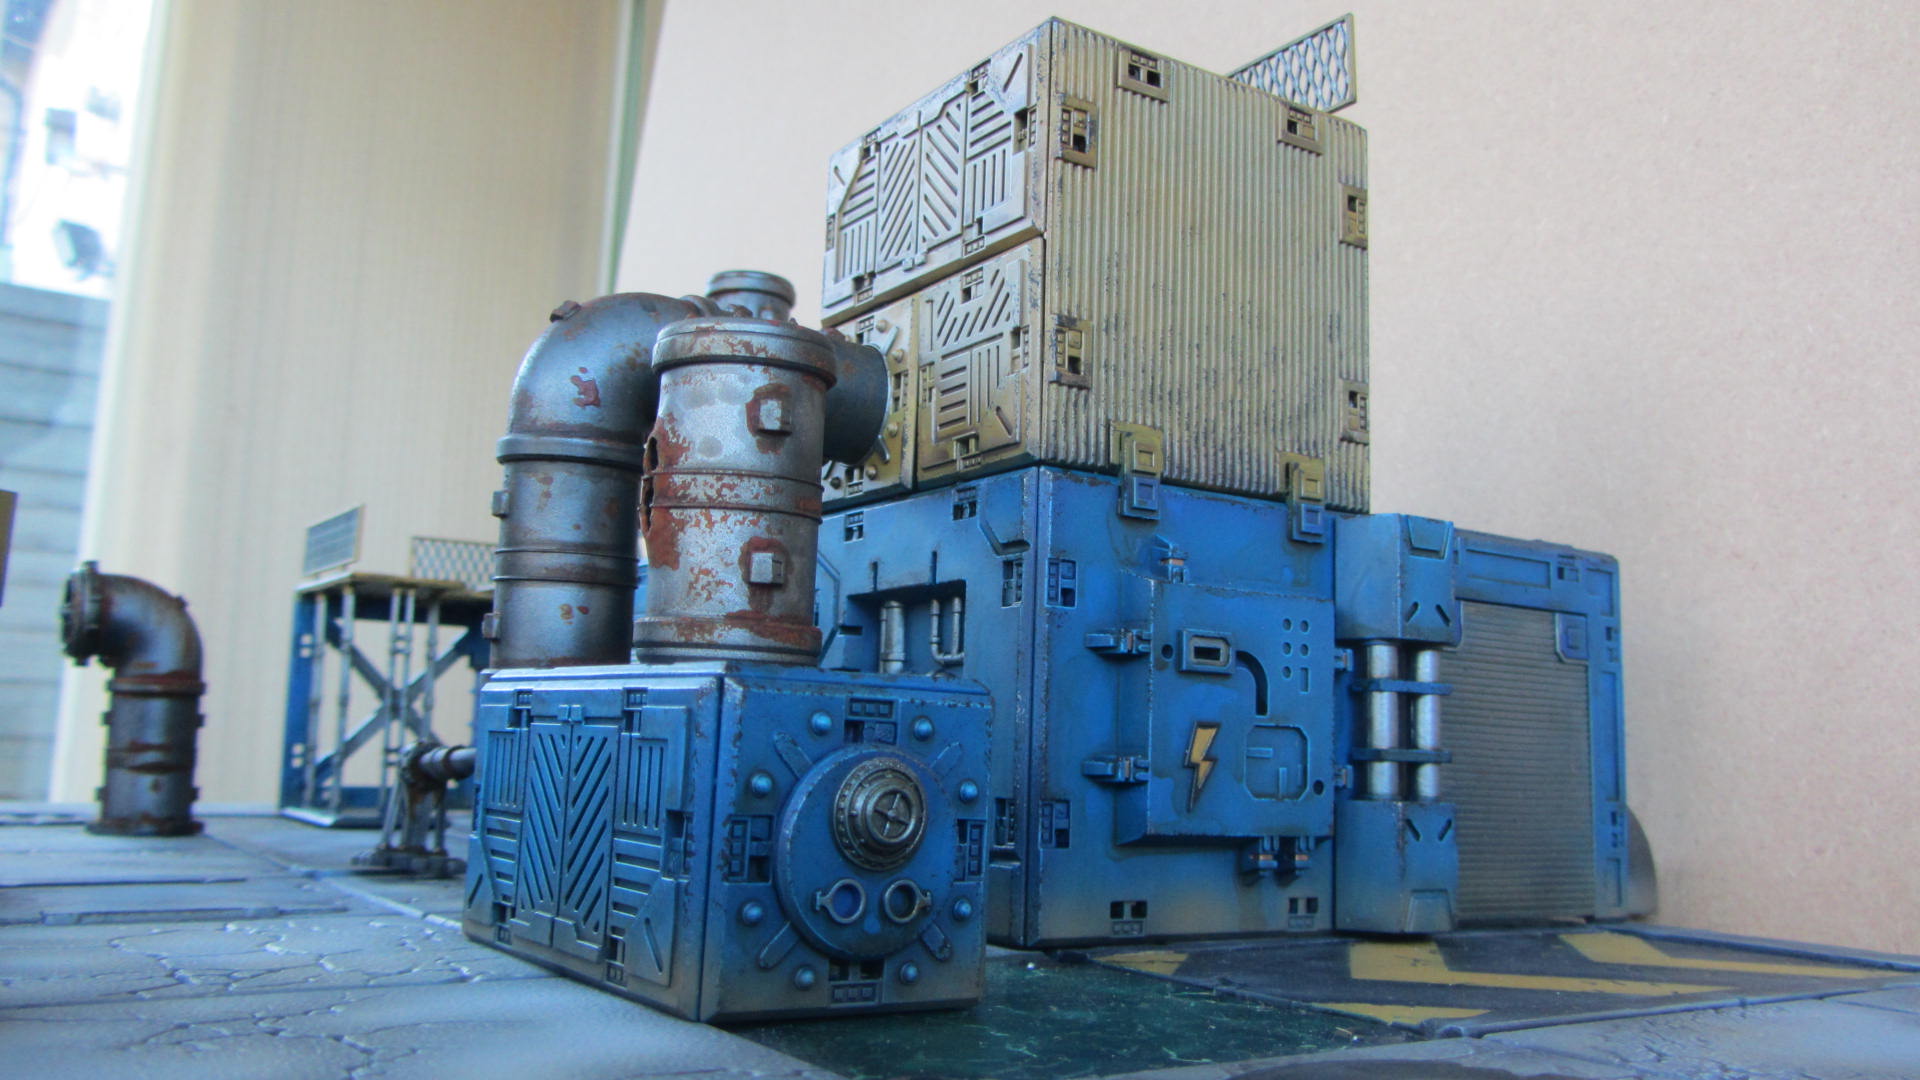
I’ve tried to build everything to look like it’s a purposeful structure, rather than ‘laser tag’ scenery. So to that end: a pumping station.
I particularly like the large pipe sections and the fact you can incorporate them into buildings with the quarter cube tiles provided.
The corrugated tiles work really well as wall or ceiling sections. The pipes leading from the main building to the tank on the left aren’t glued to the wall, so the pipe and tank can be removed for easier storage.
A mine shaft entrance with conveyor belt. I cut one of the corrugated tiles in half diagonally to make the angled side panels. Nice and easy to do (scored the tile using a metal ruler and sharp craft knife) then cut the tile in two with a modelling saw.:
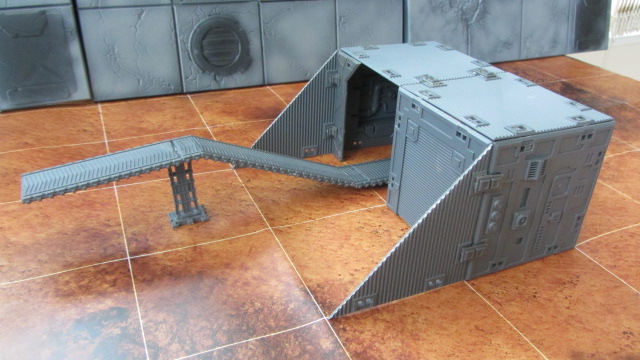
I realised that I haven’t taken a standalone photo of the mine shaft now it’s painted, but you can see it in the photo below in the top left quarter, painted blue and with a ventilation shaft on top (more on those later).

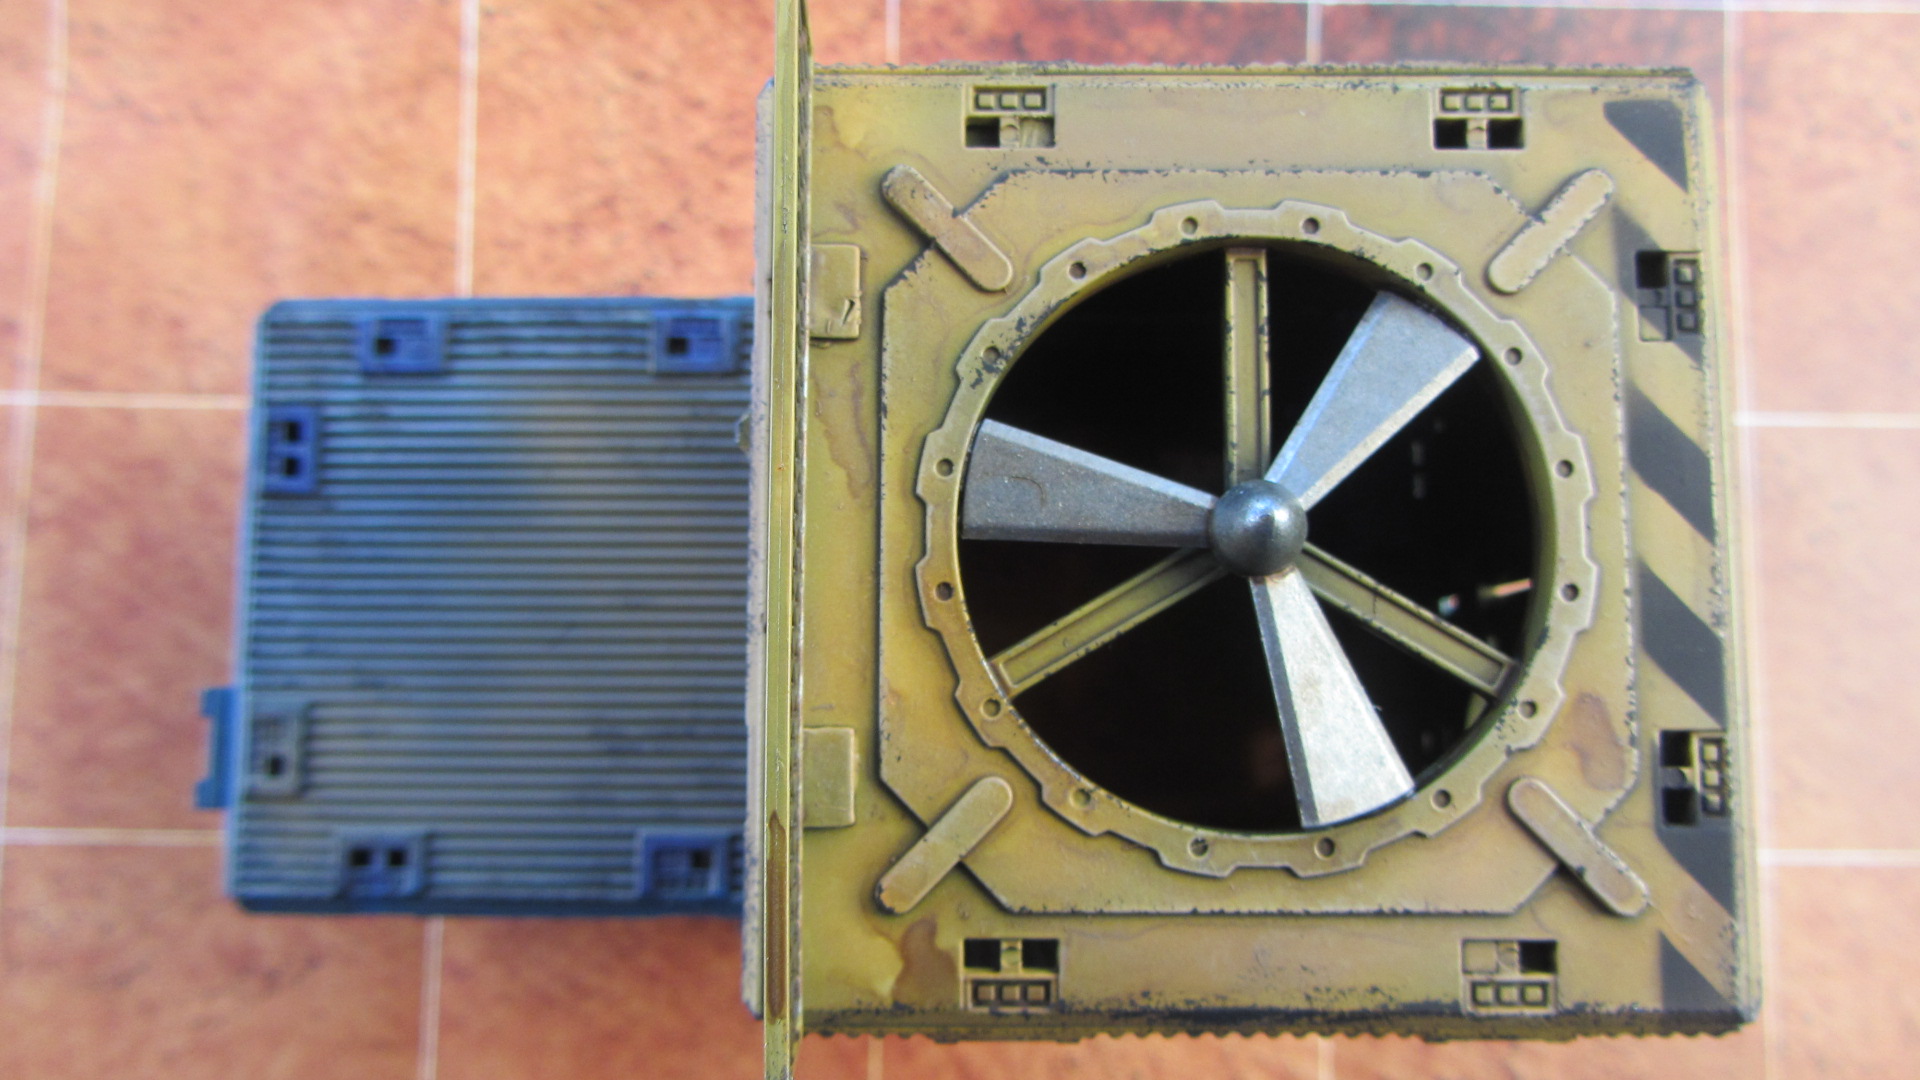
The back of the mineshaft has two of the (I think very cool) giant fans, which always remind me of the film ‘Angel Heart’:

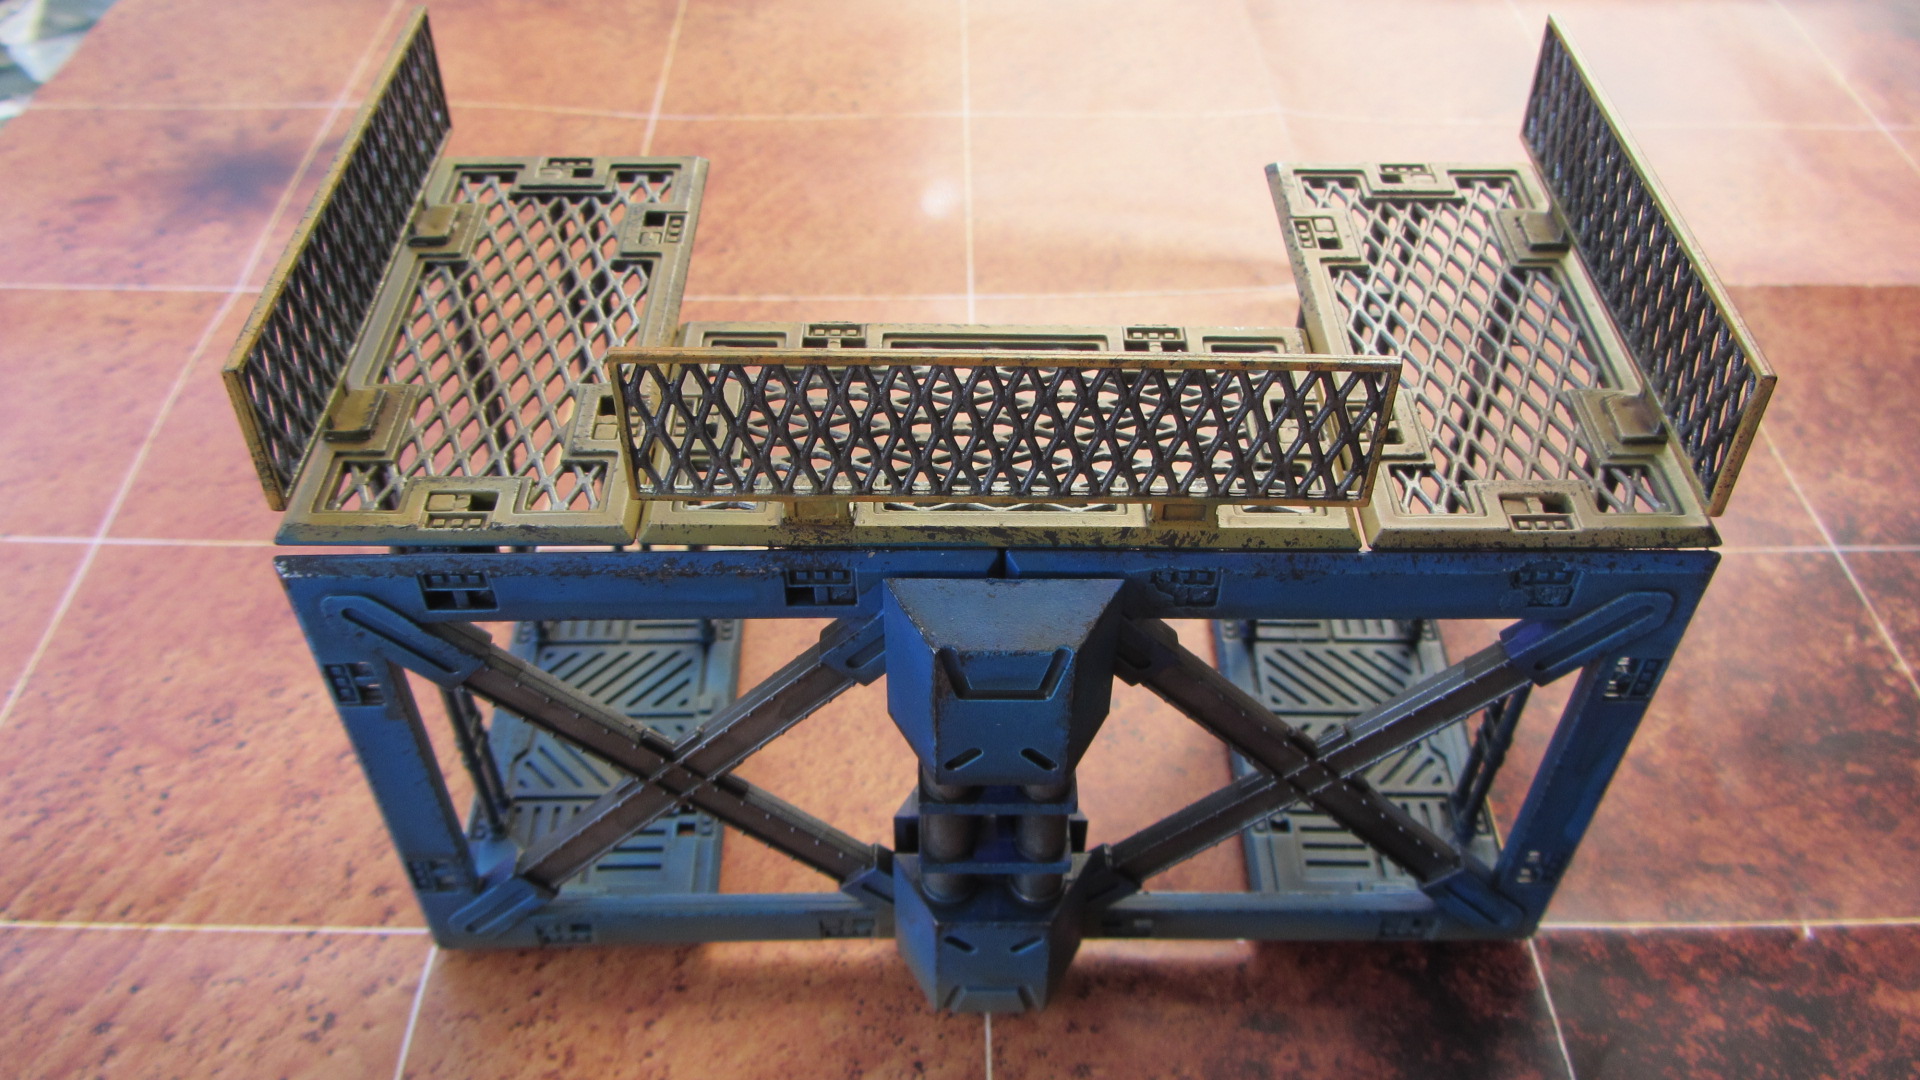
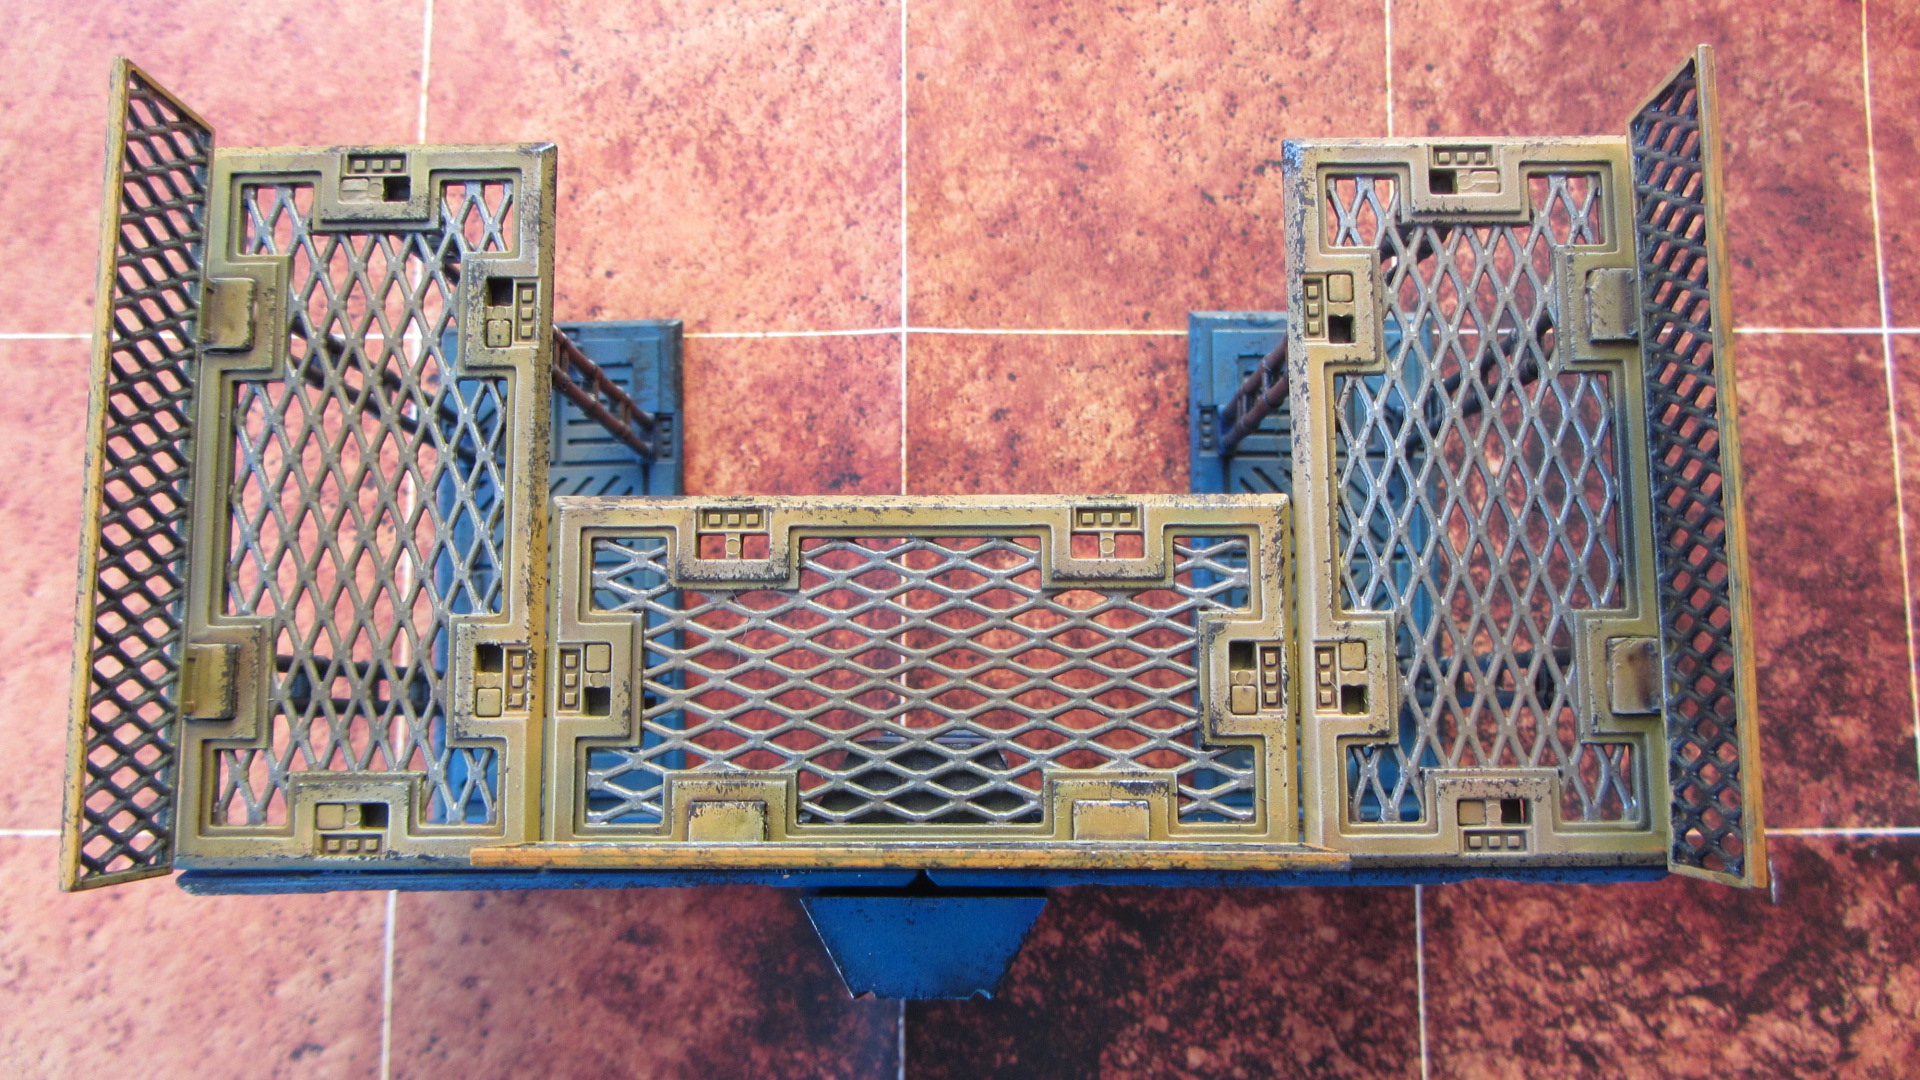
The conveyor belts are great fun. I originally created this processing plant for them to lead up to:

But then before painting this piece, I started on my massive set of fortified walls and base . I needed more half cube walkways to complete this work, so I cannibalised this conveyor station and rebuilt it as you can see below:

I plonk a resin skip below the end of the conveyor belt to show what the rock falls into. I keep meaning to scratch build a one-cube pile of debris. One day!
I found a good use for two cross section tiles and half cube tiles I had left over from earlier purchases and fashioned this gantry.
The thin support sections work well when embedded into other tiles.

I like this as it looks that bit different to the other things I’ve built.
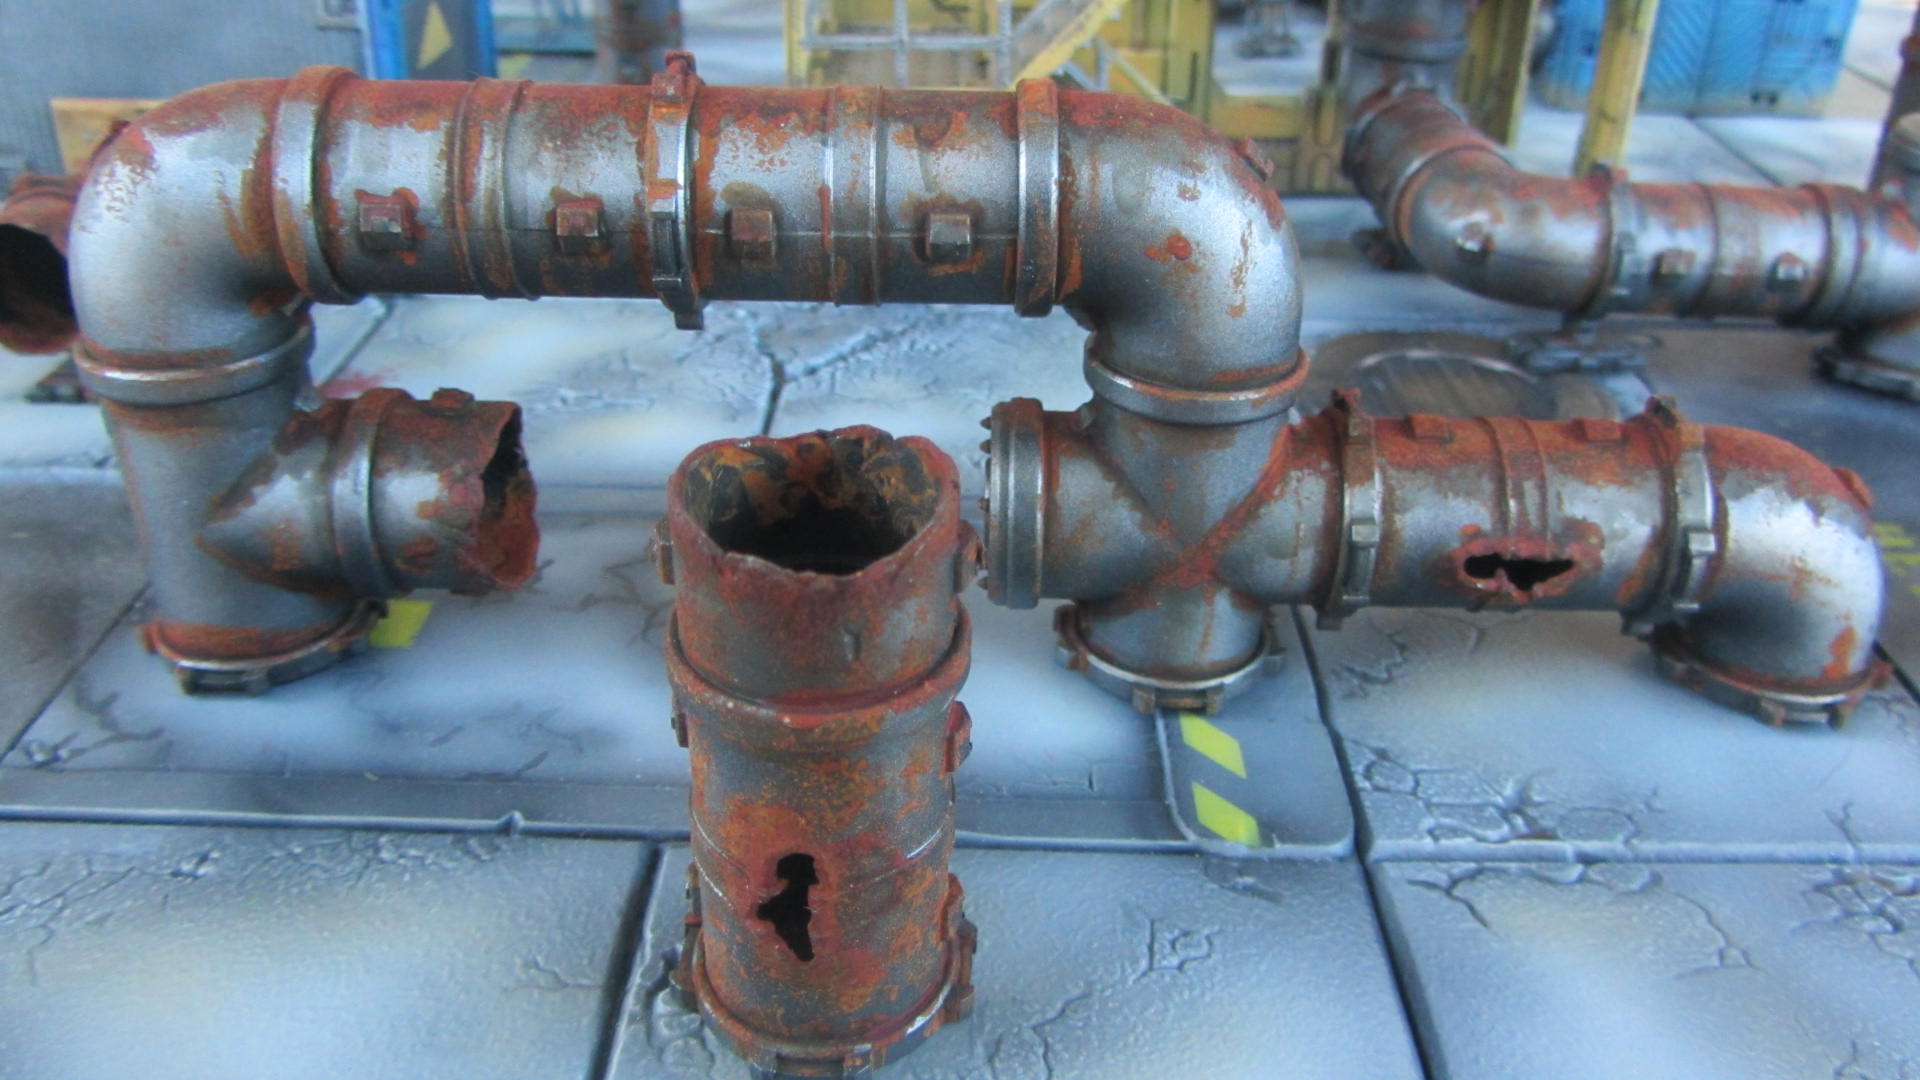
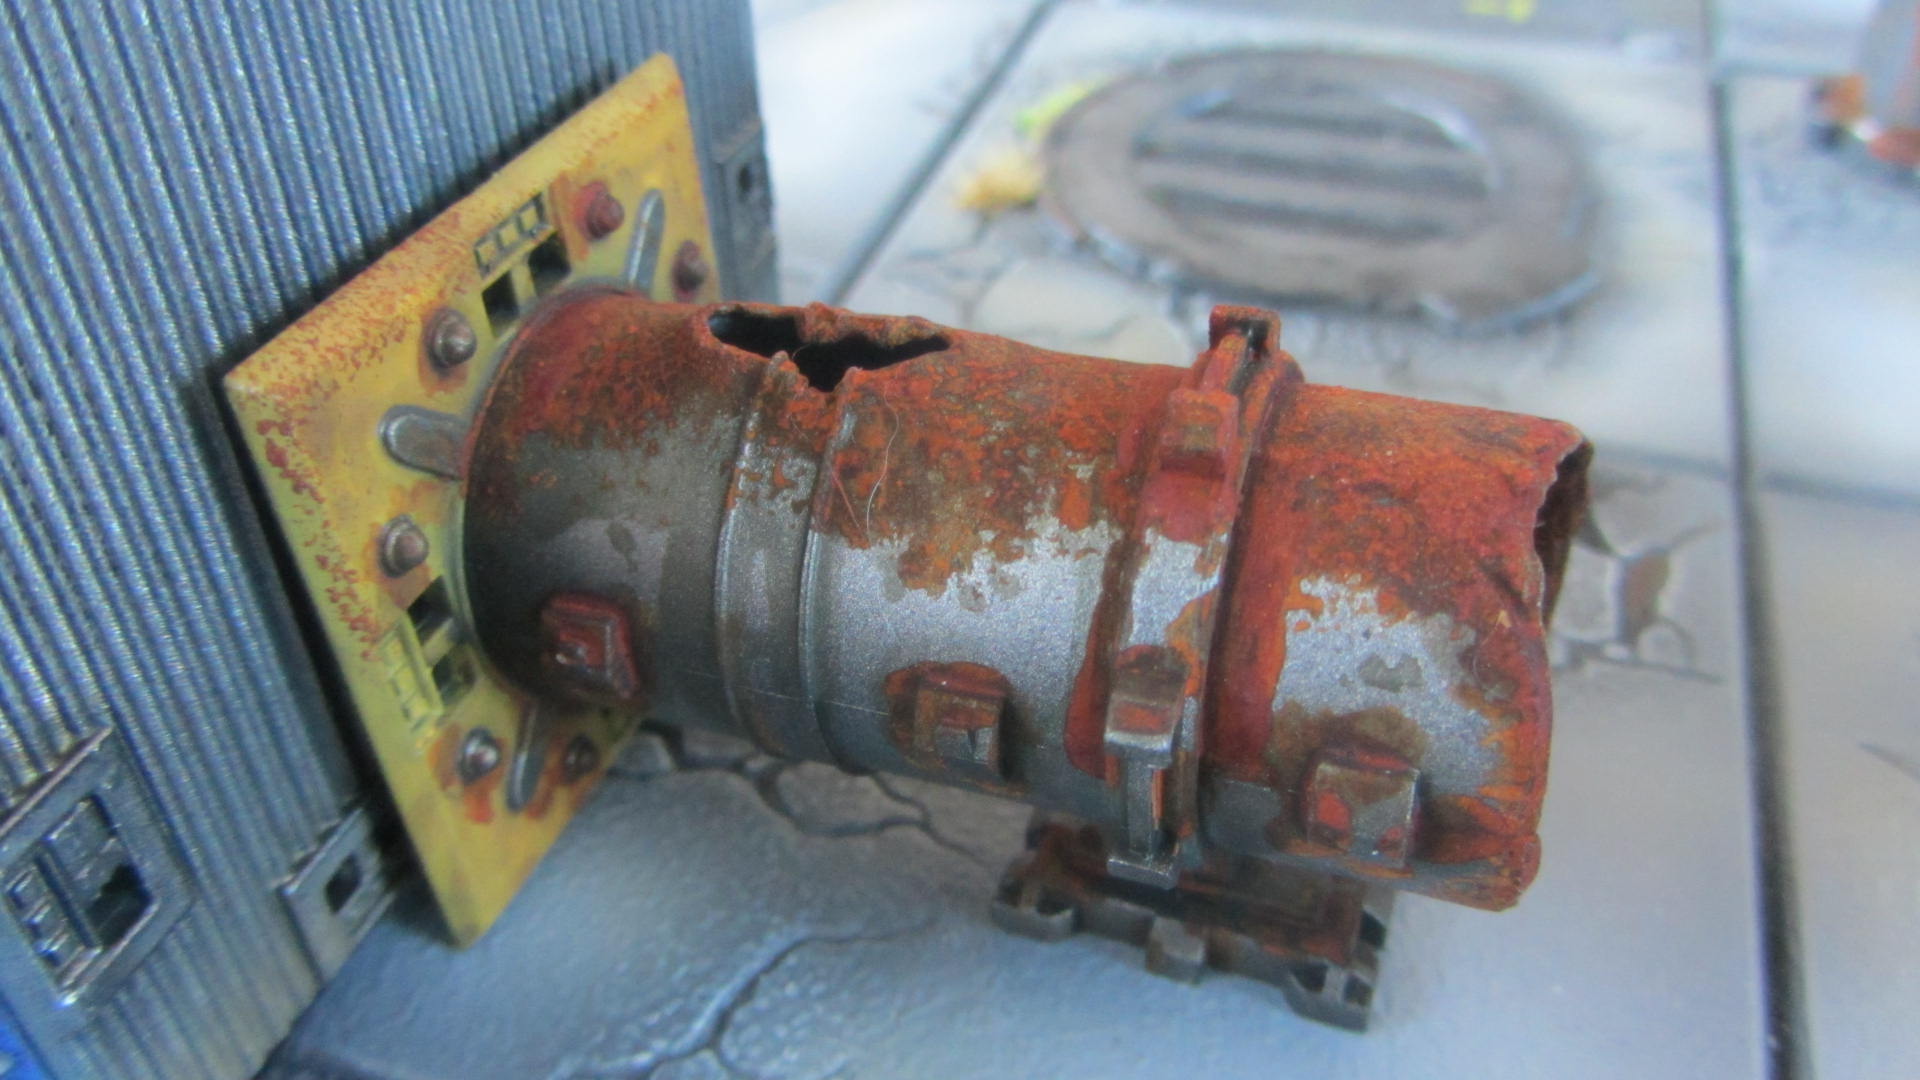
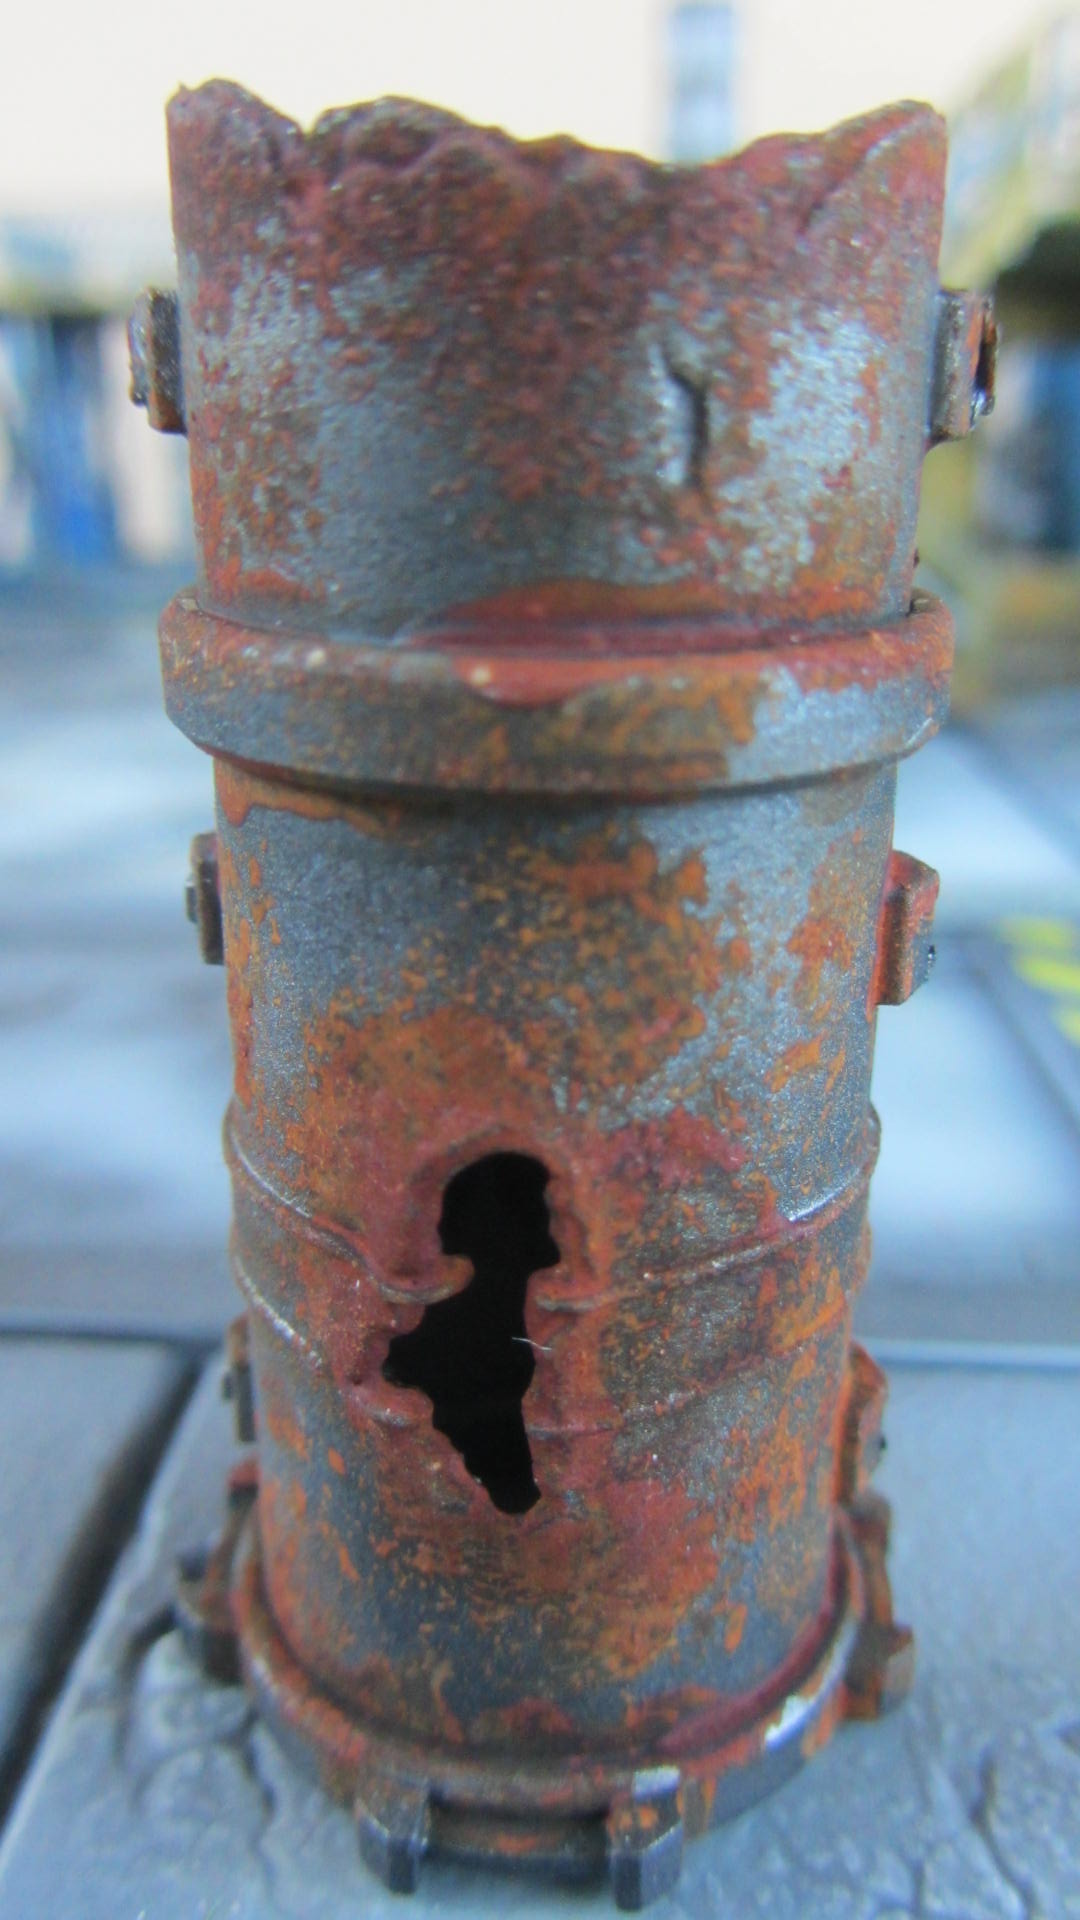
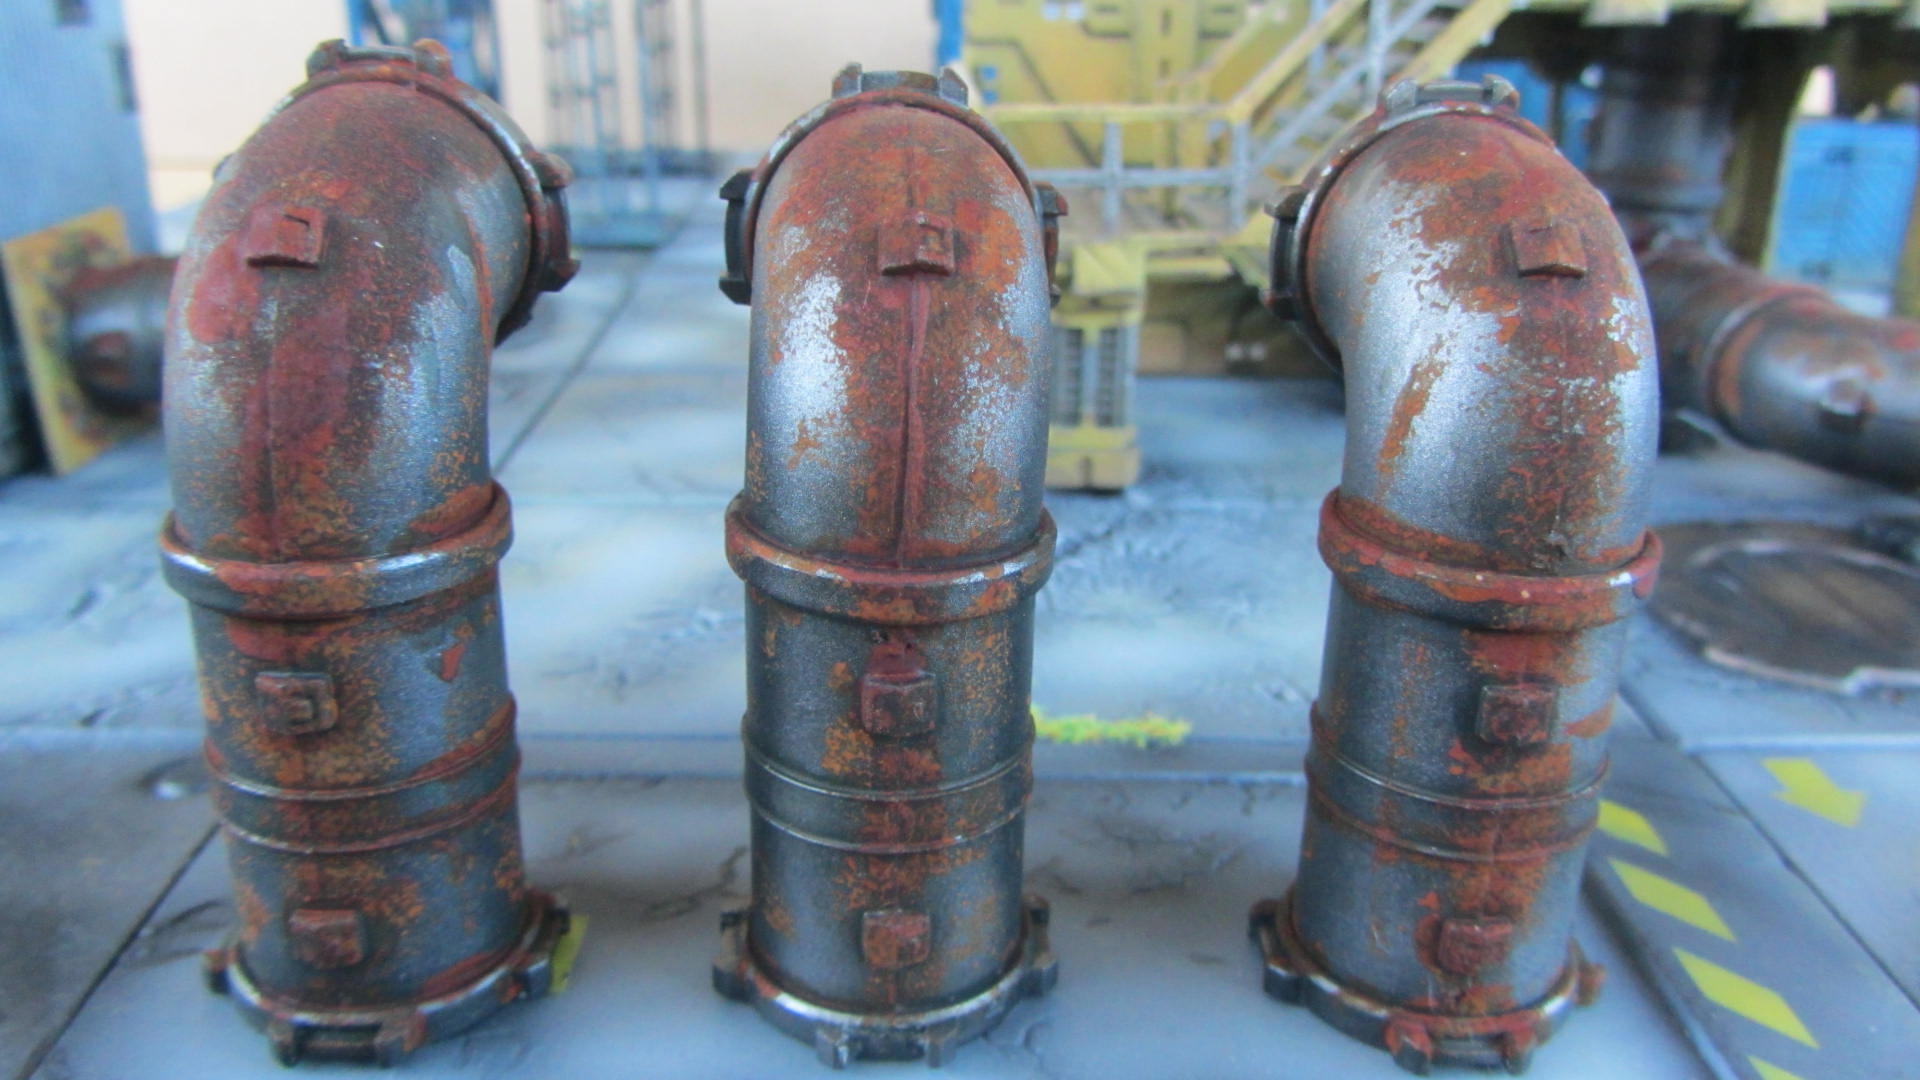
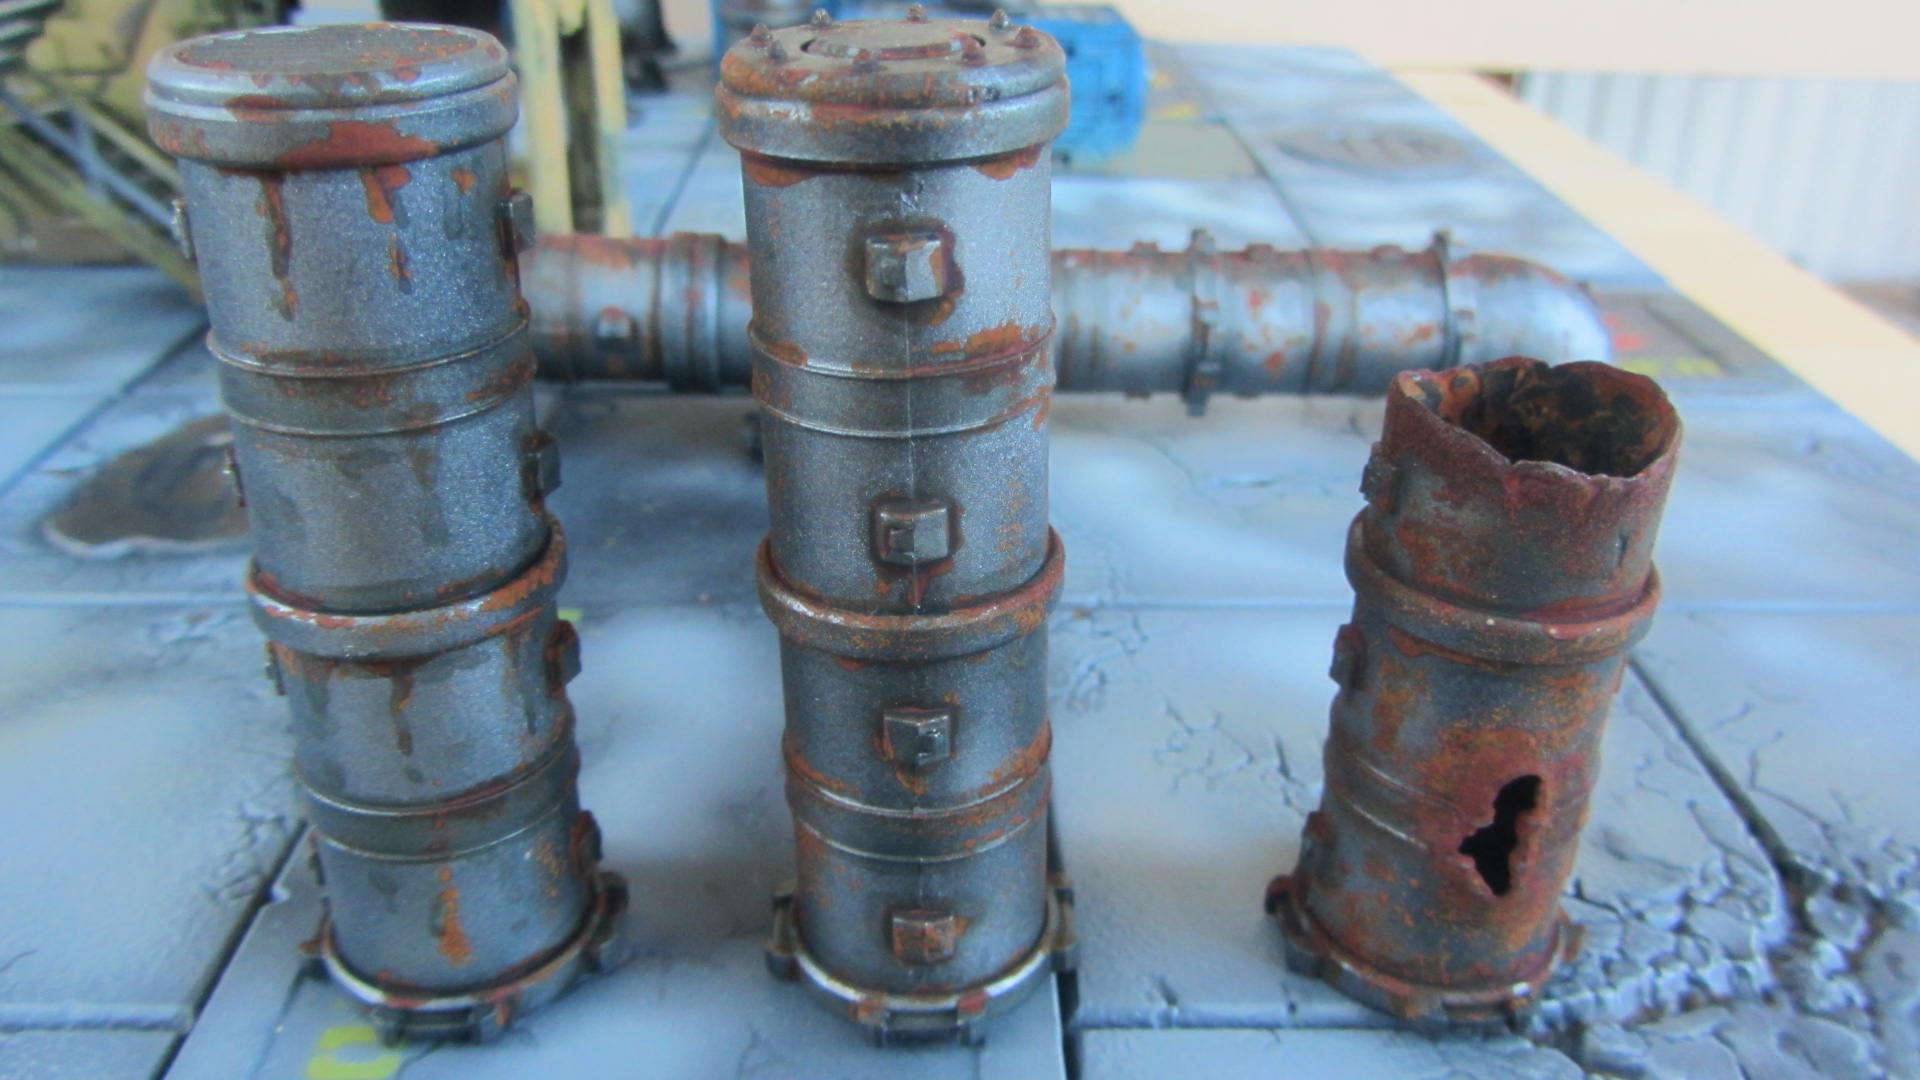
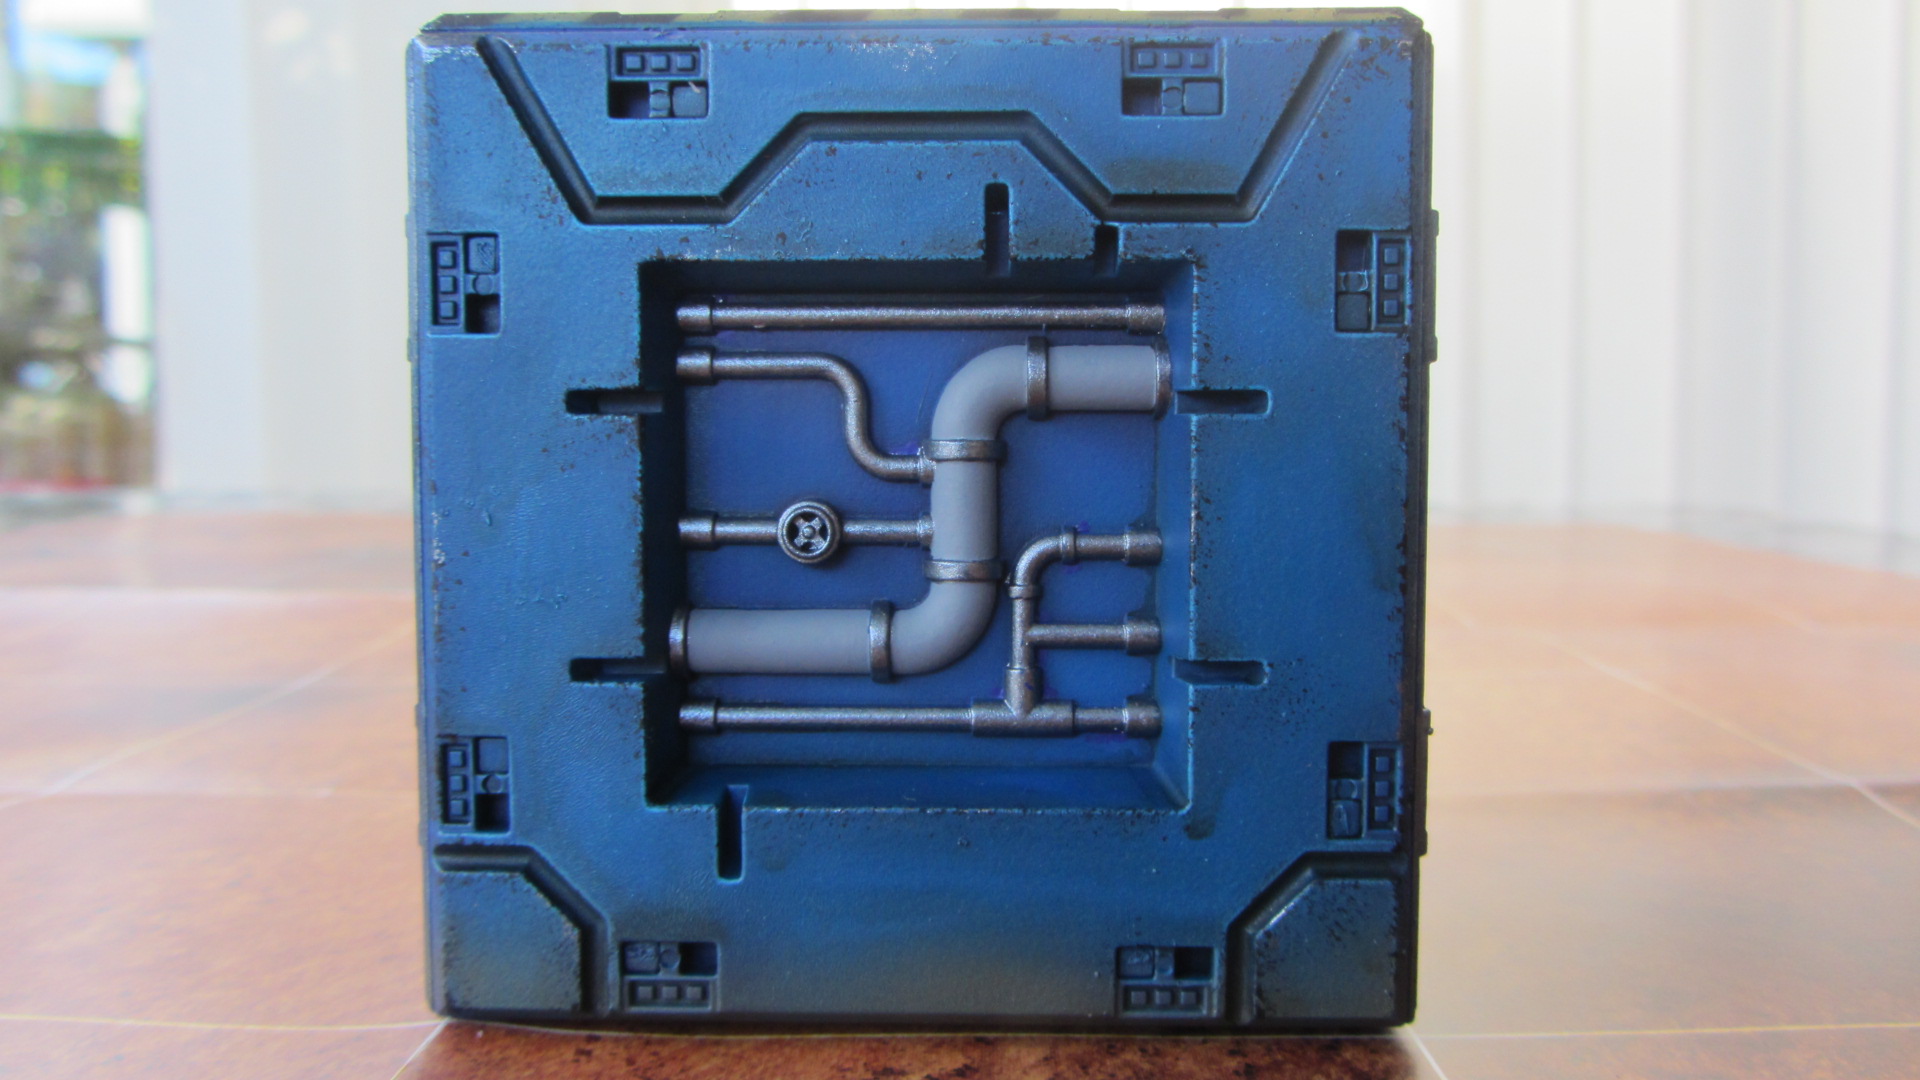
I REALLY like the pipes and tube sections in these sets and when Mantic released them at retail, treated myself to a couple more packs so I could create some pipework worthy of an industrial setting.
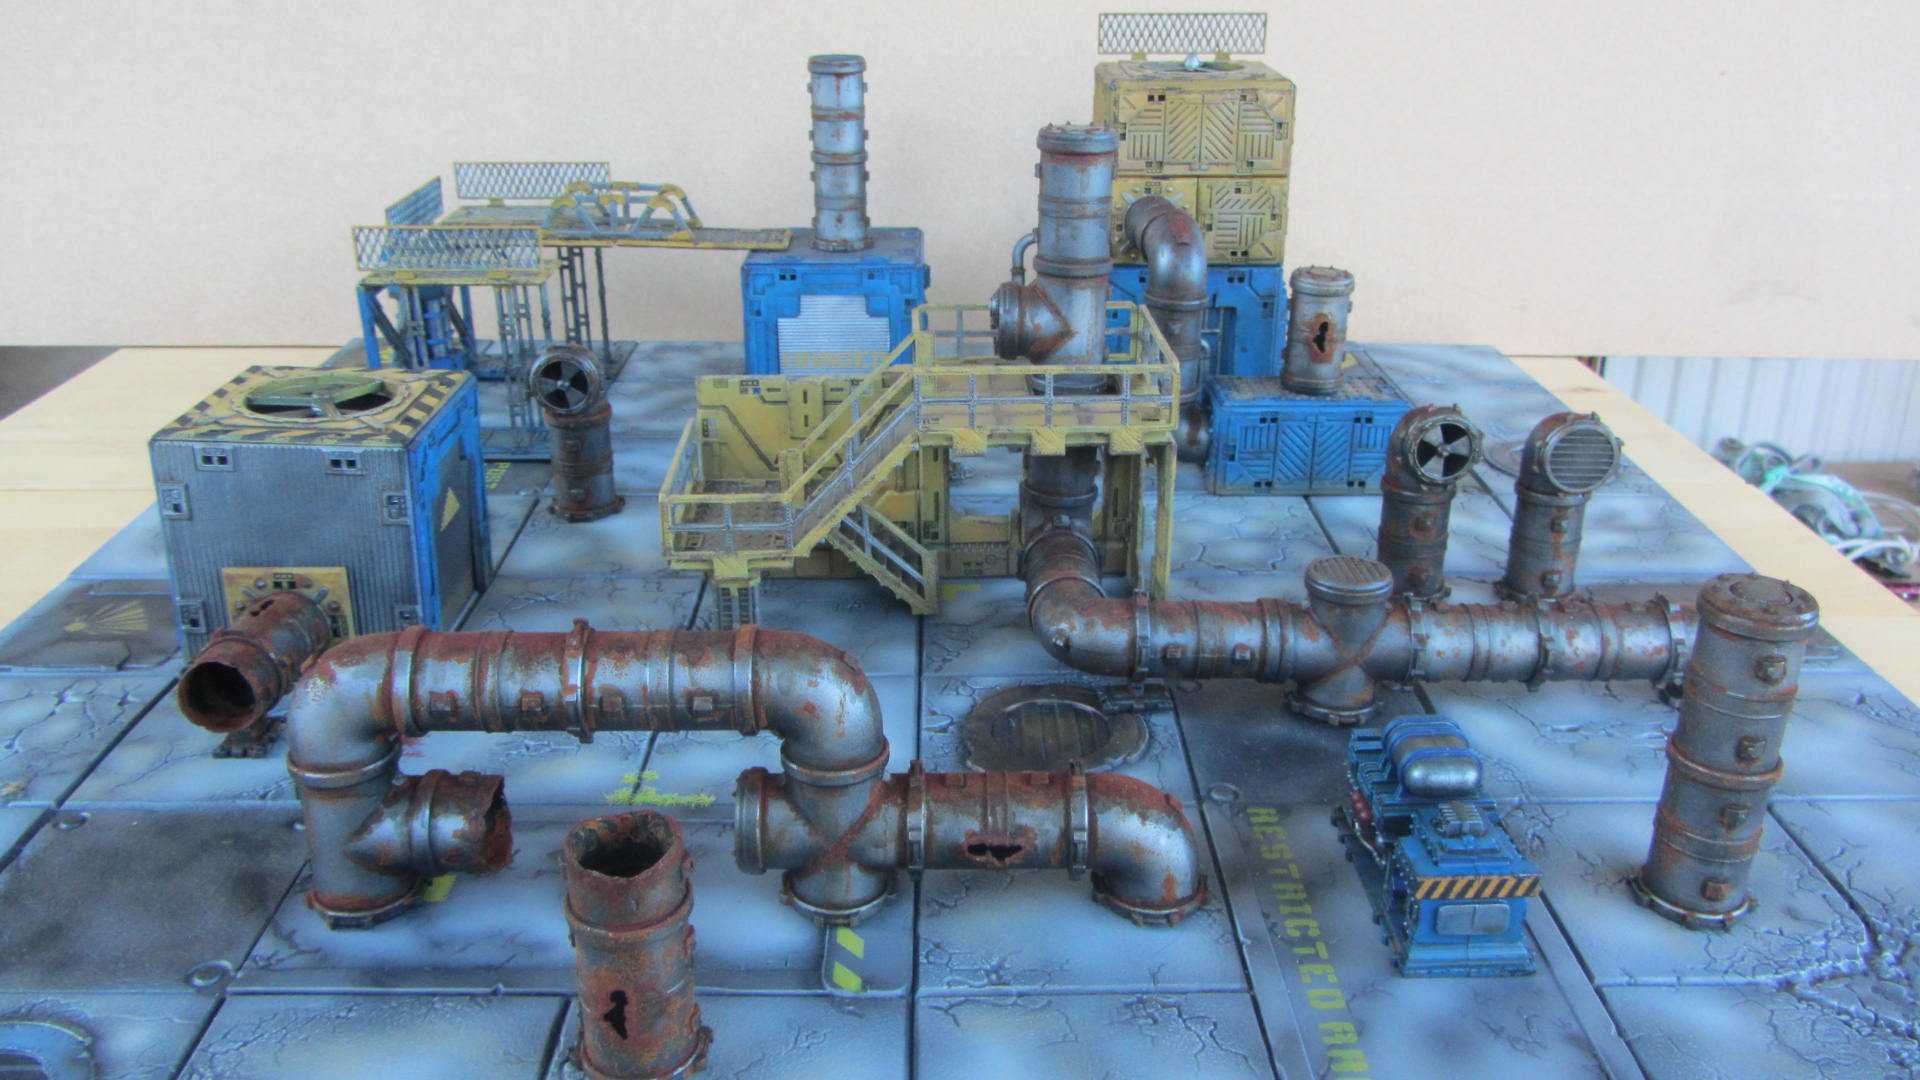
I decided to make good use of my pot of Modelmate Rust Paint on these pipes. They were undercoated black and had a base coat of Citadel Leadbelcher applied. I then mixed Army Painter Strong Tone Ink with a little green ink, watered the mix down a little and daubed this wash in the crevices of the pipes and onto the uppermost surfaces, where rain would have fallen. Finally, I sponged the Rust Paint onto the same areas, concentrating on the tops and crevices, with random daubs here and there to make them look worn and grubby. I think sponging the rust paint on has worked a treat.
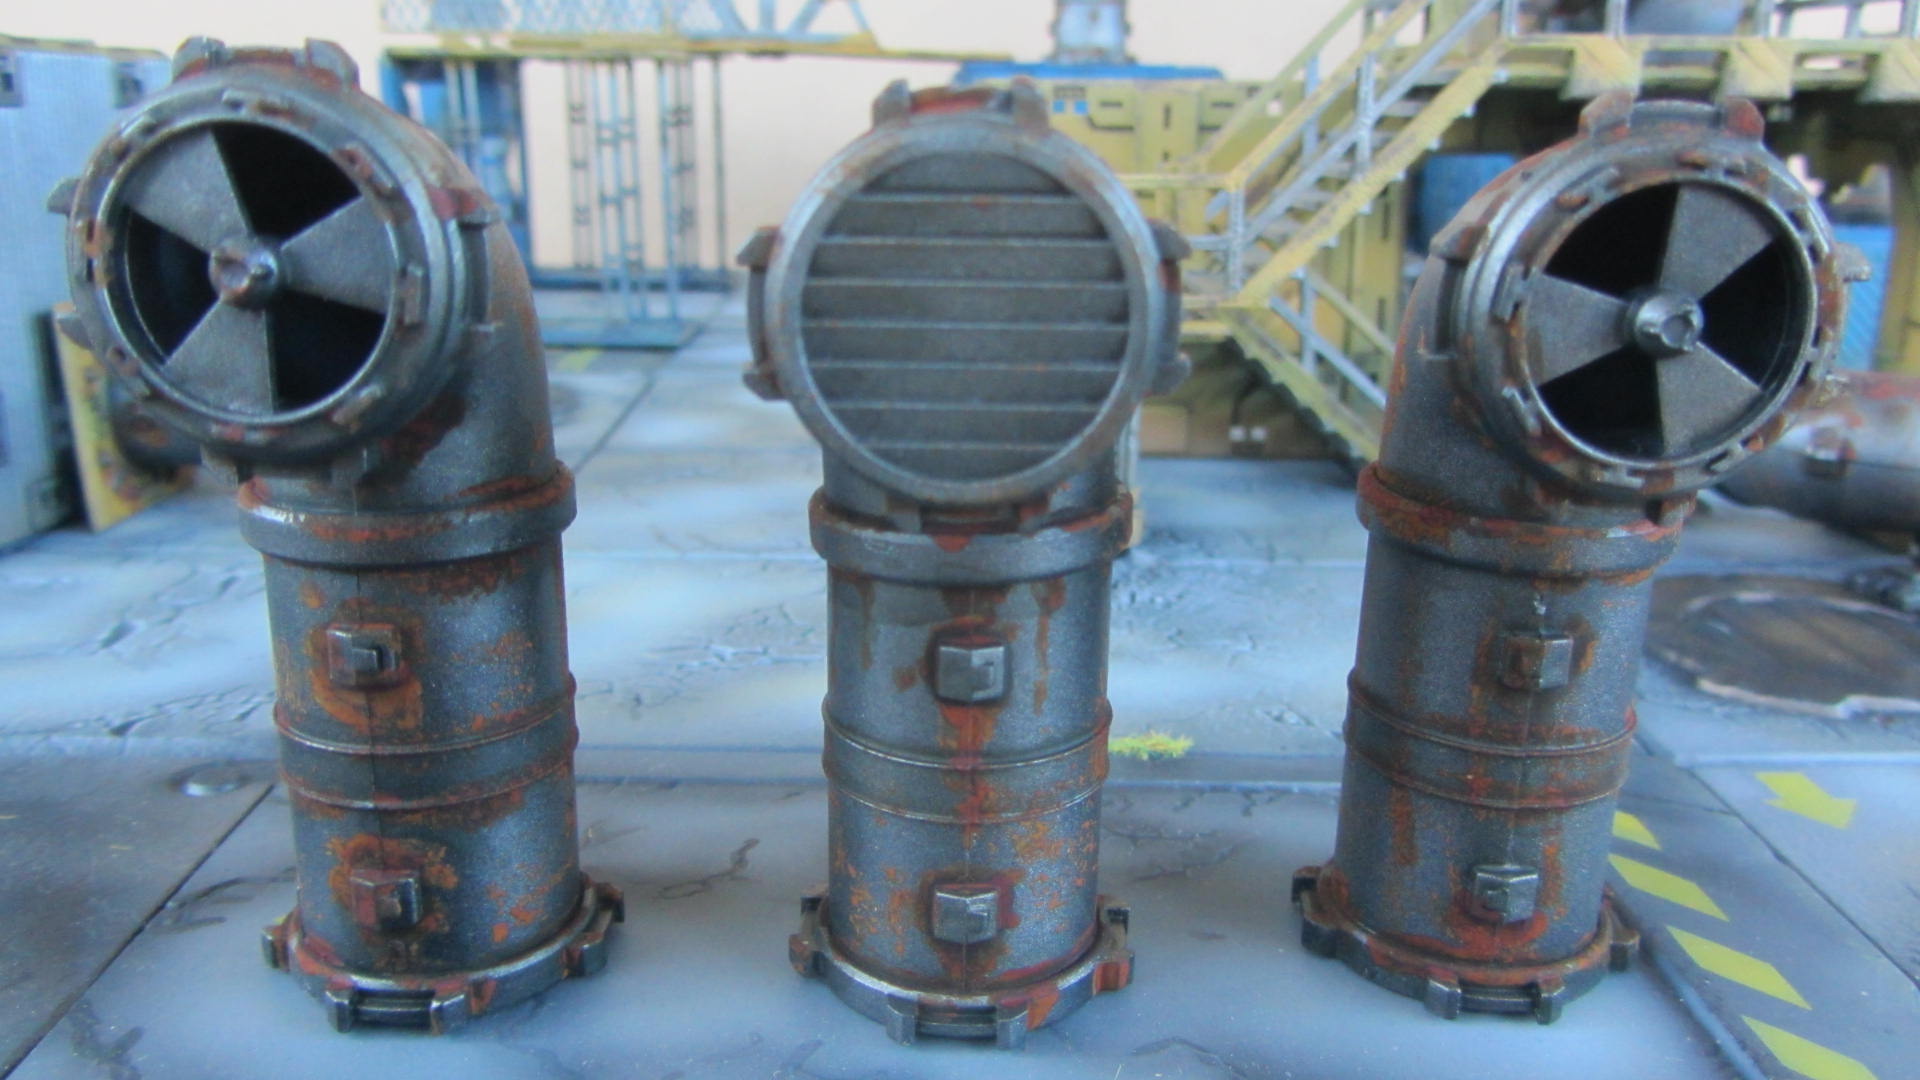
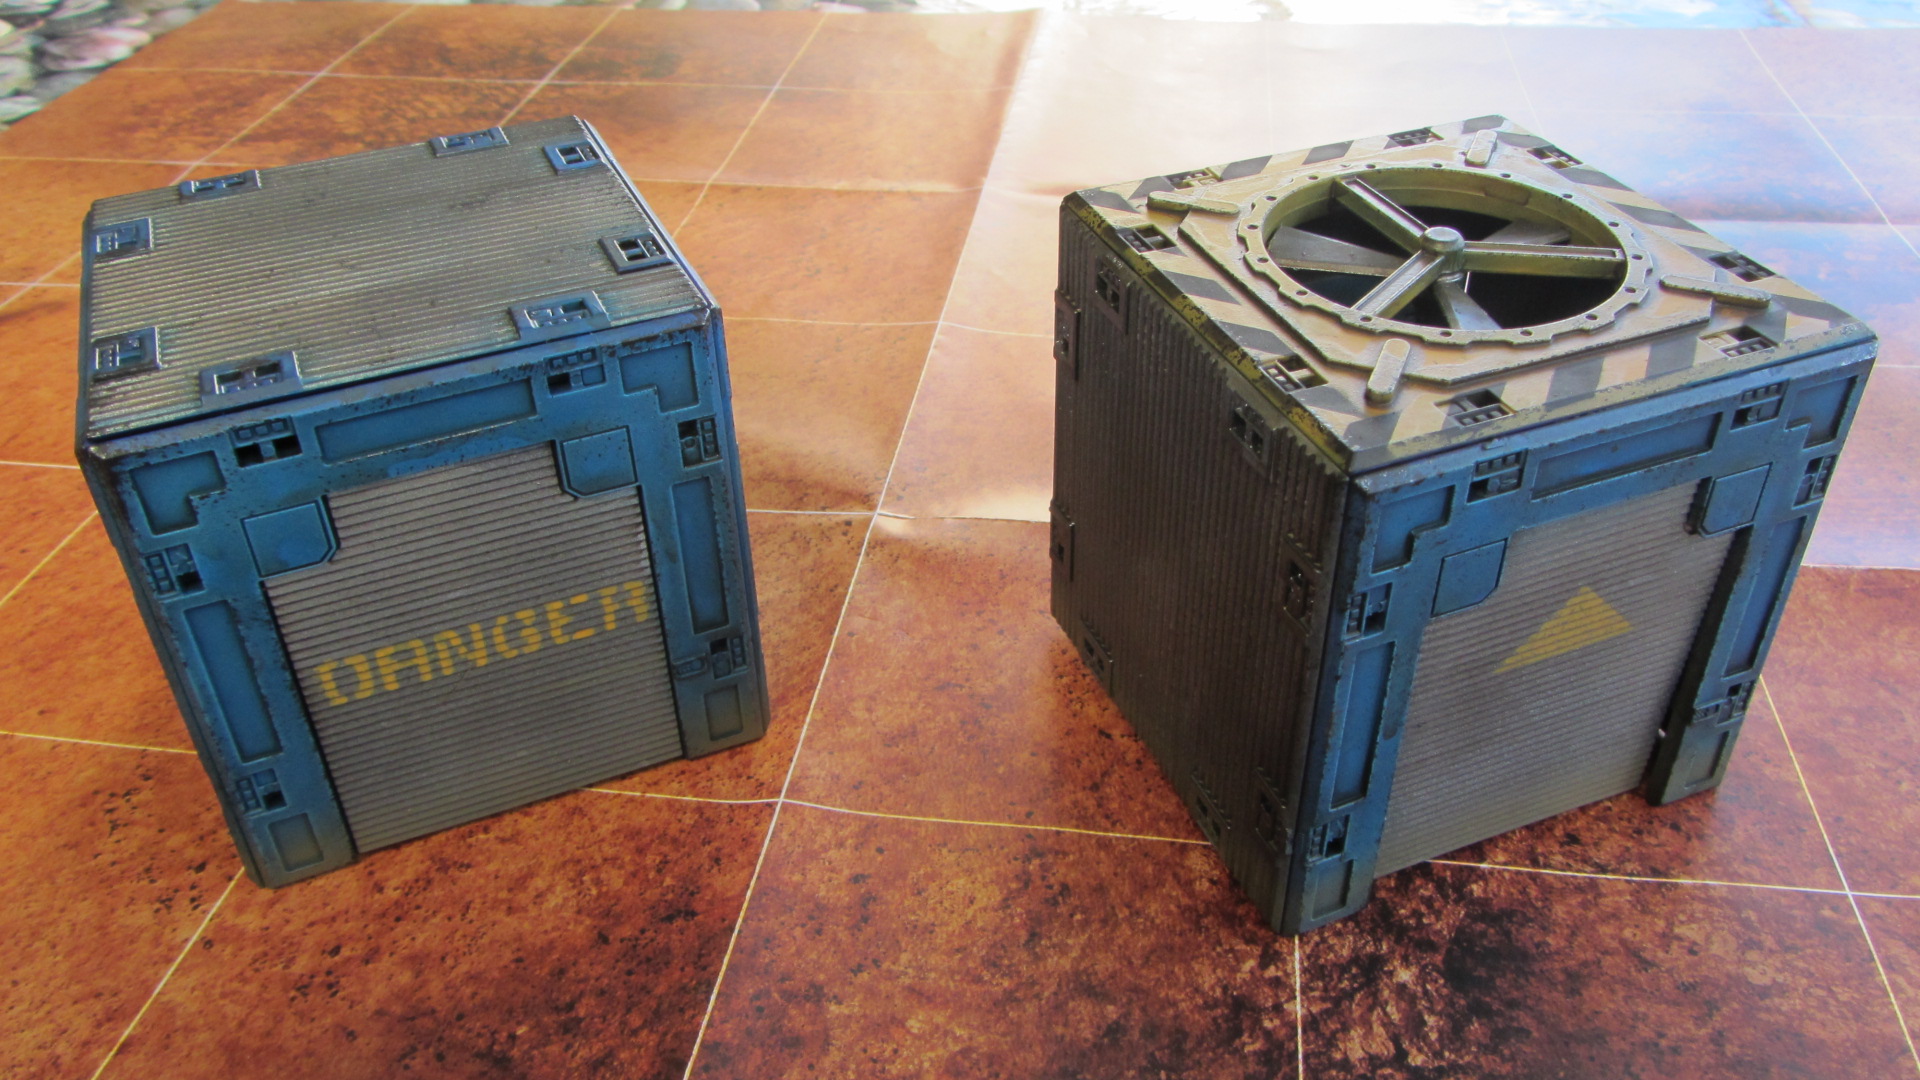
I like these vents, very useful as they’re standalone and can be placed on open ground or the top of other structures:
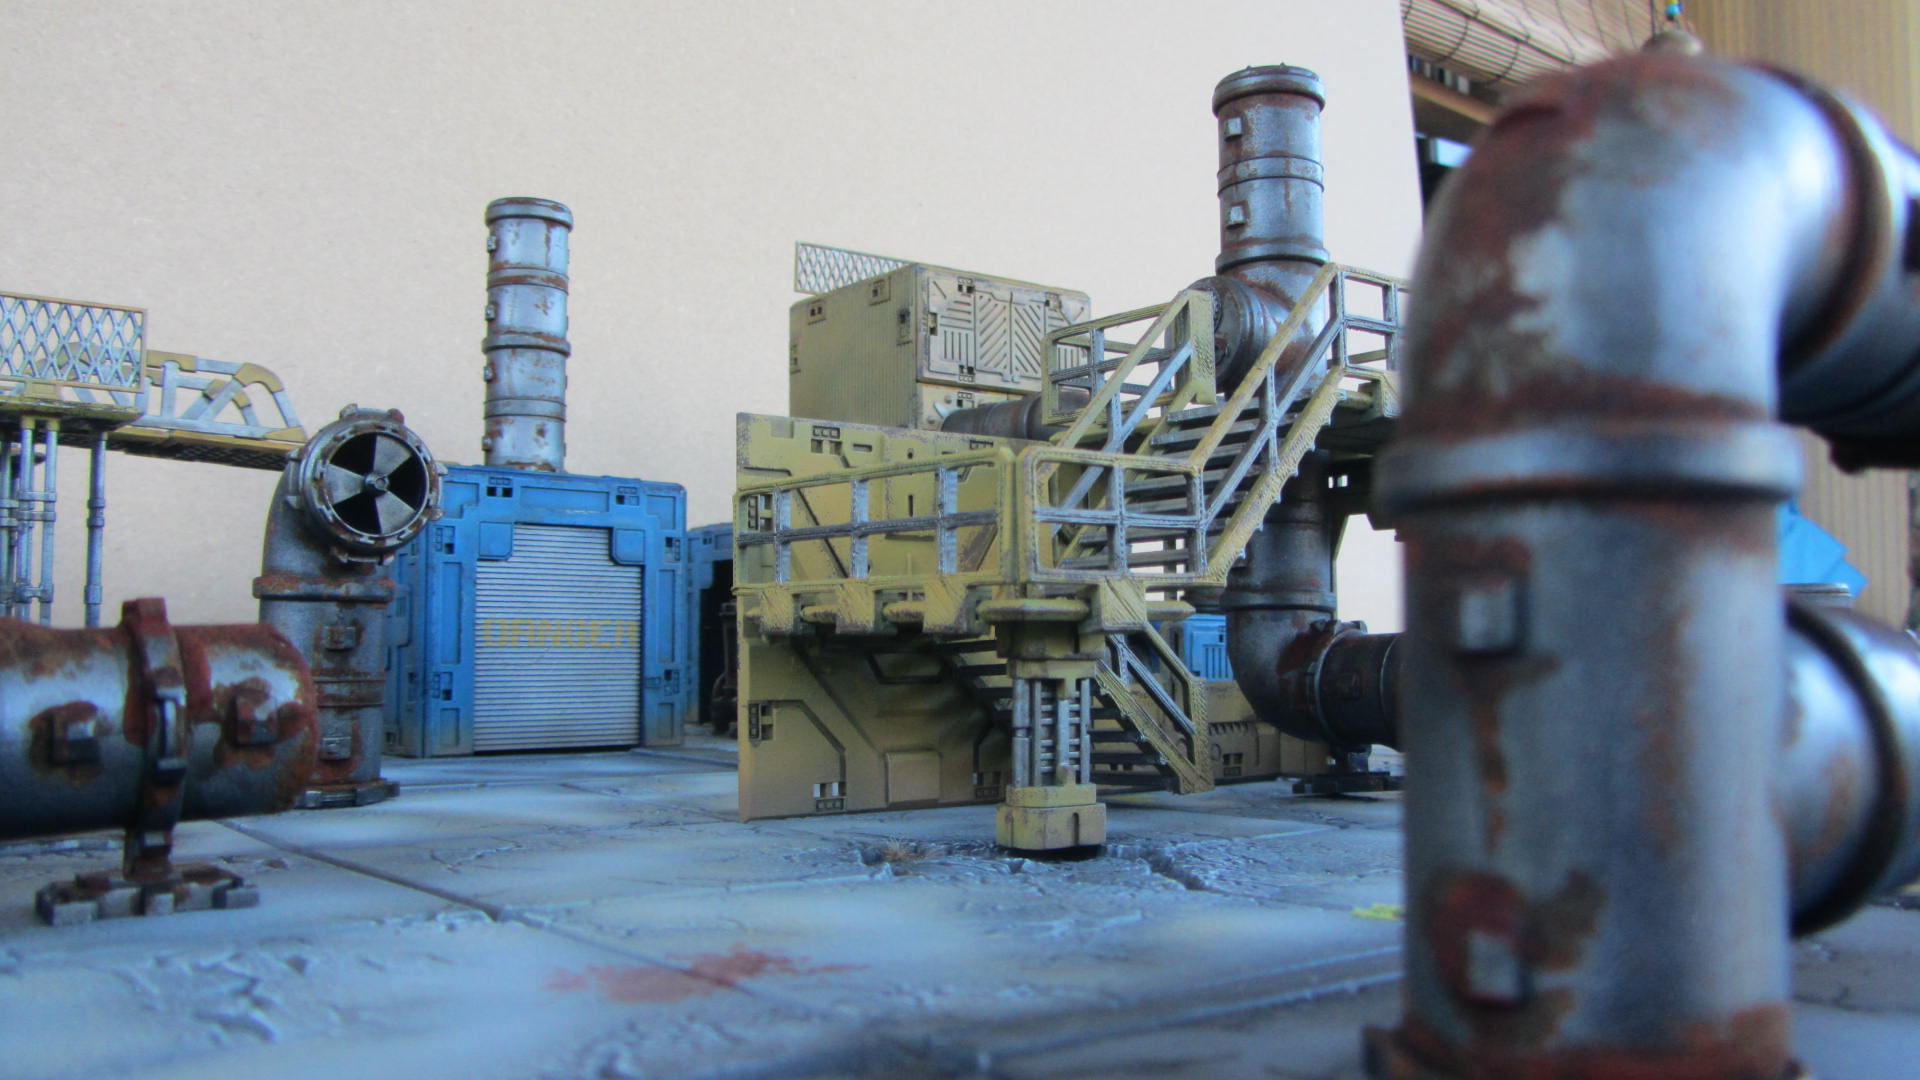
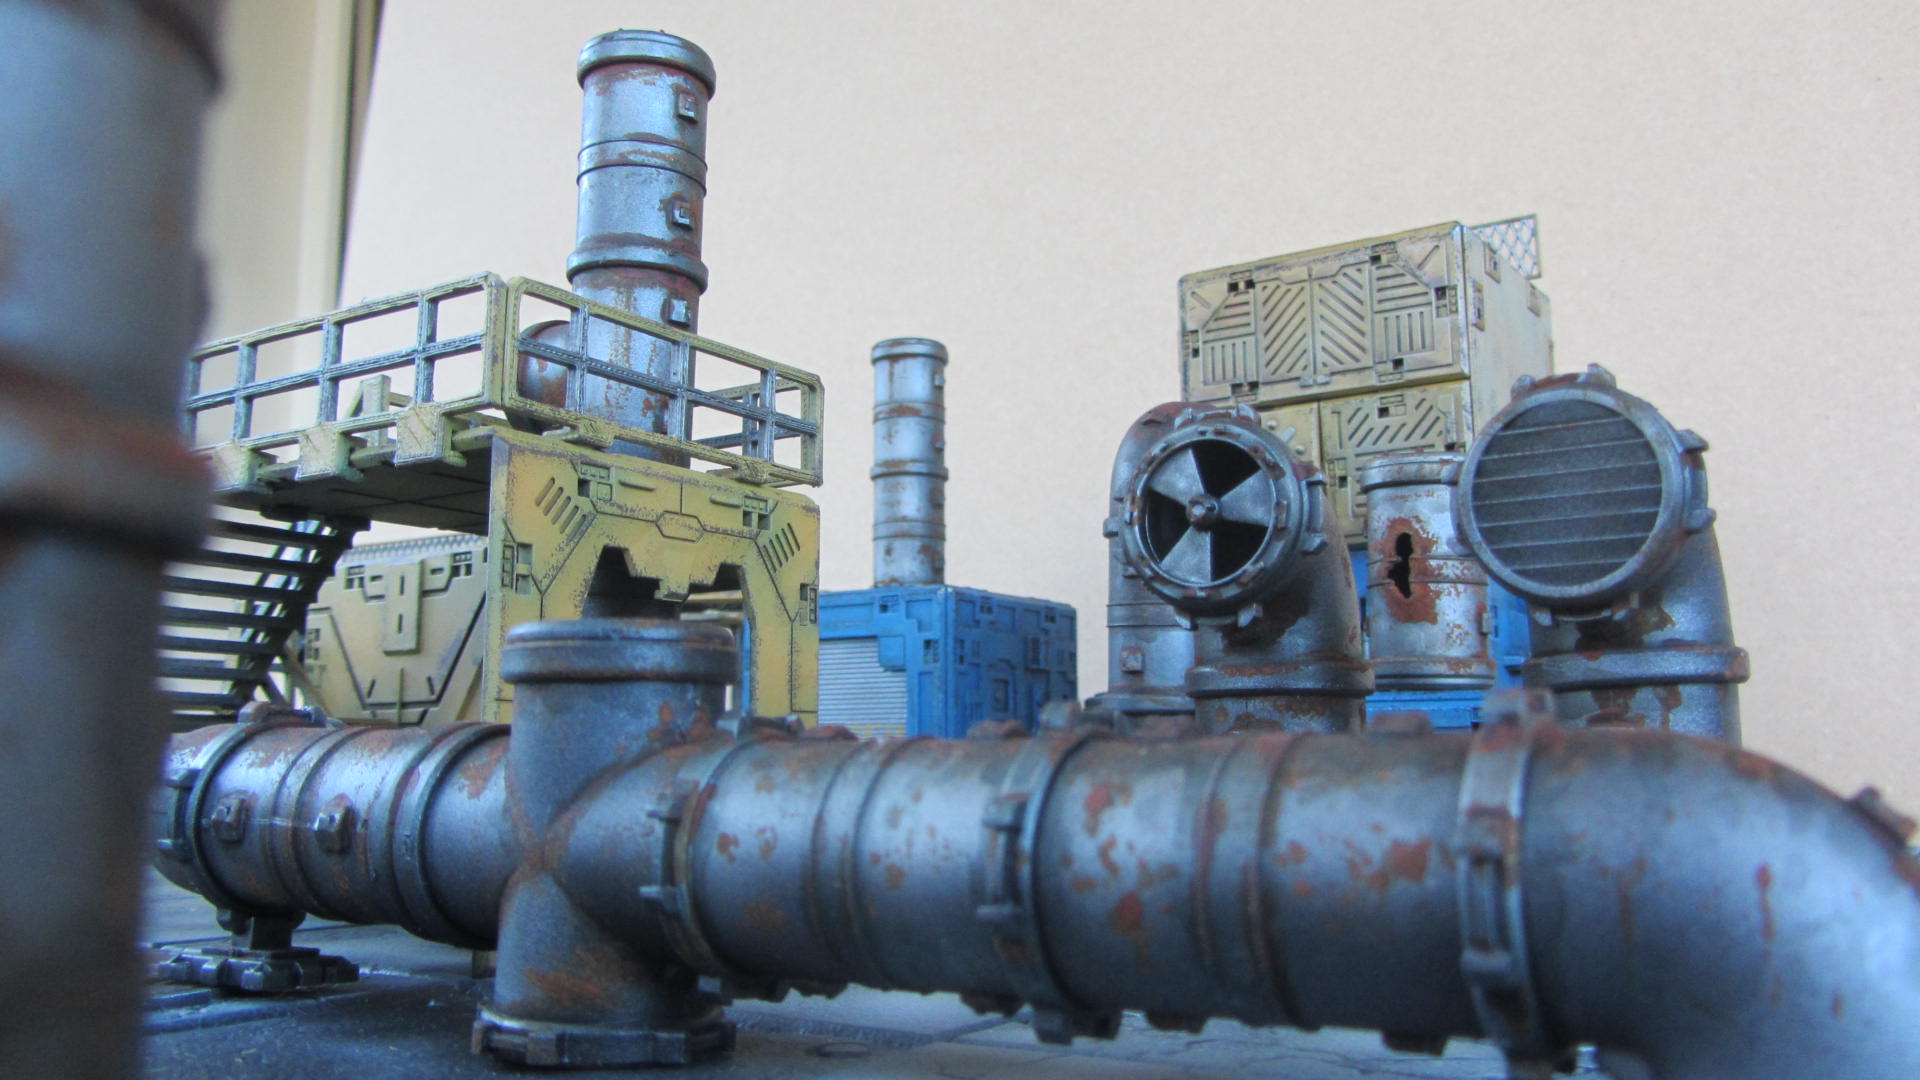
Here’s a few photos where I’ve tried to give more of a first person p.o.v of being in a Deadzone:
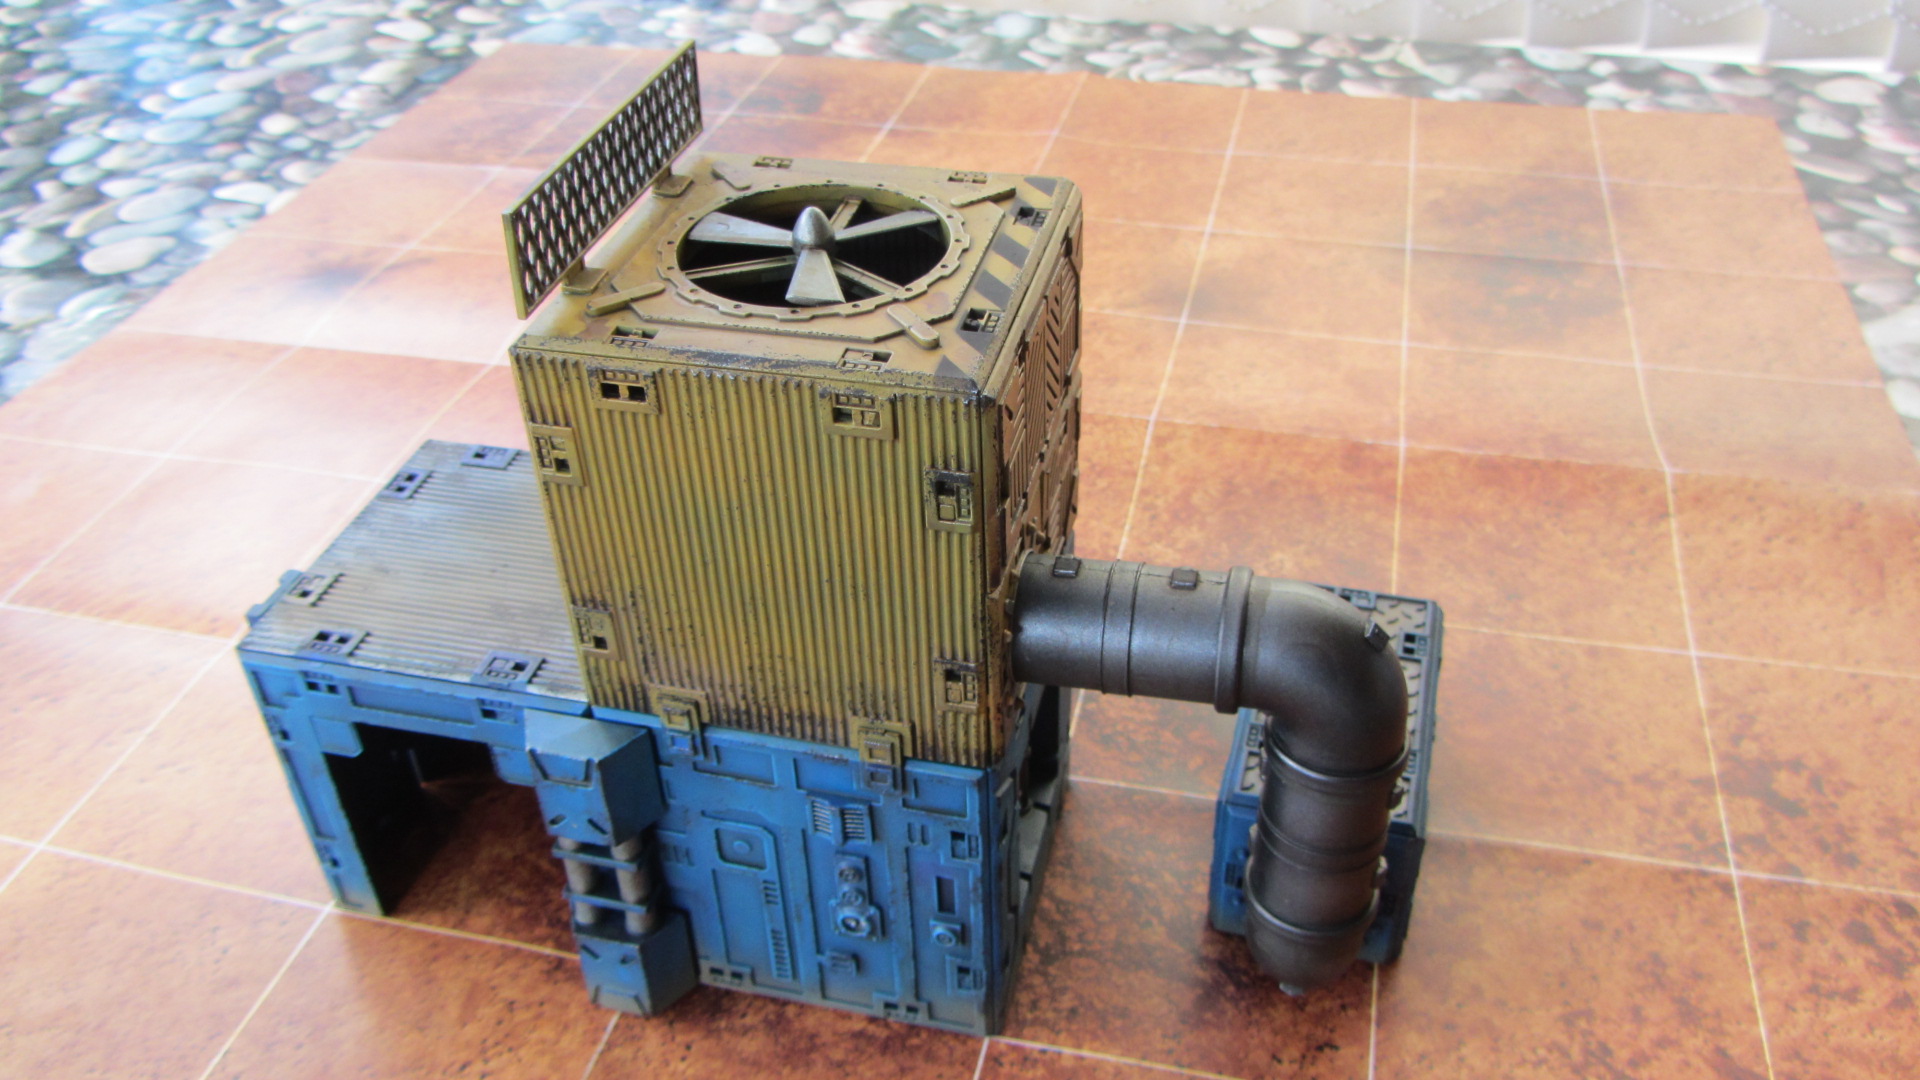
One cube structures are always useful for blocking line of sight and fitting in where needed so you can add some walkways between buildings. I built an electrical station and storage shed/mineshaft entrance.
The last thing I built uses a few accessories left over from other Battlezone sets. I’ve had these two hydraulic arms laying around for a while now and was trying to figure out what to to with them. I wanted to create some kind of ‘power loader’ and was rifling through my bitz box when I saw a spare laser cannon and noticed that the column section can be fitted so it rotates. With a sudden rush of inspiration I built this:
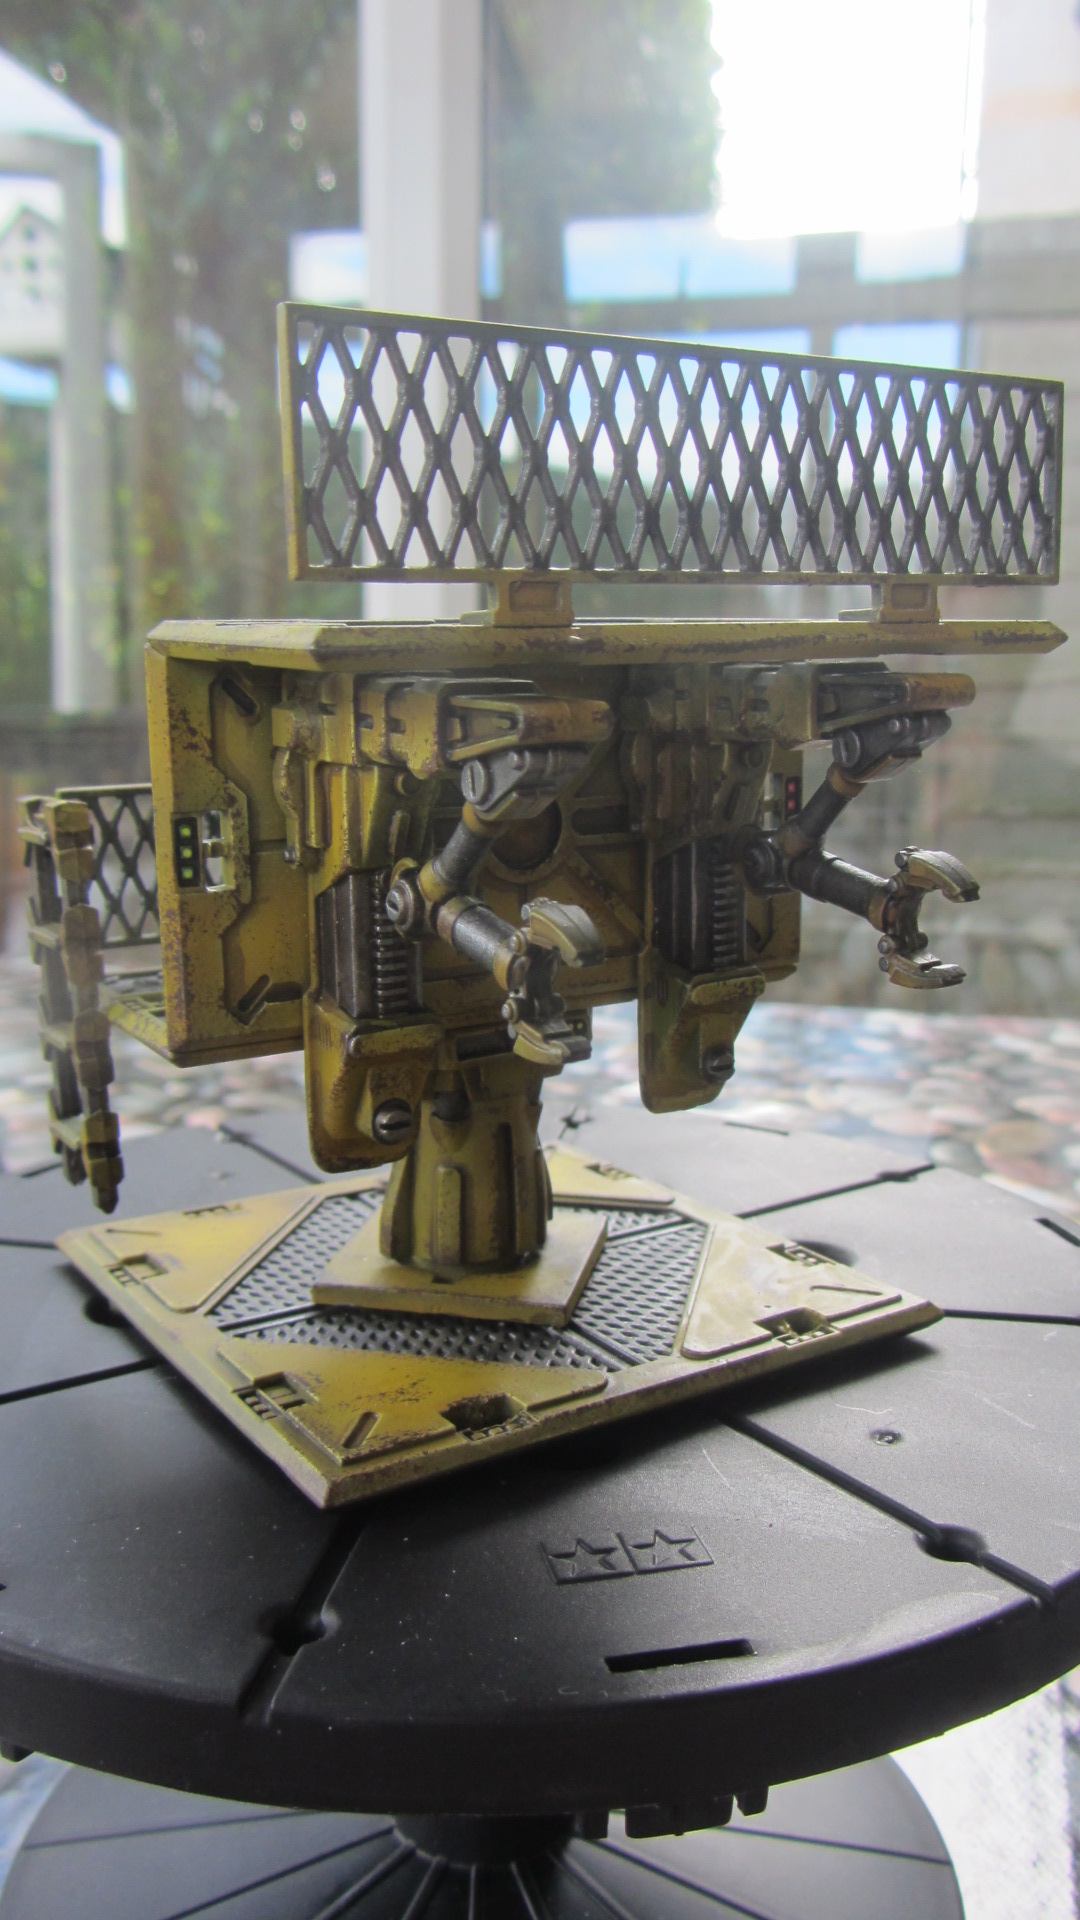
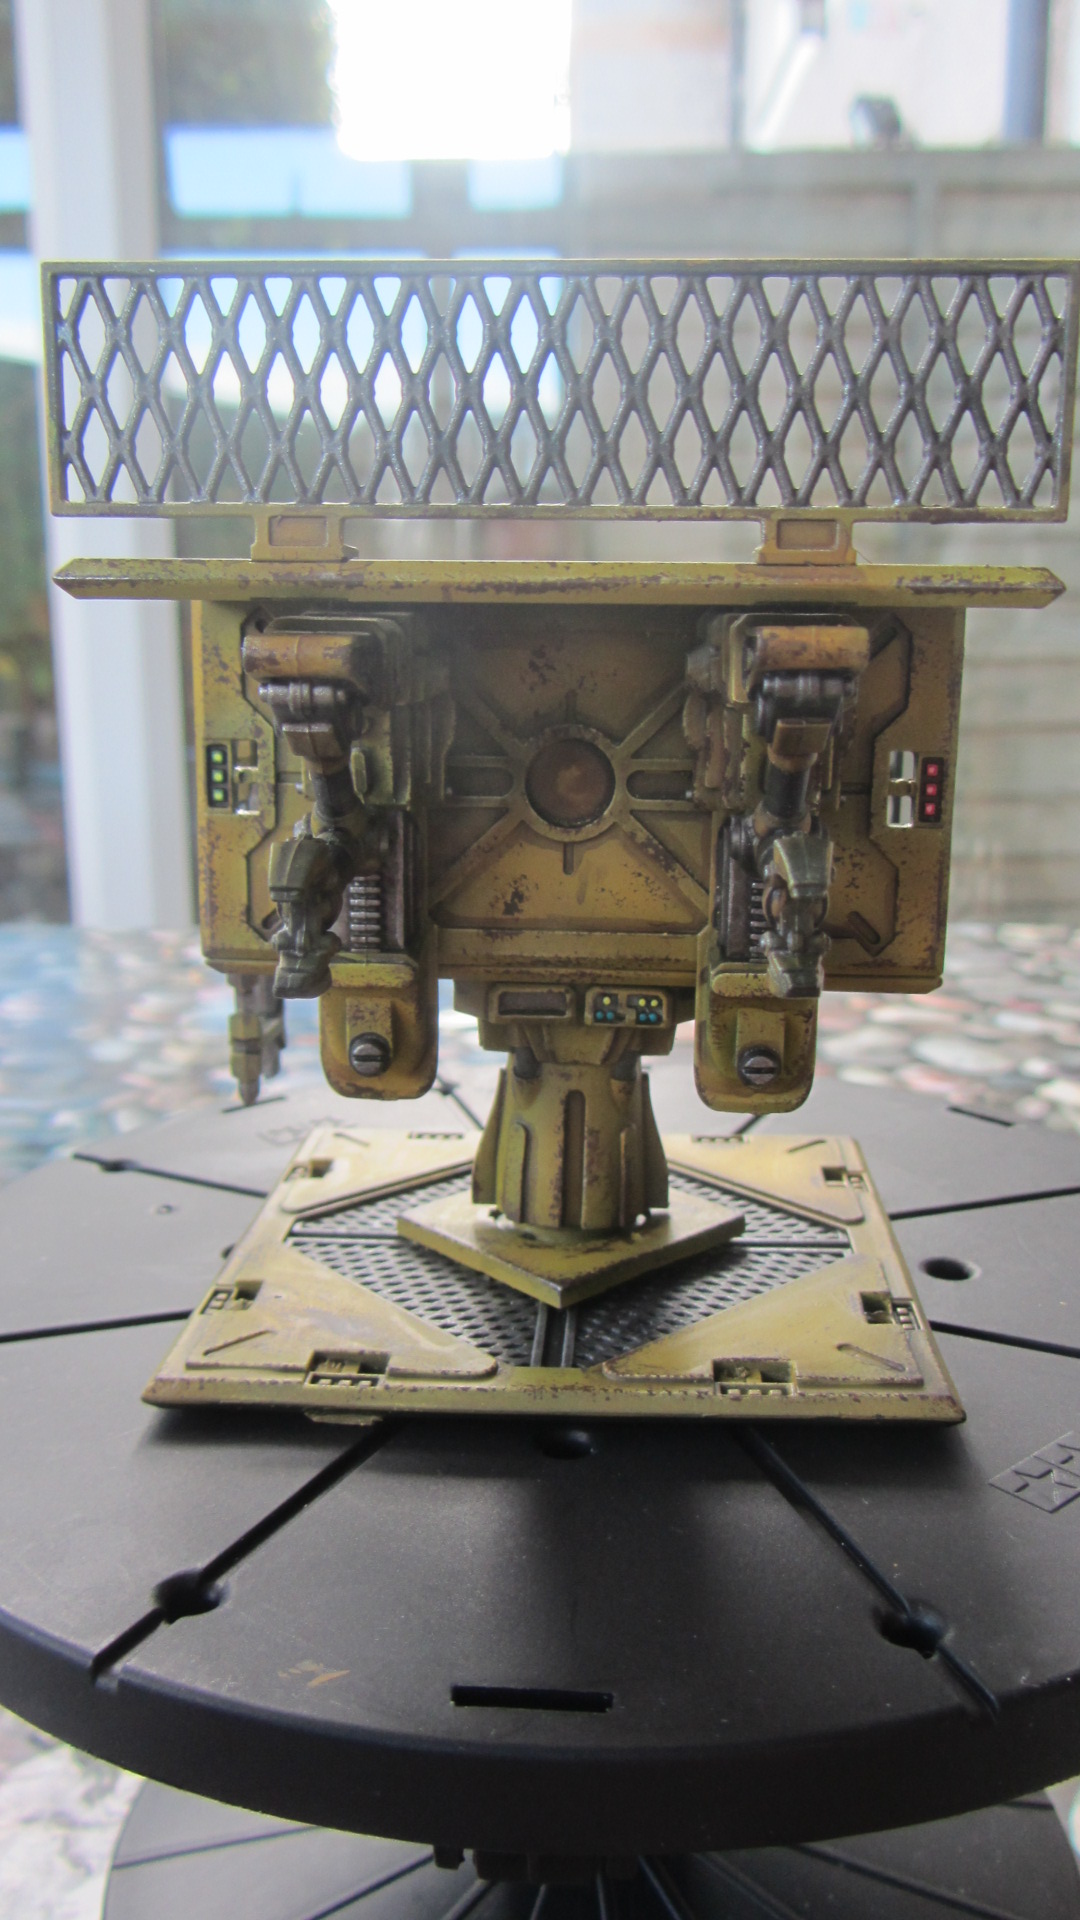
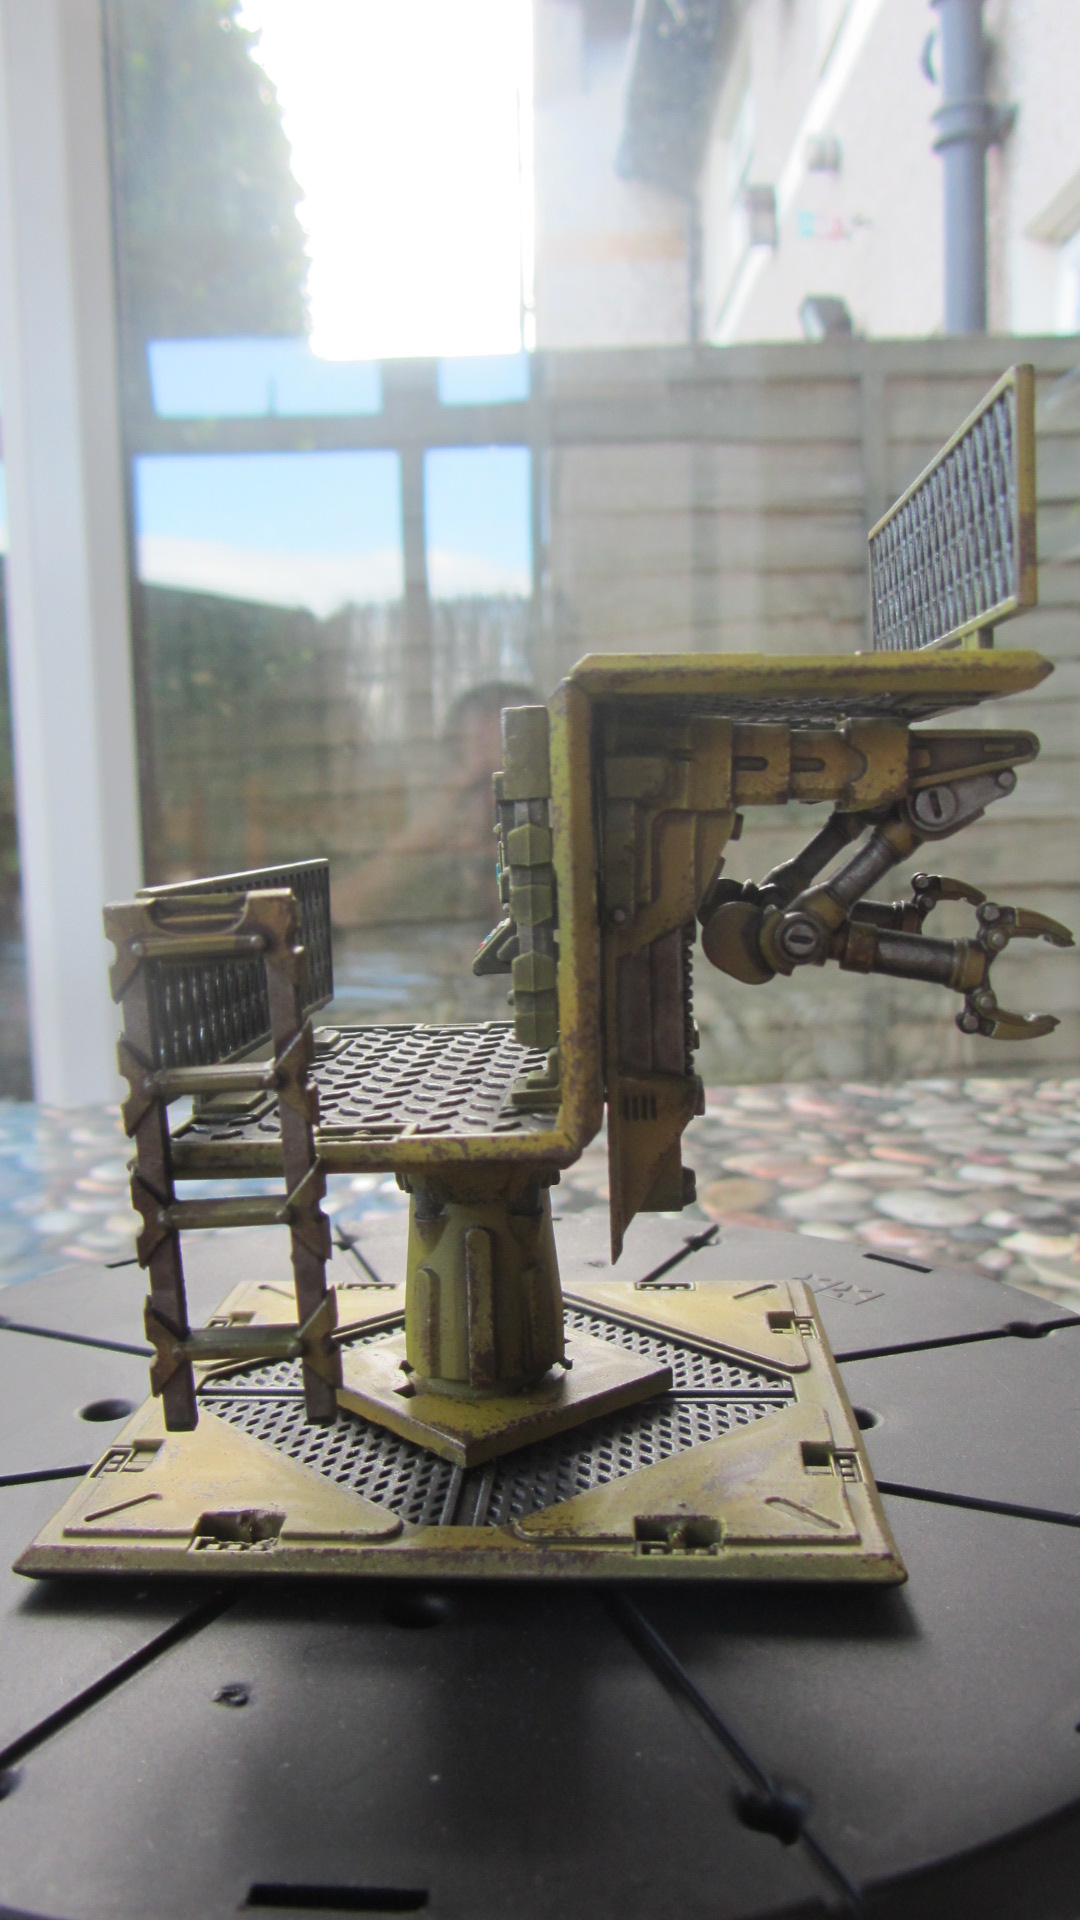

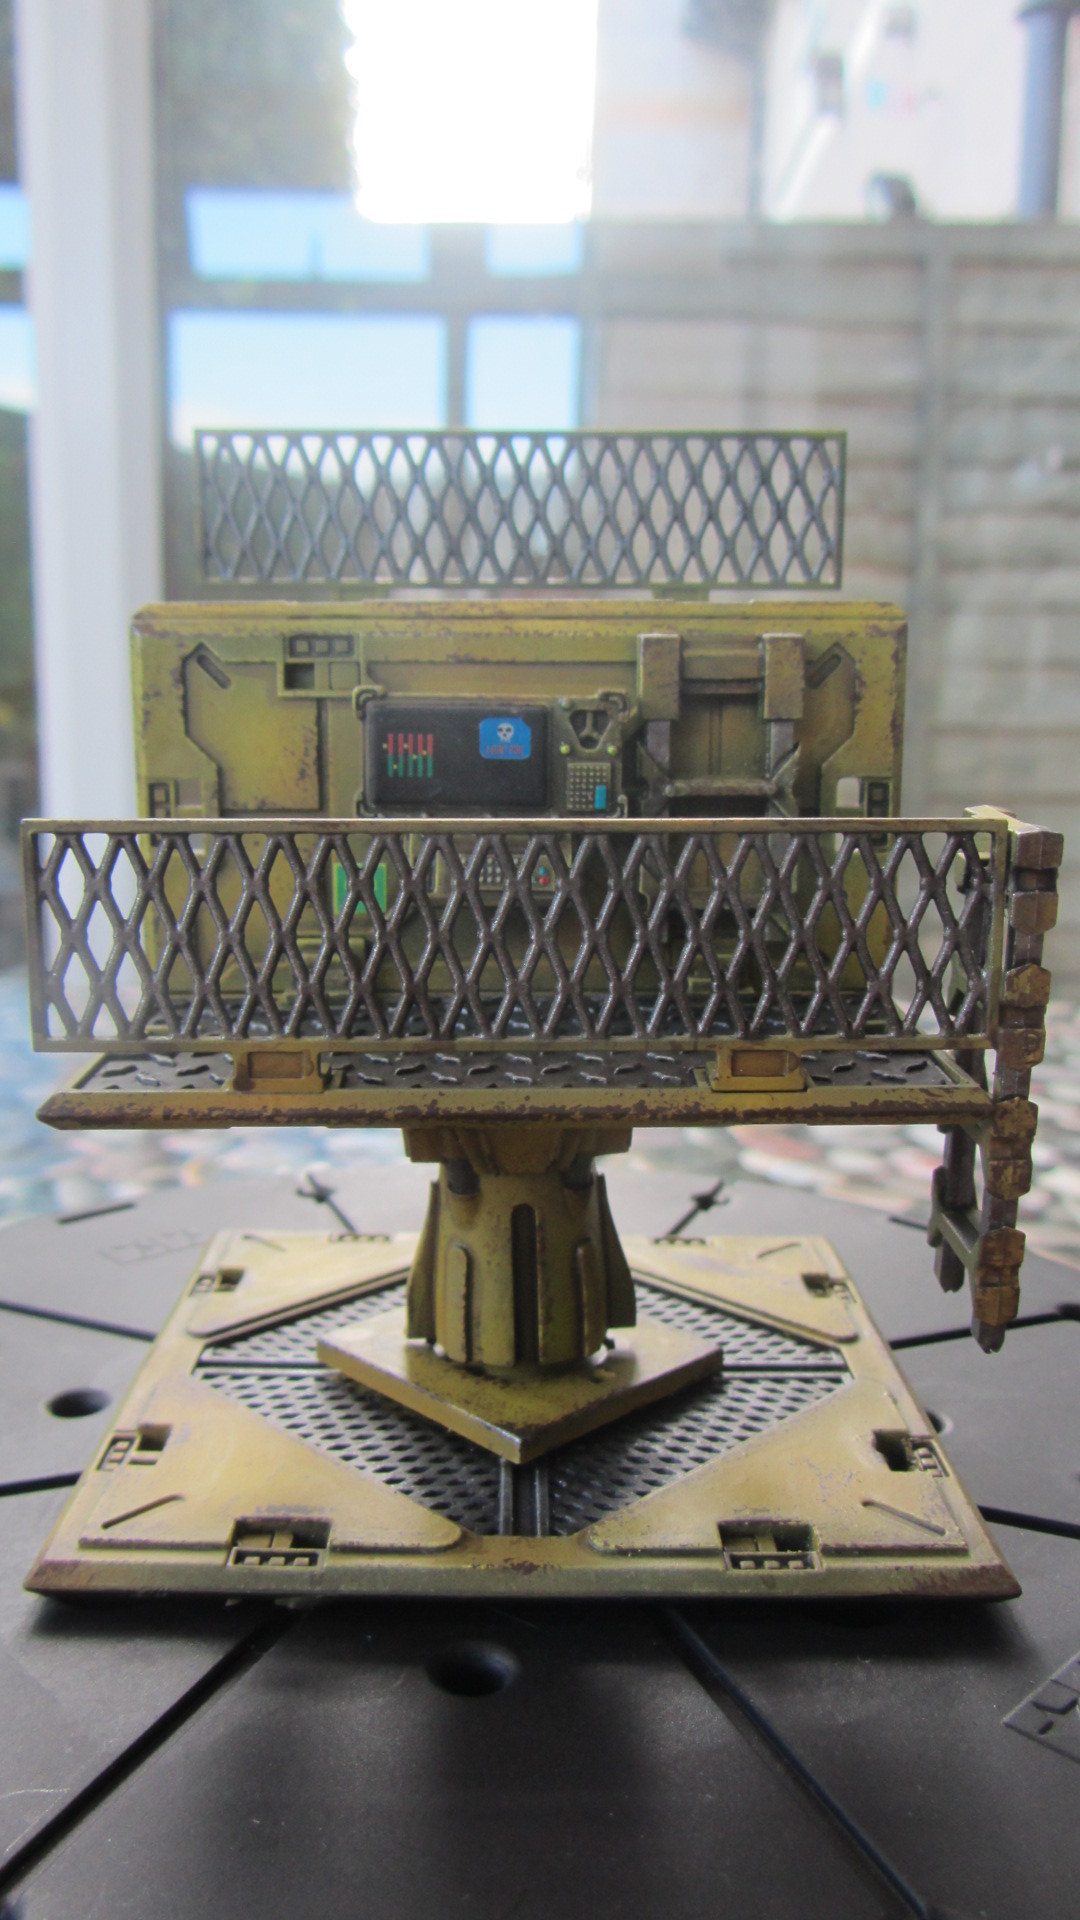
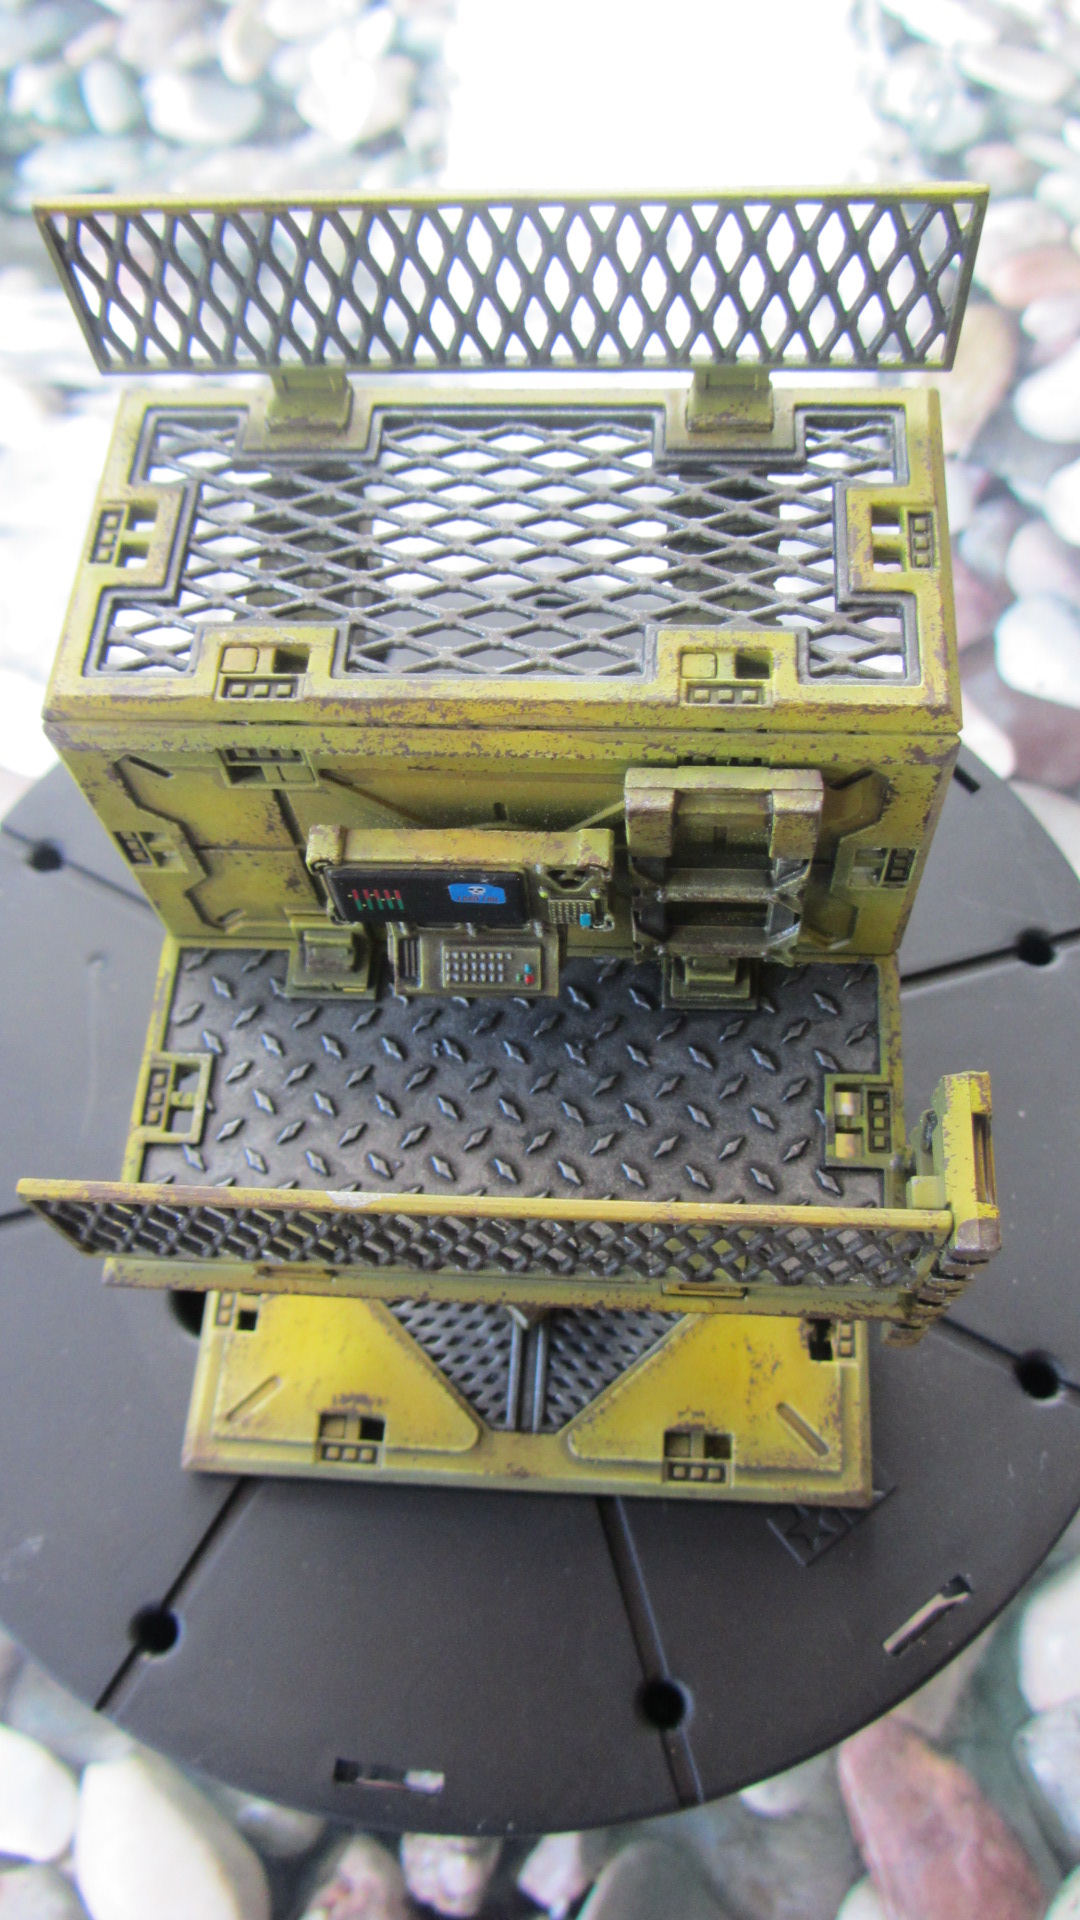
I clipped a ladder to fit in two places and provide some ‘realistic’ means of access and filed down one of the computer terminal connectors to use as a control panel. Again, being one cube in size this is great at filling any areas of the board that look a little too open.
Painting My Deadzone Industrial Battlezone
When researching potential colour schemes three colours stood out in actual real world examples; blue, yellow and grey. I liked that the yellow ties in with the rest of my Outpost 31 Deadzone terrain, so I went with a yellow and blue scheme for the industrial pieces Here’s some of the reference photos I used:


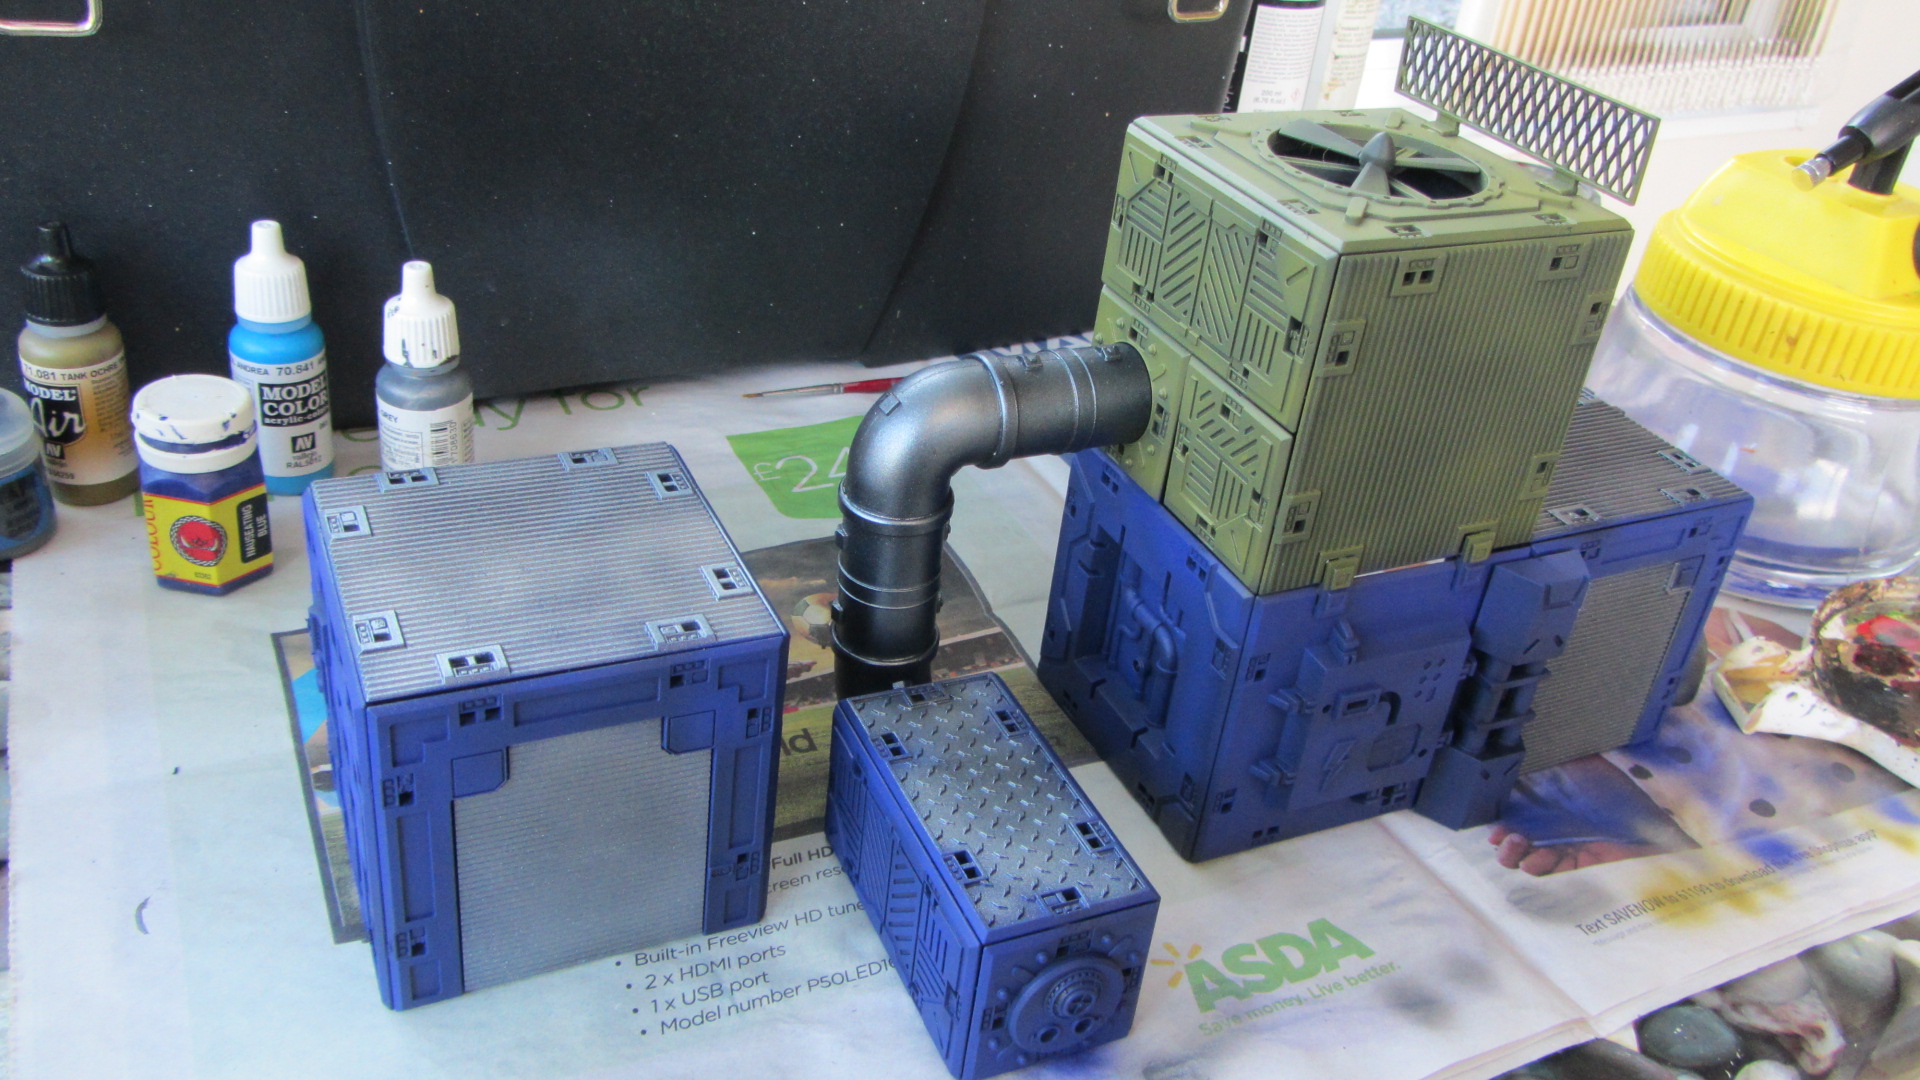
And here’s a couple of pieces partway through painting…
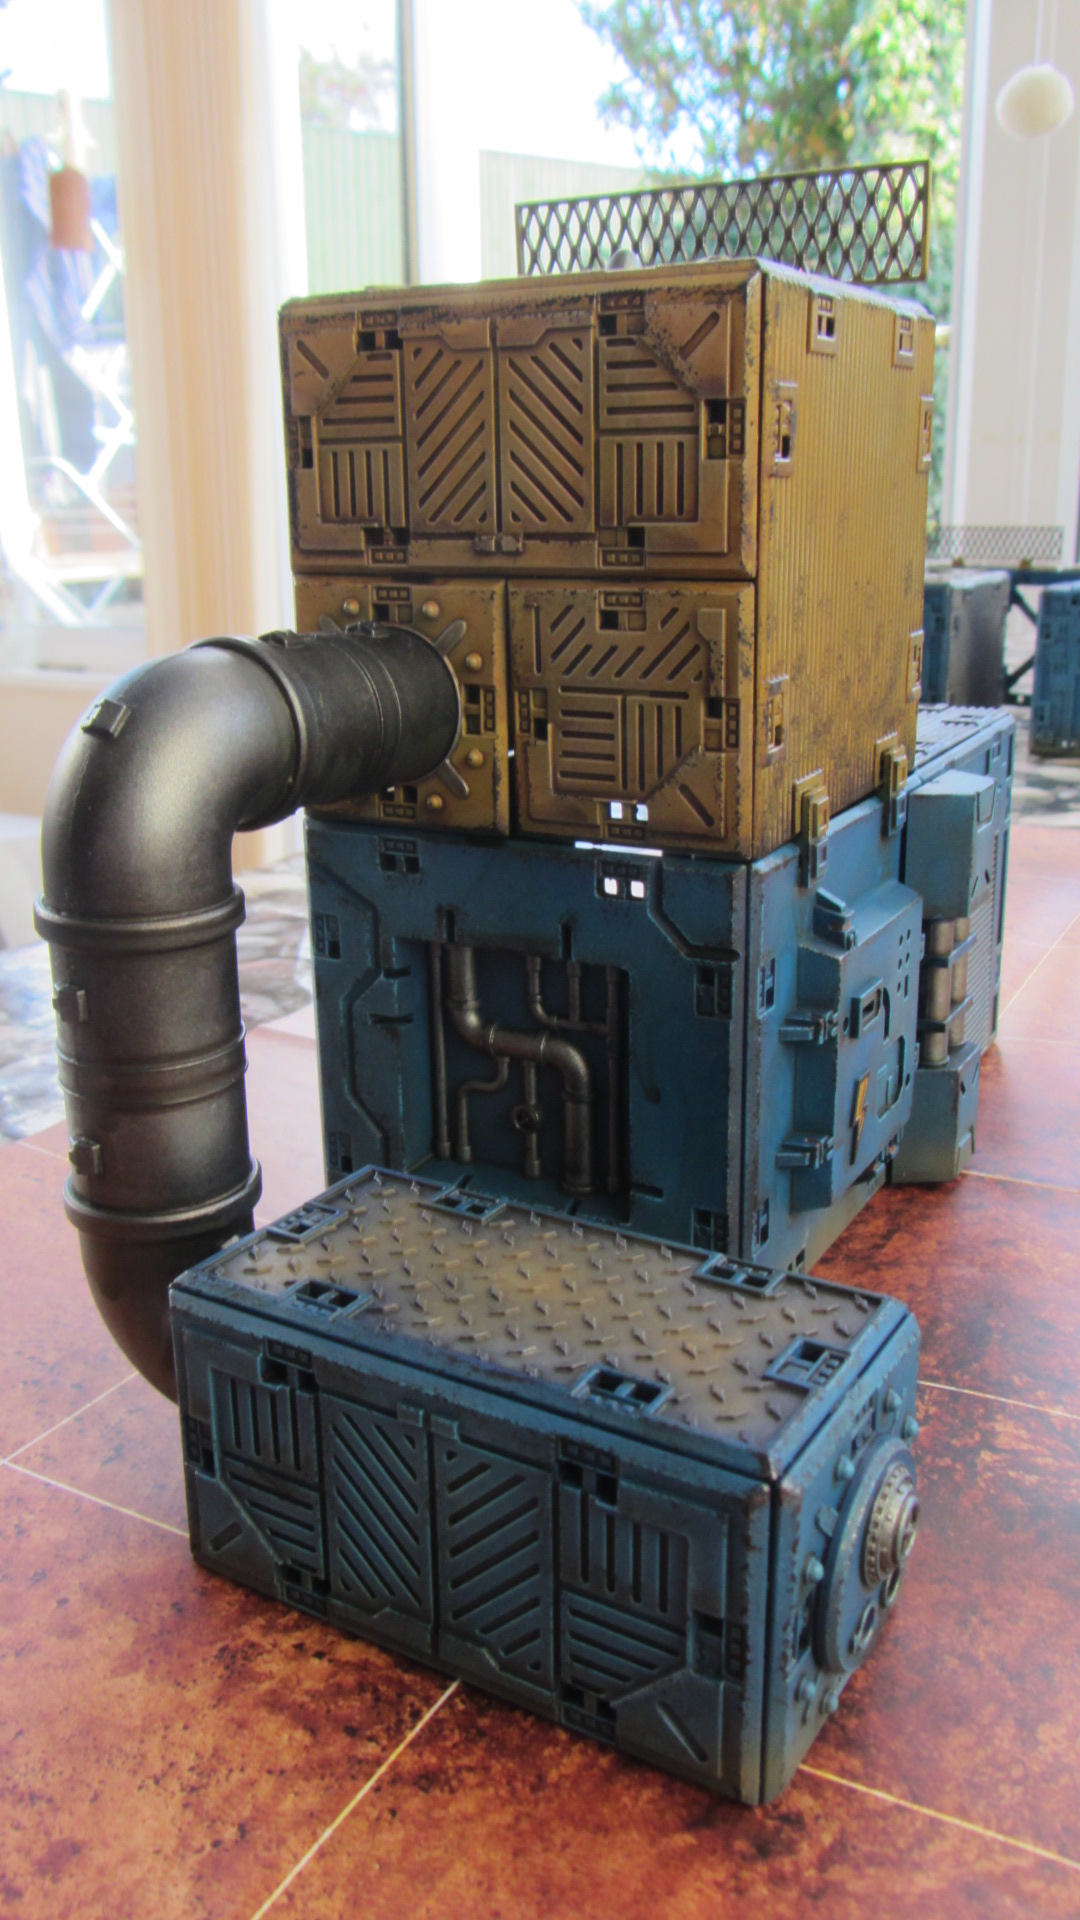
And the finished pieces:
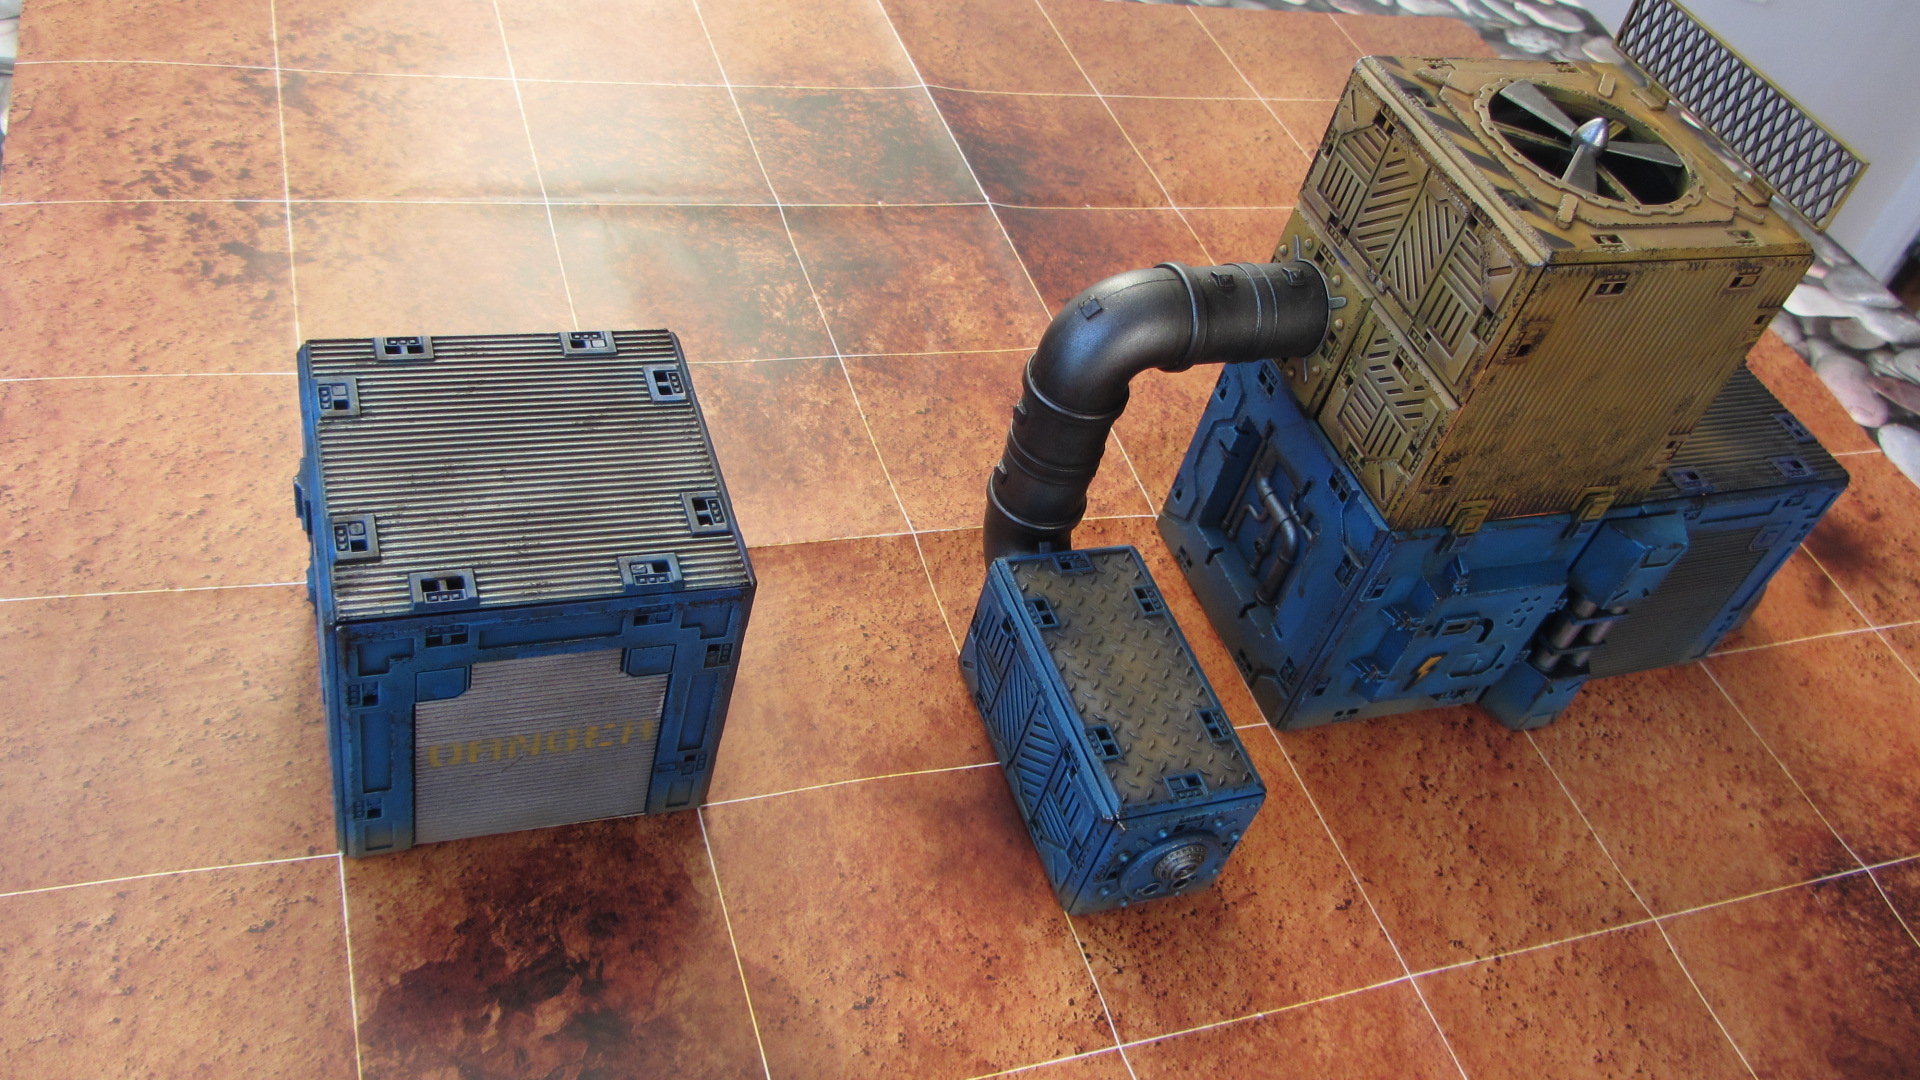
I’m pleased with the overall effect and happy that the blue colour I’ve used looks right – not too bright or dark.
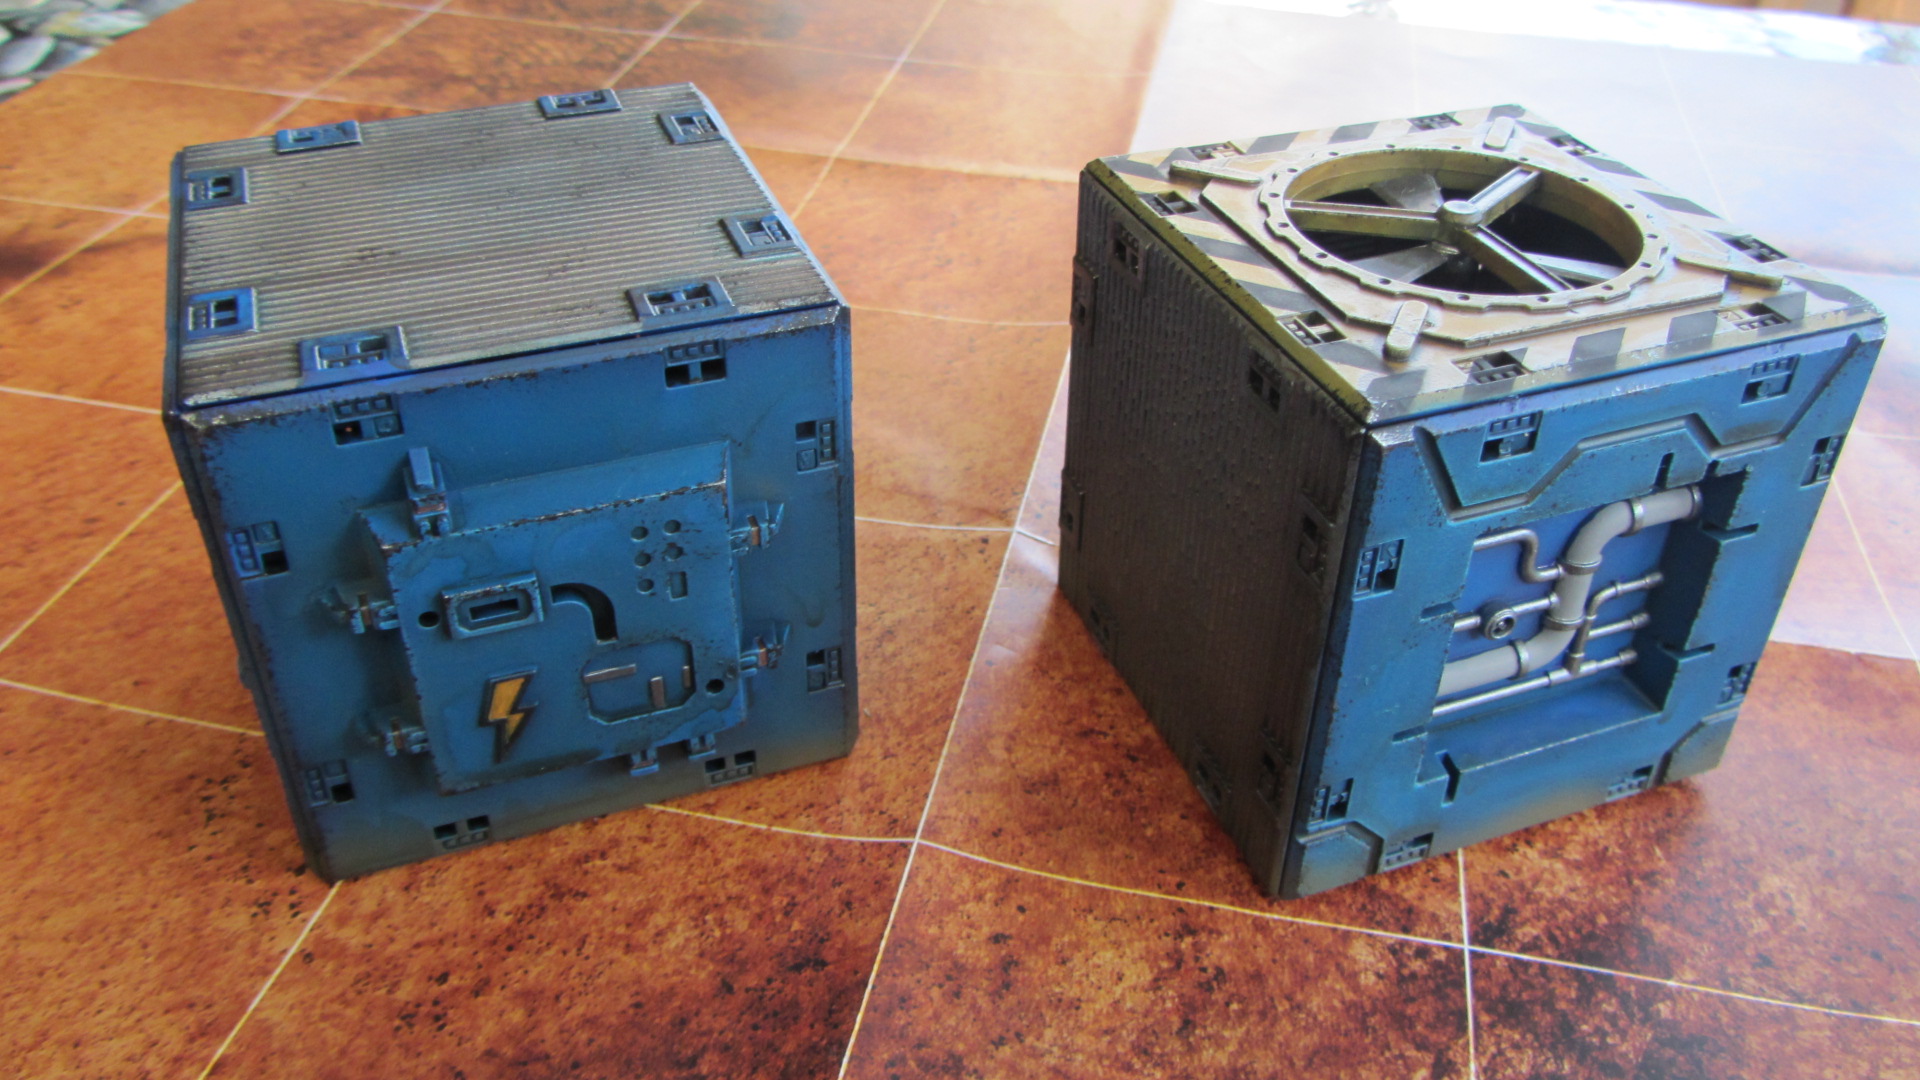
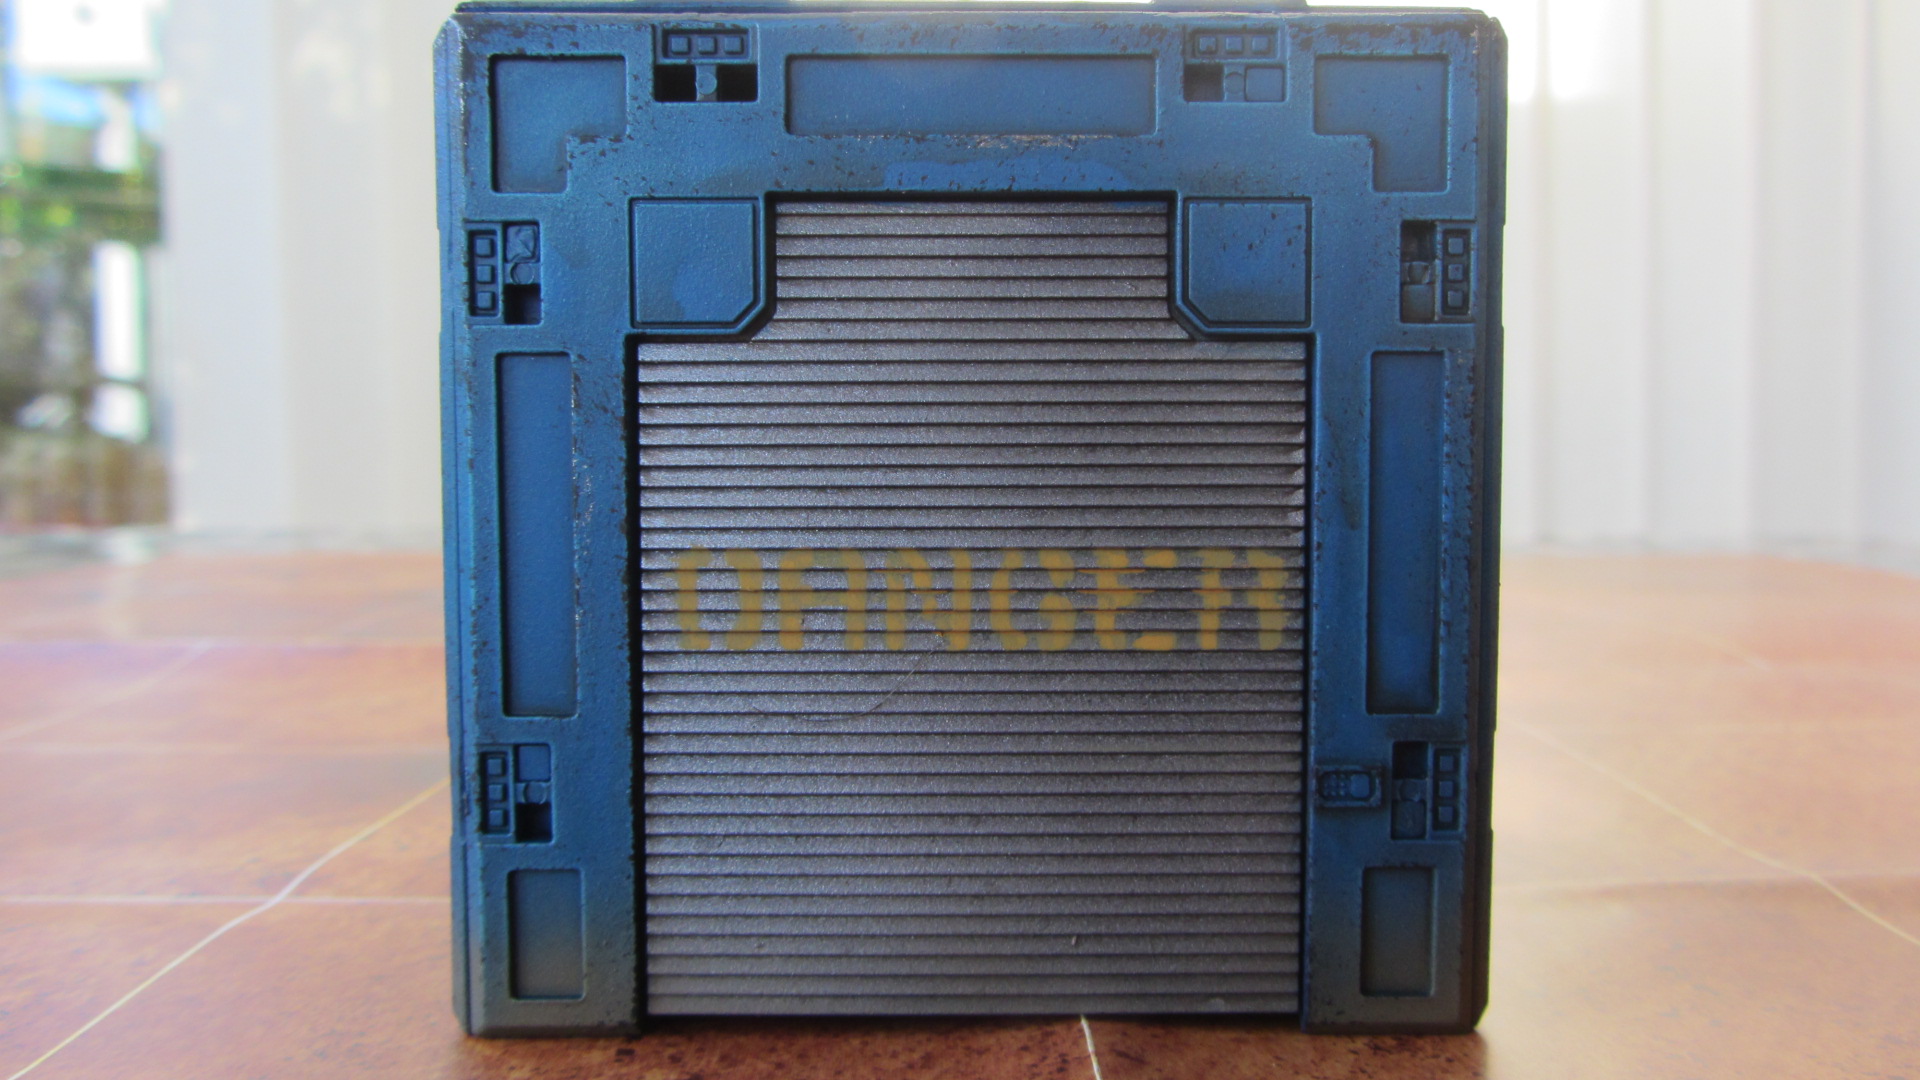
Here’s a closer look at some of the pieces, followed by a quick breakdown of how I painted them. First up, a one cube ‘electrical station’ building;
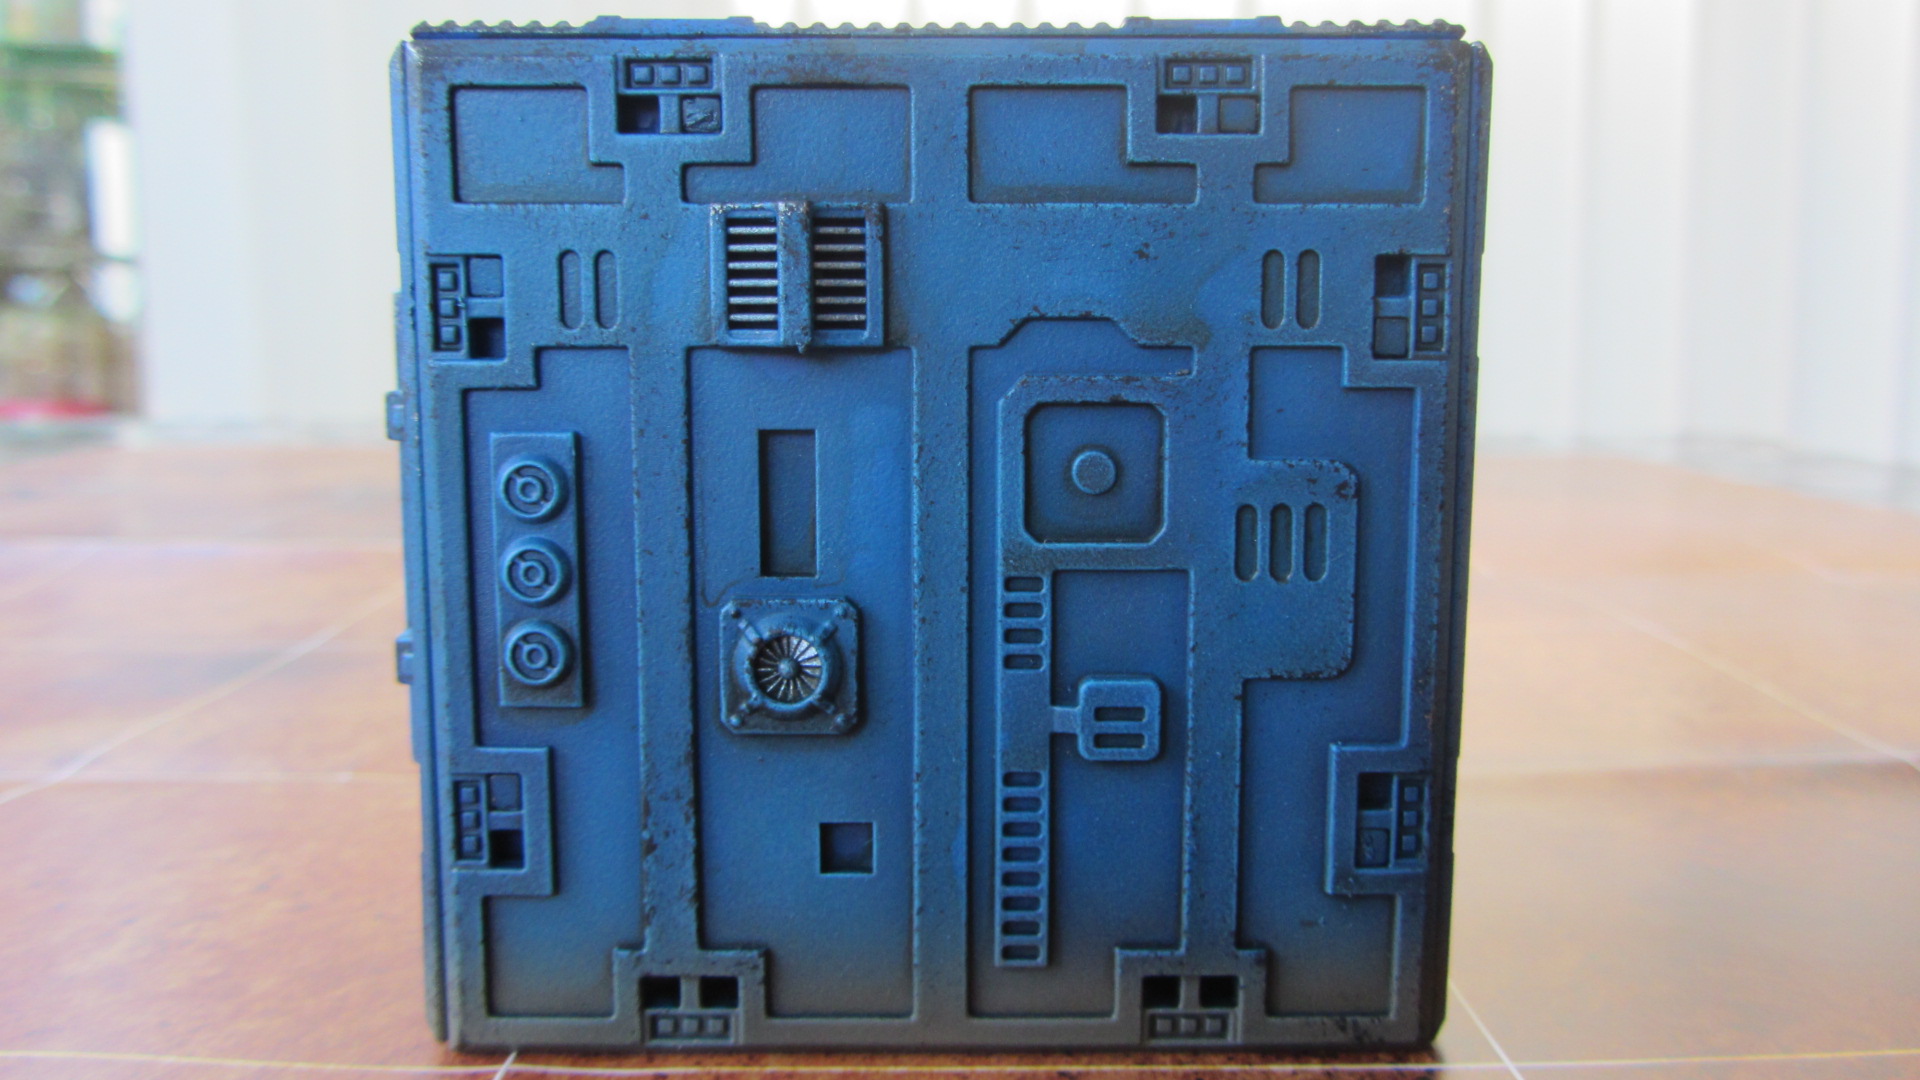
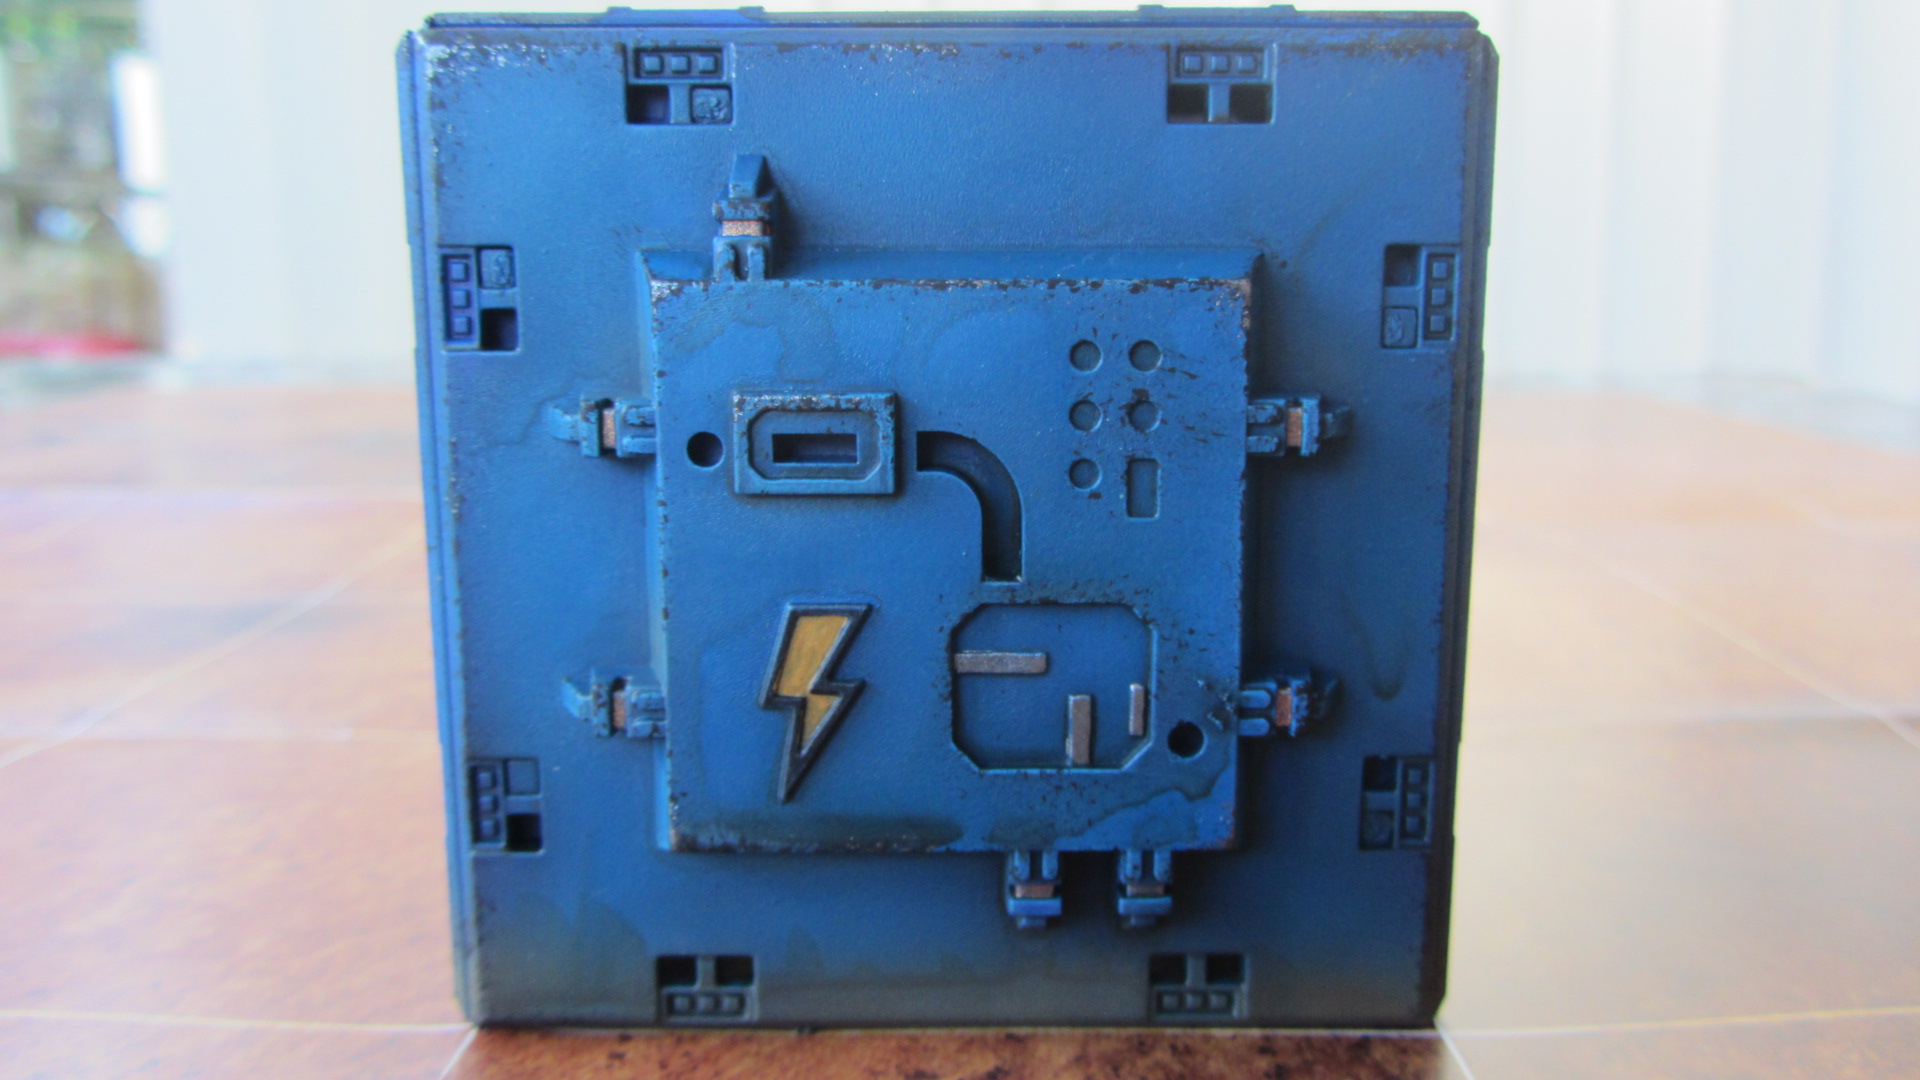
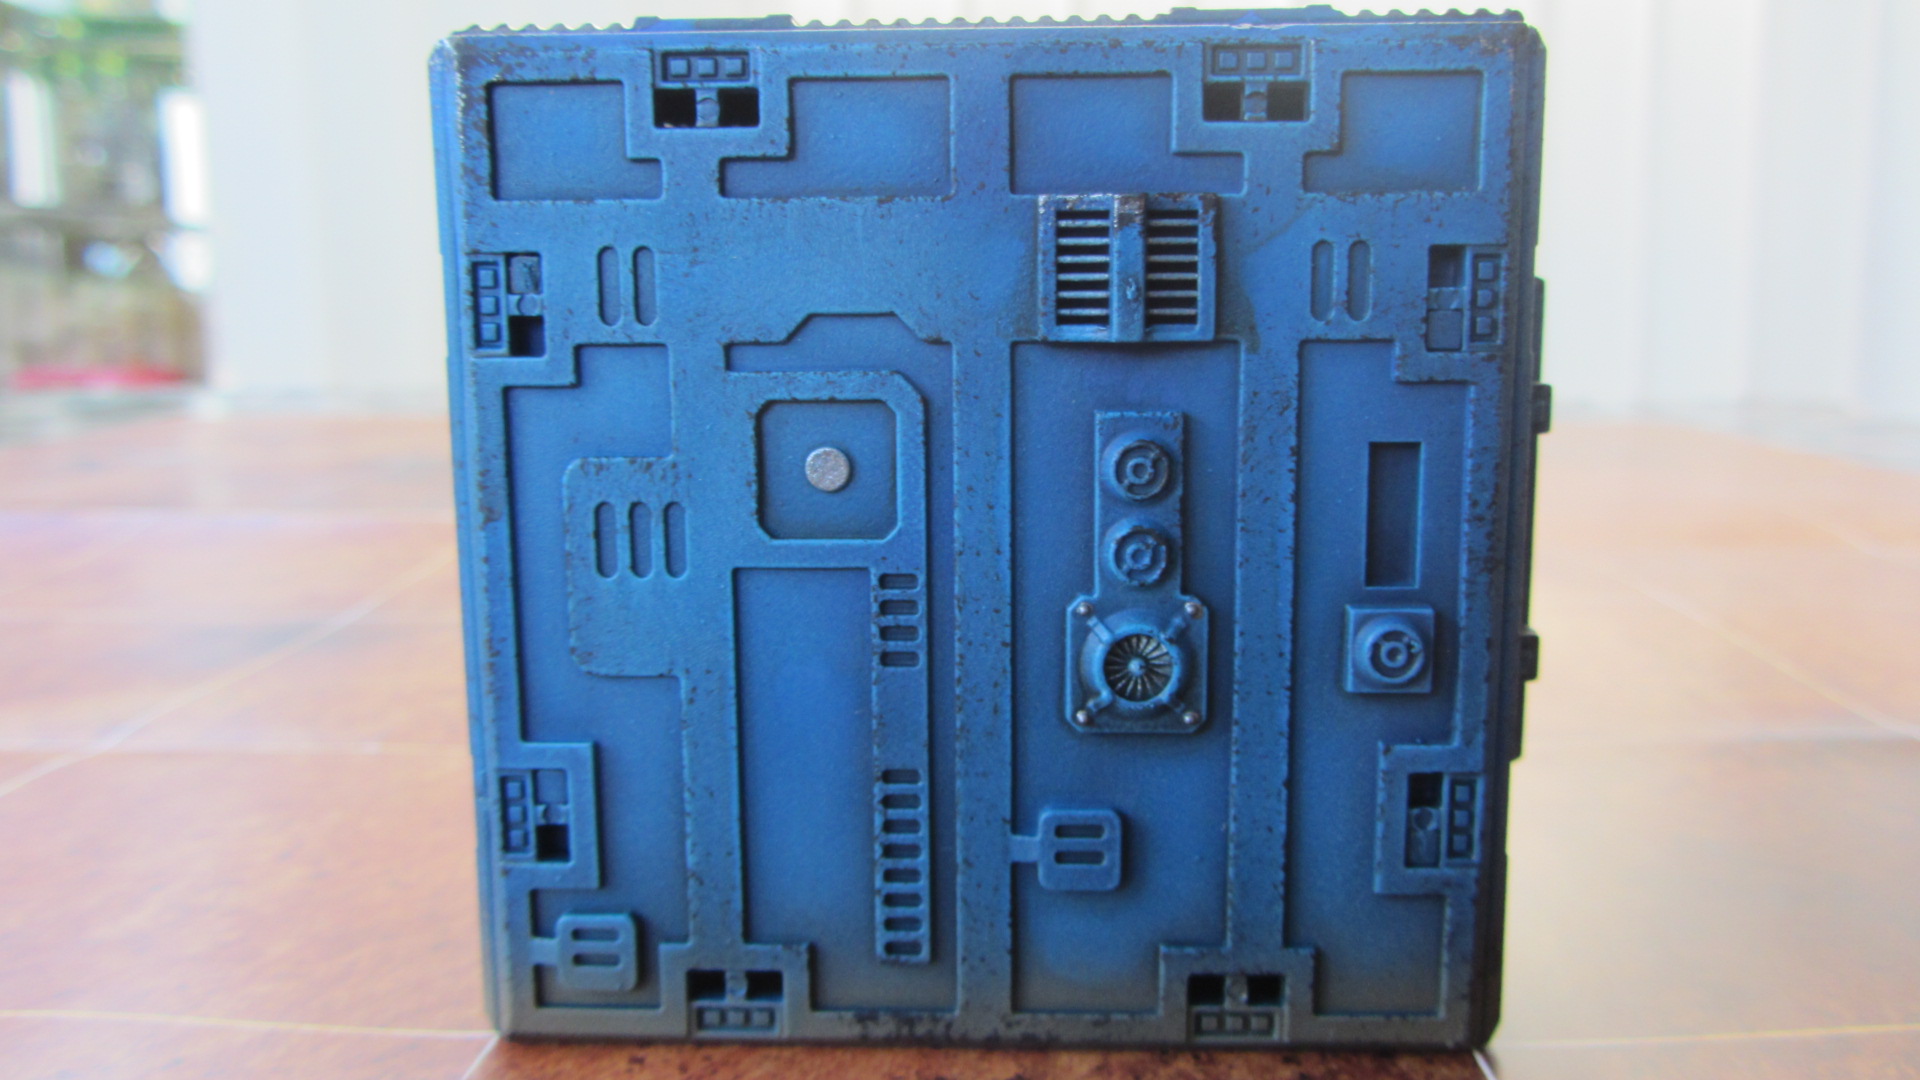
I painted the blue by undercoating on black, then airbrushing on an old Citadel colour I still have; ‘Nauseating Blue’. I kept this base coat quite thin, so some of the black still showed through. next I layered on Vallejo Model Colour Medium Blue 70.963. I washed on a watered down coat of Army Painter Strong Tone ink and once dry, drybrushed the edges with a lightened shade of the medium blue.
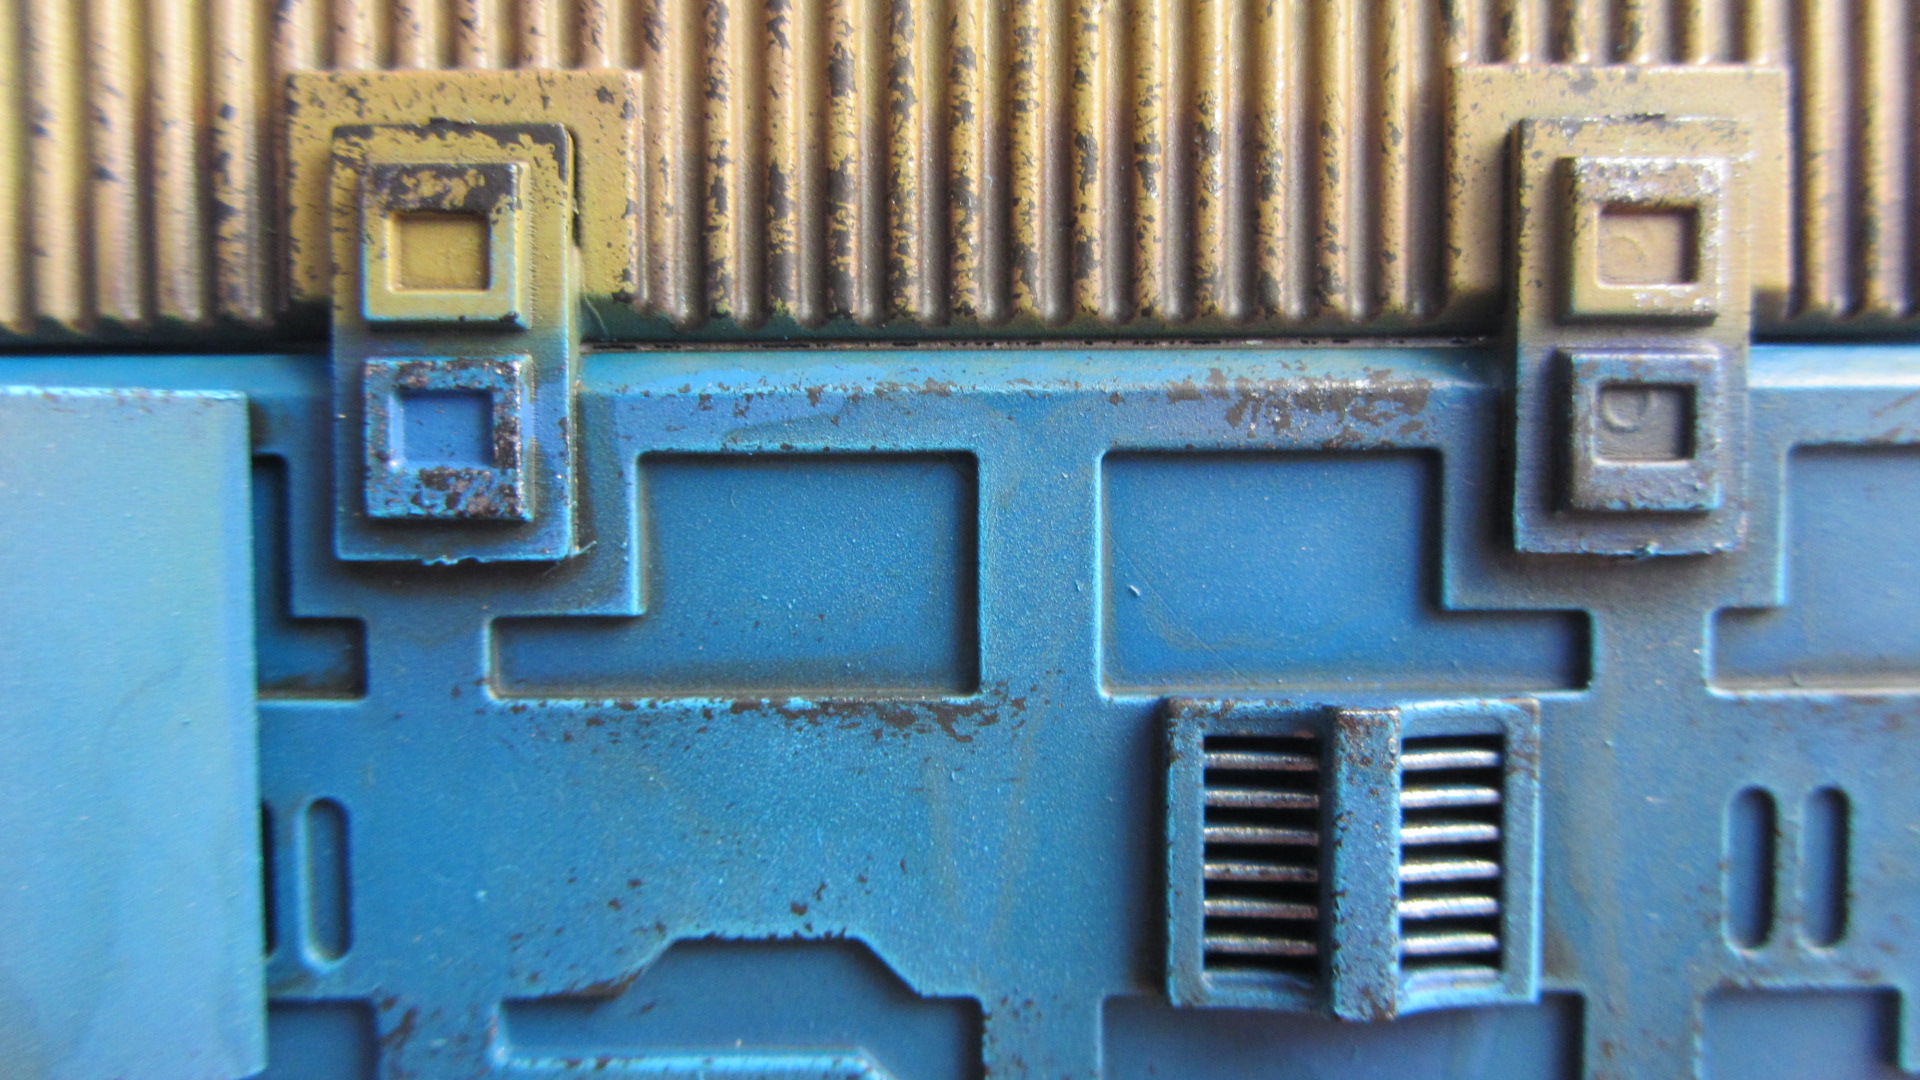
For weathering, I lightly airbrushed some brown paint along the bottom of each cube,to show an accumulation of ground-level dust and then edge-sponged on black around the edges to show where the blue paint had chipped off. Where the black edge sponging was quite noticeable, I edge-sponged on some gunmetal, to try and show where the paint had been scraped off the building down to the bare metal beneath.
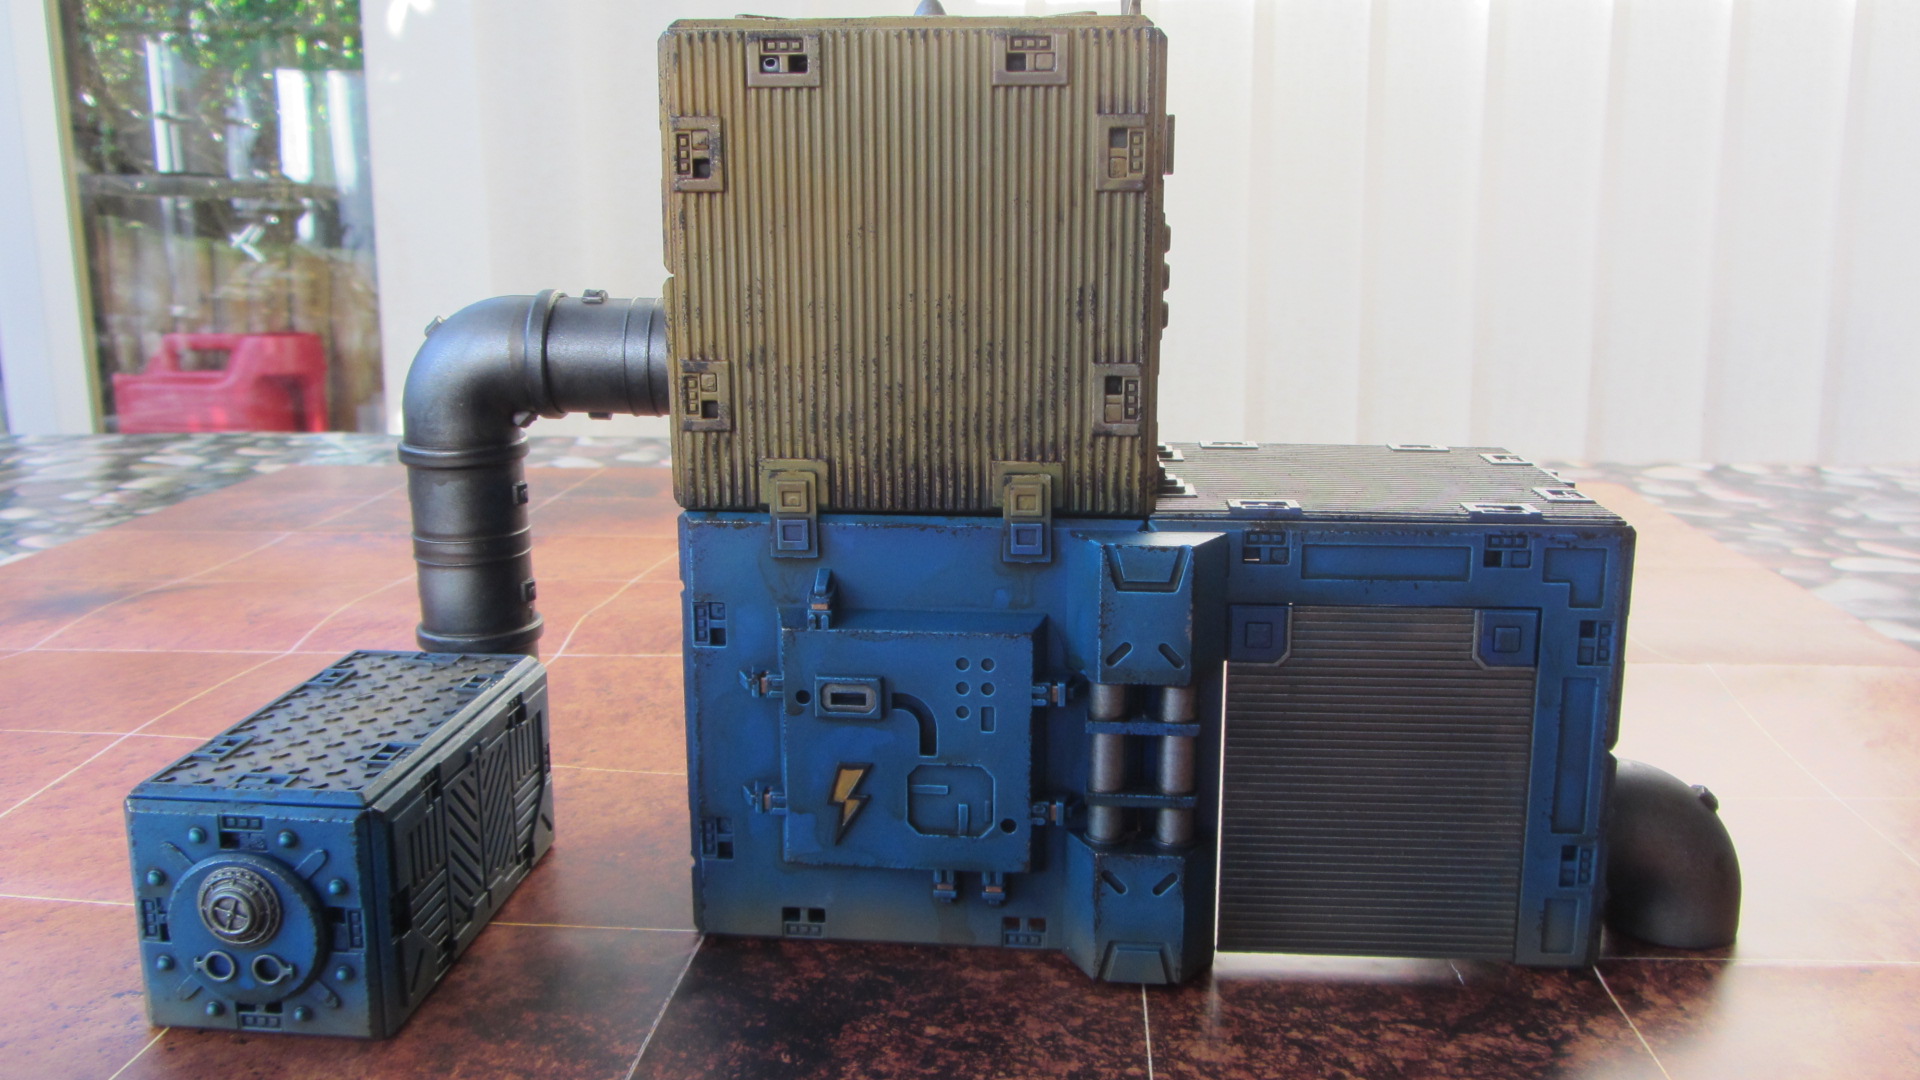
The second one-cube building:
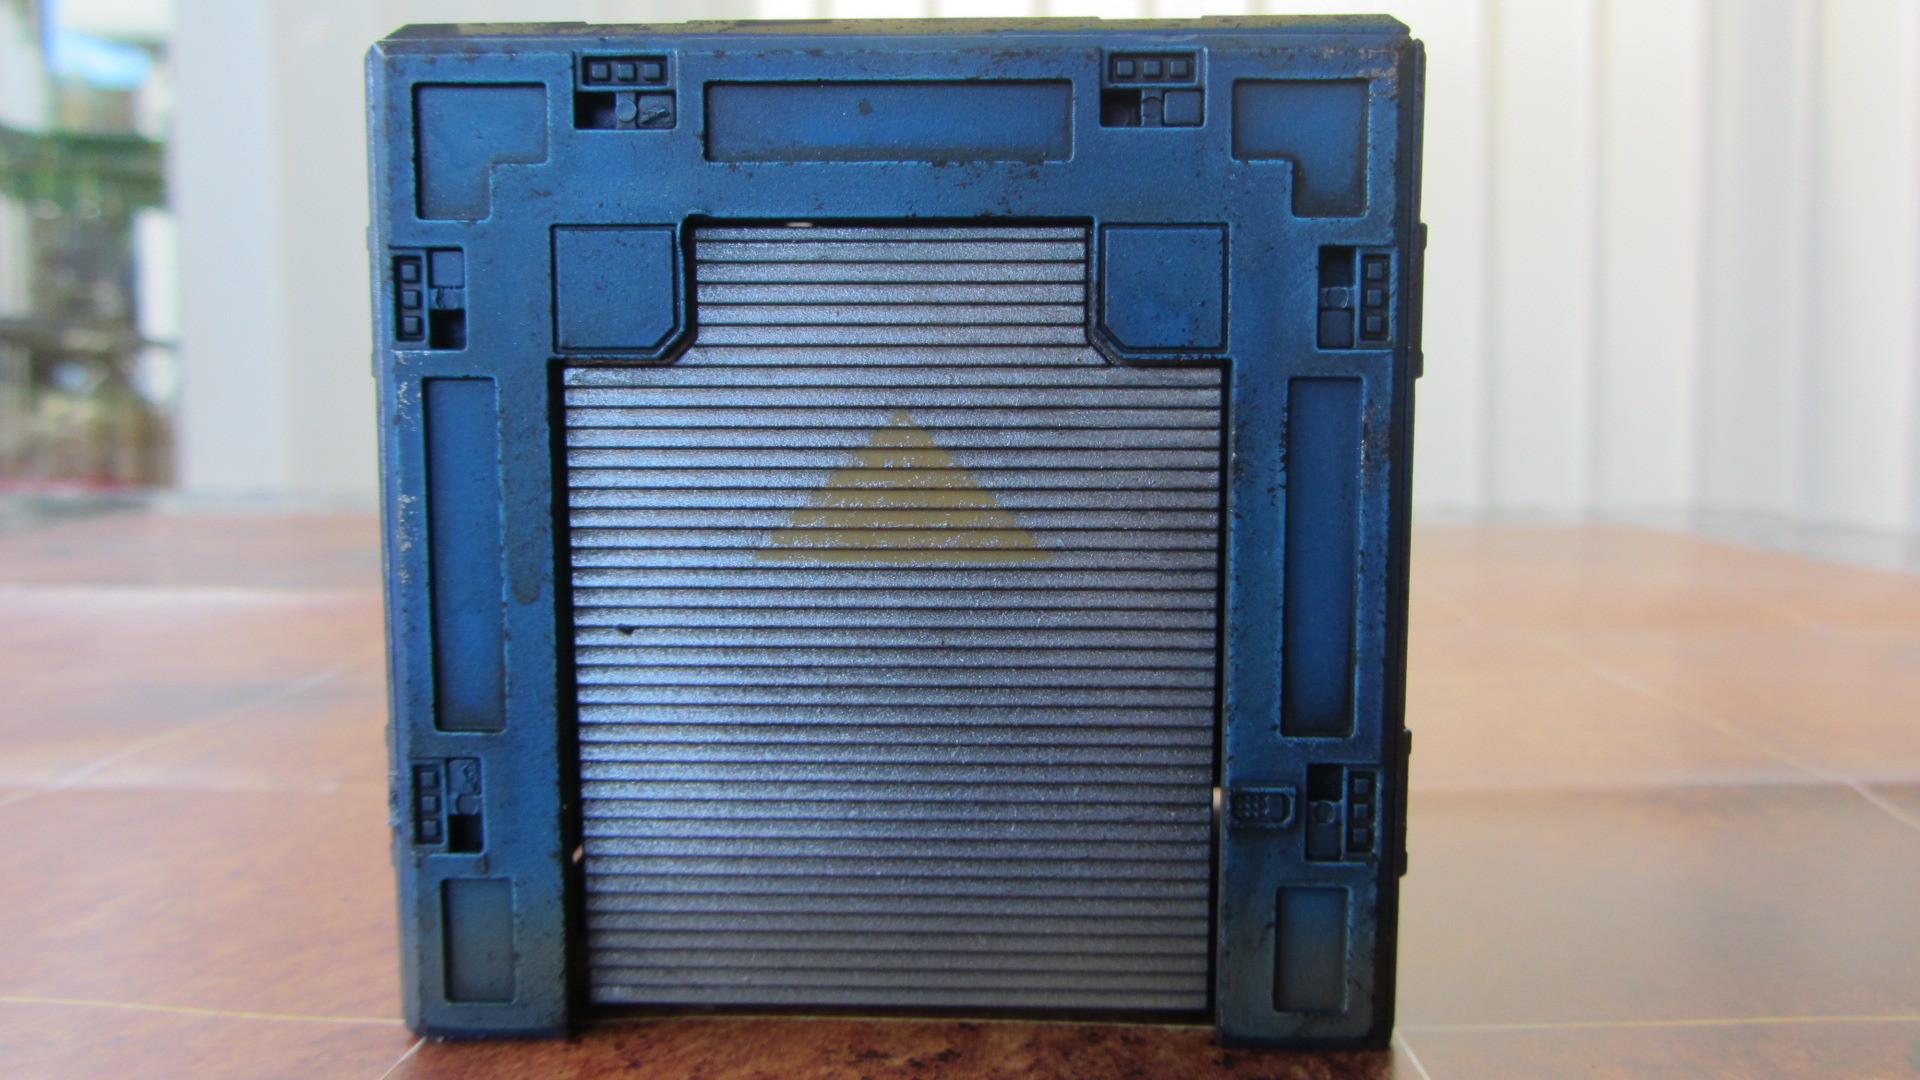
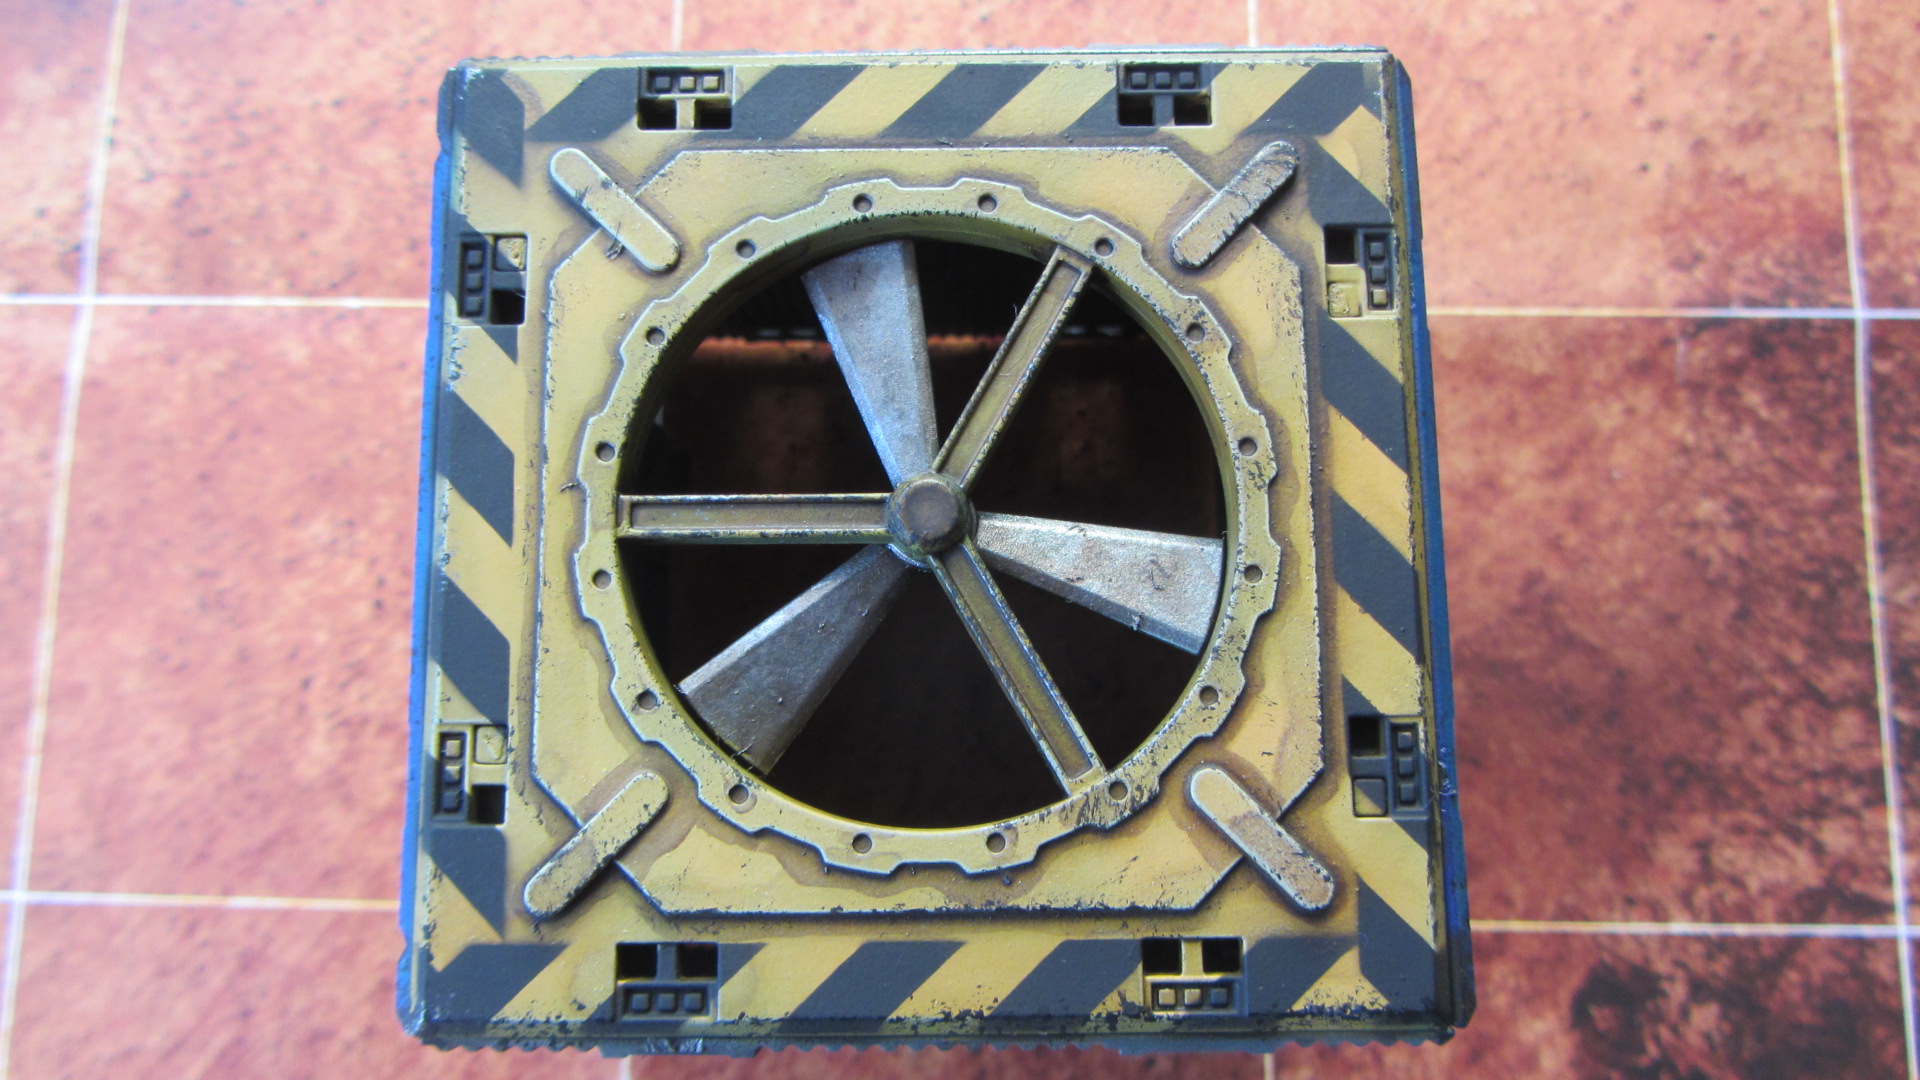
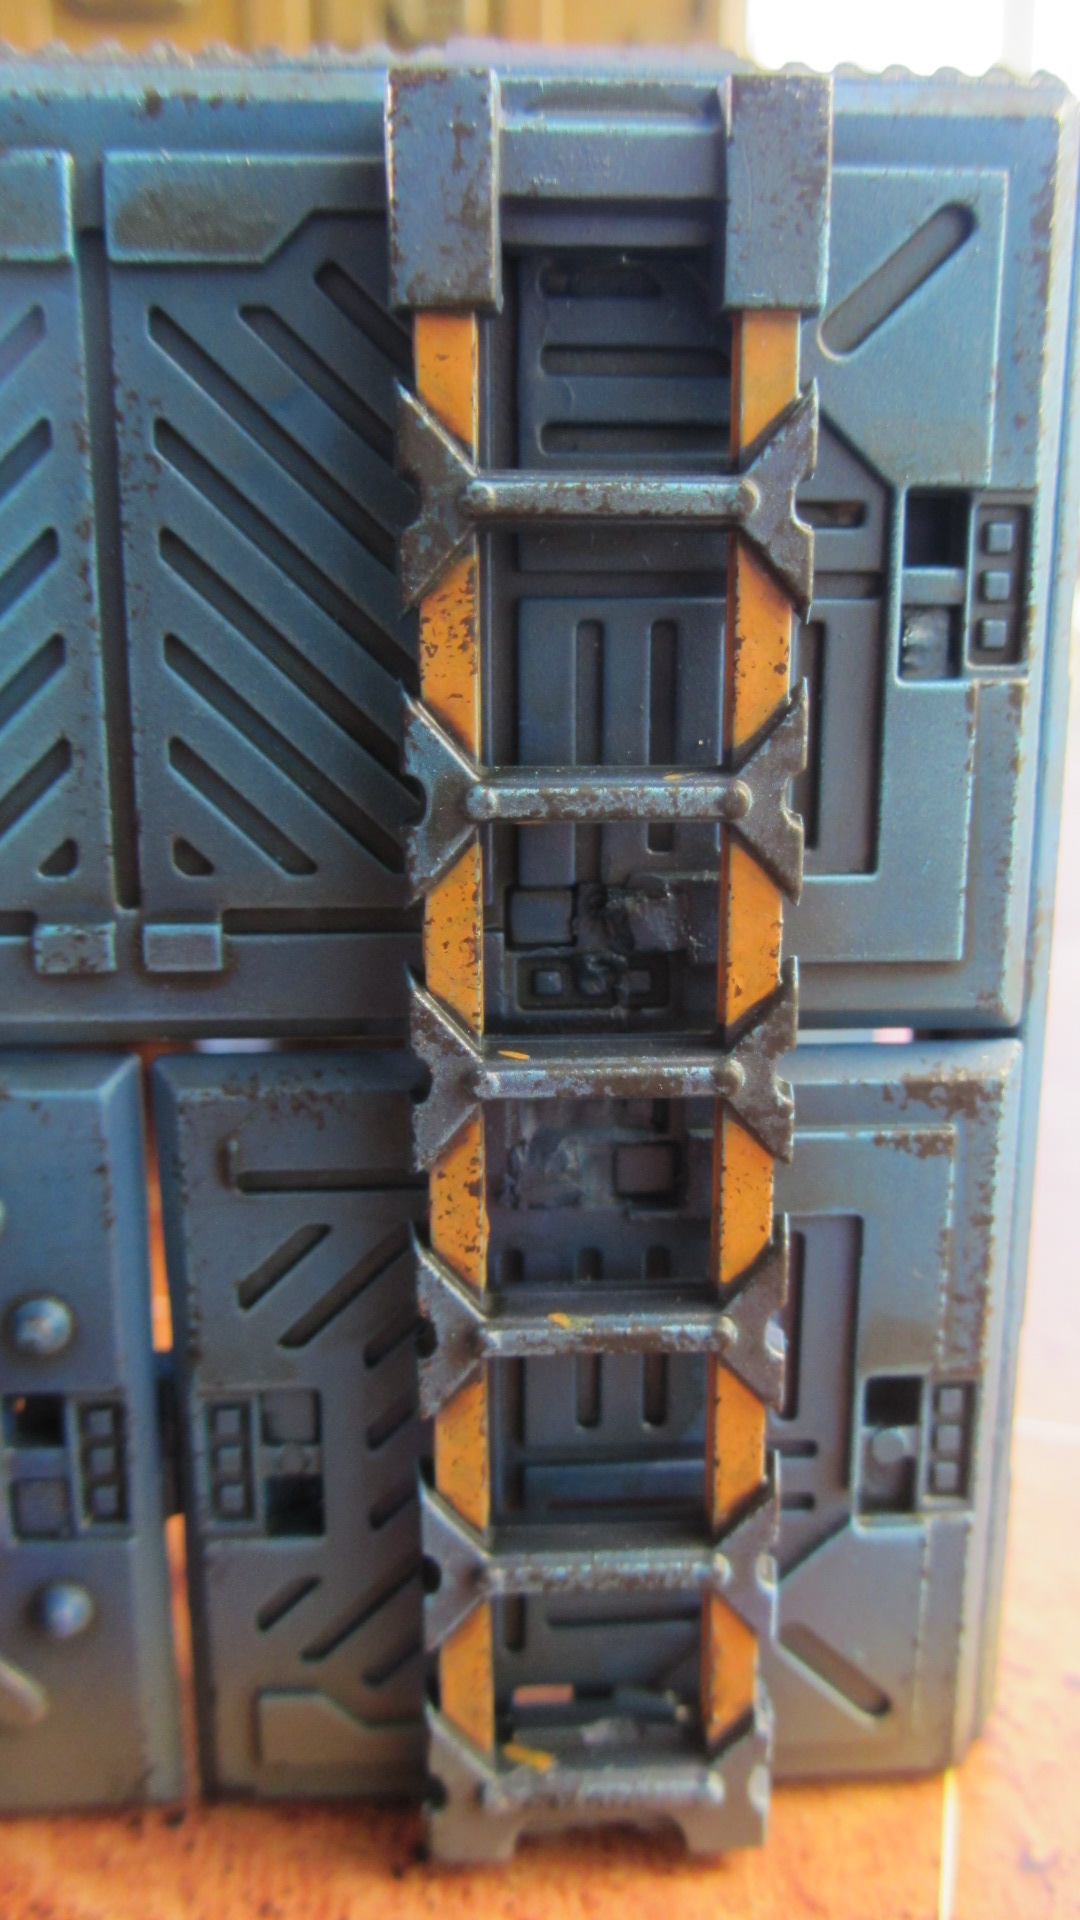
I’m particularly happy with how the hazard stripes turned out on the roof. My friend Andy bought all three of the Anarchy Models Deadzone stencil sets and as kindly loaned them to me to try out. They’re great and I highly recommend them. I also added the word ‘danger’ on the front of the previous one cube building and the arrow on the front of this one using these stencils. These stencils also came in massively useful when I painted my landing pad.
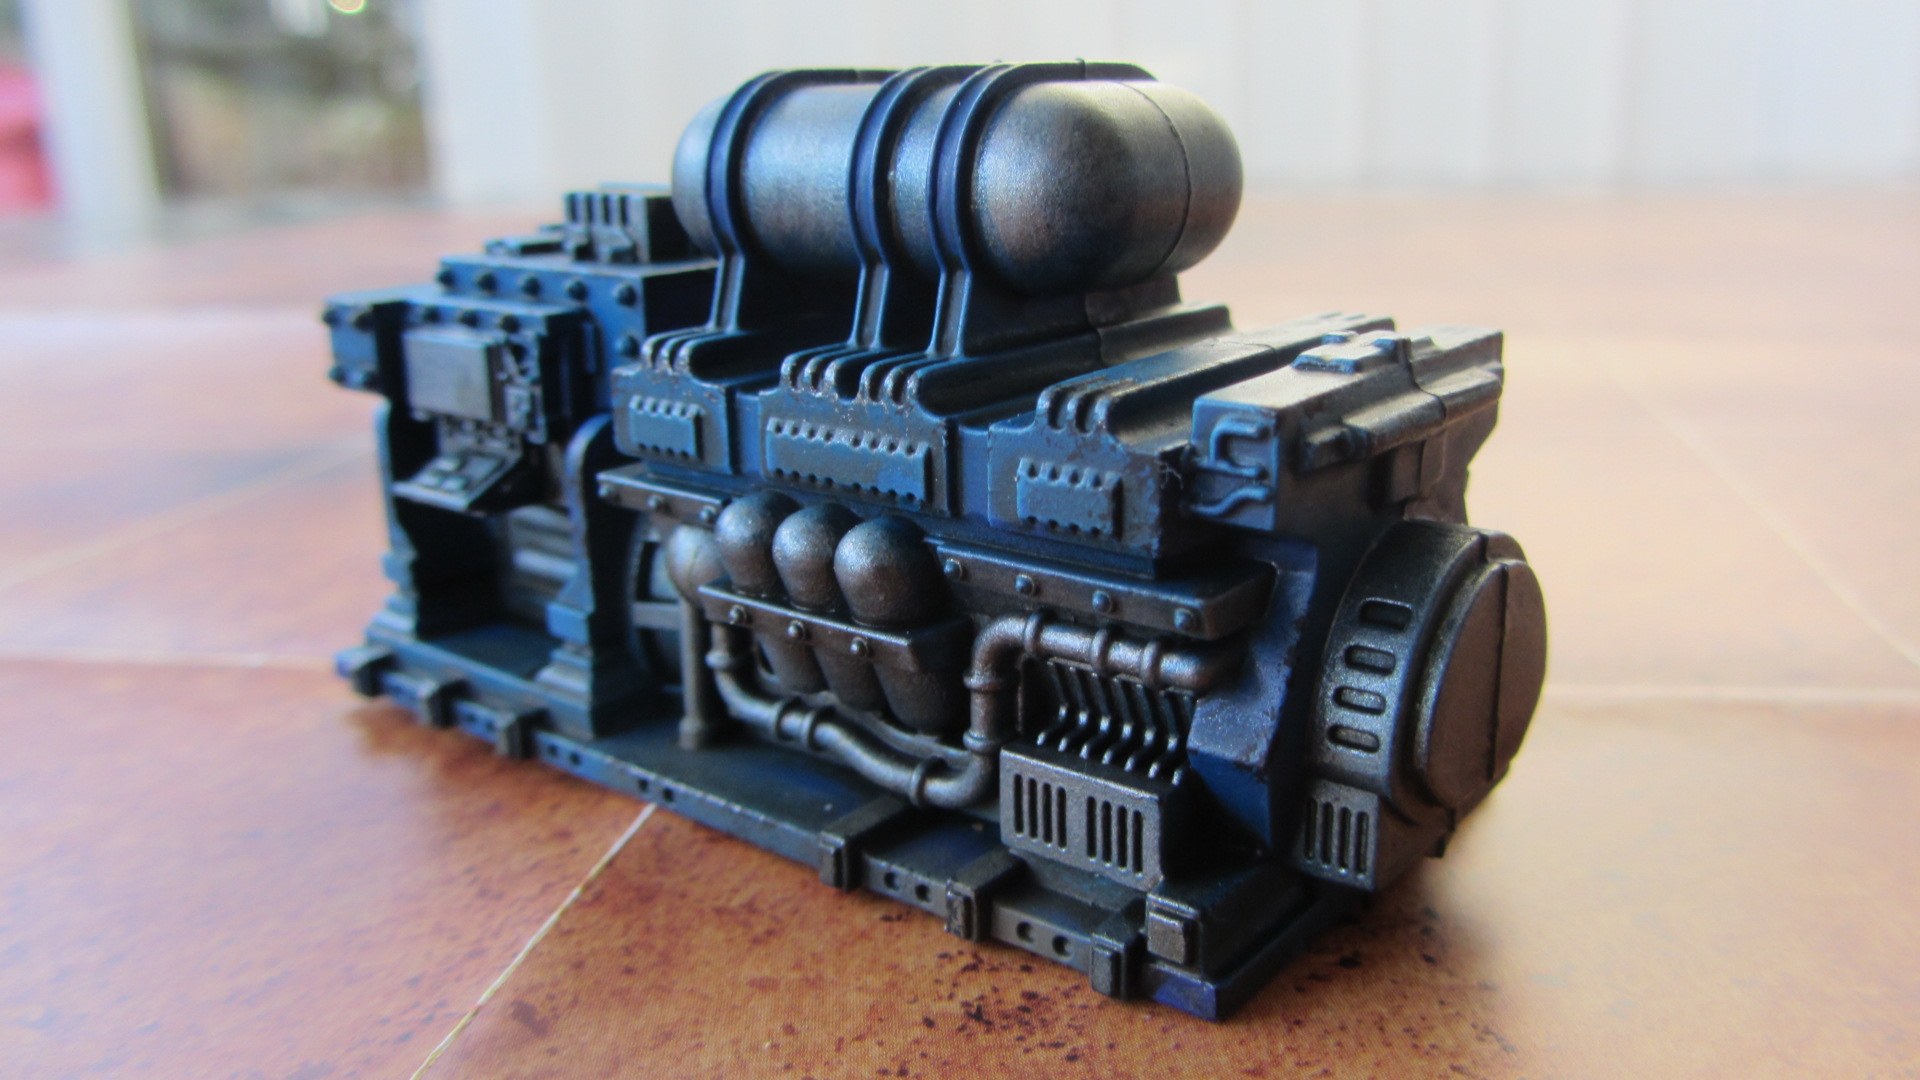
This is one of the ‘generator’ pieces you get in the industrial battlezone sets. The hazard stripes on the right side of the top picture were again created using Anarchy stencils.
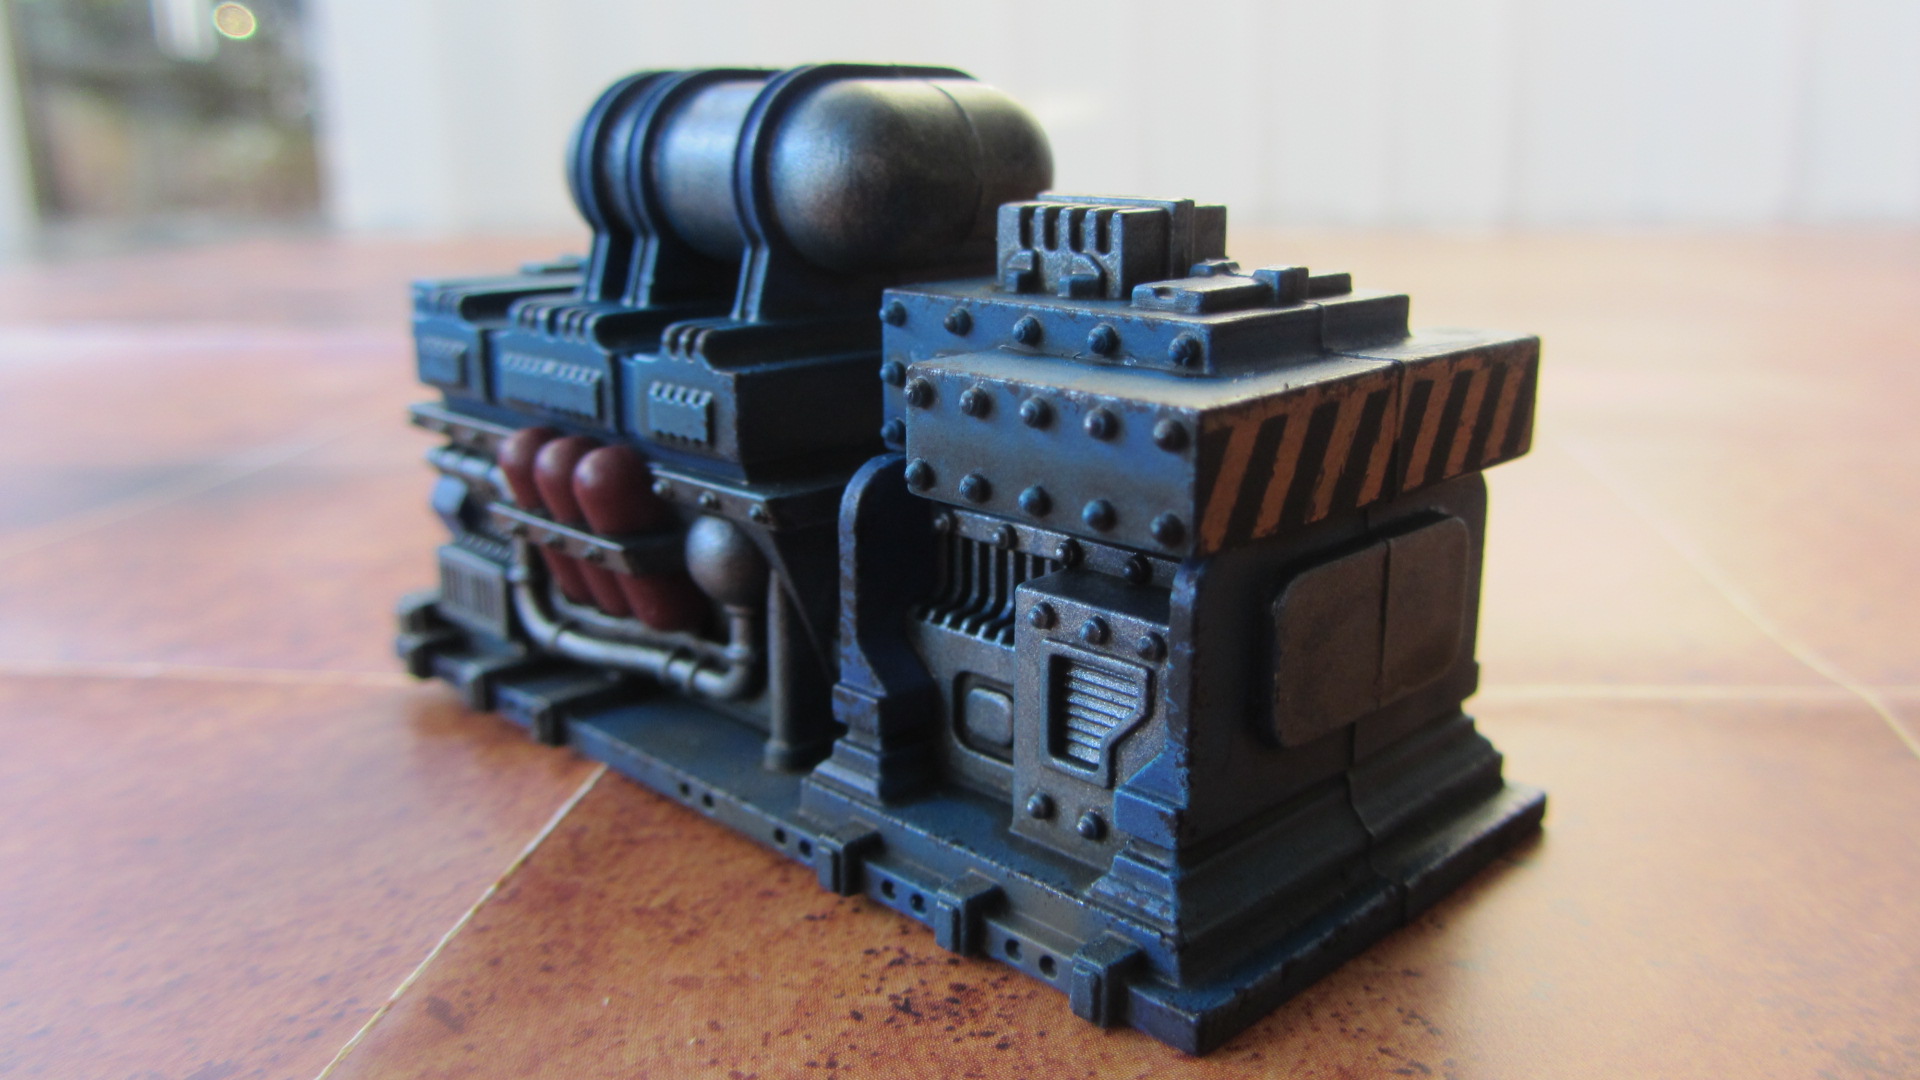
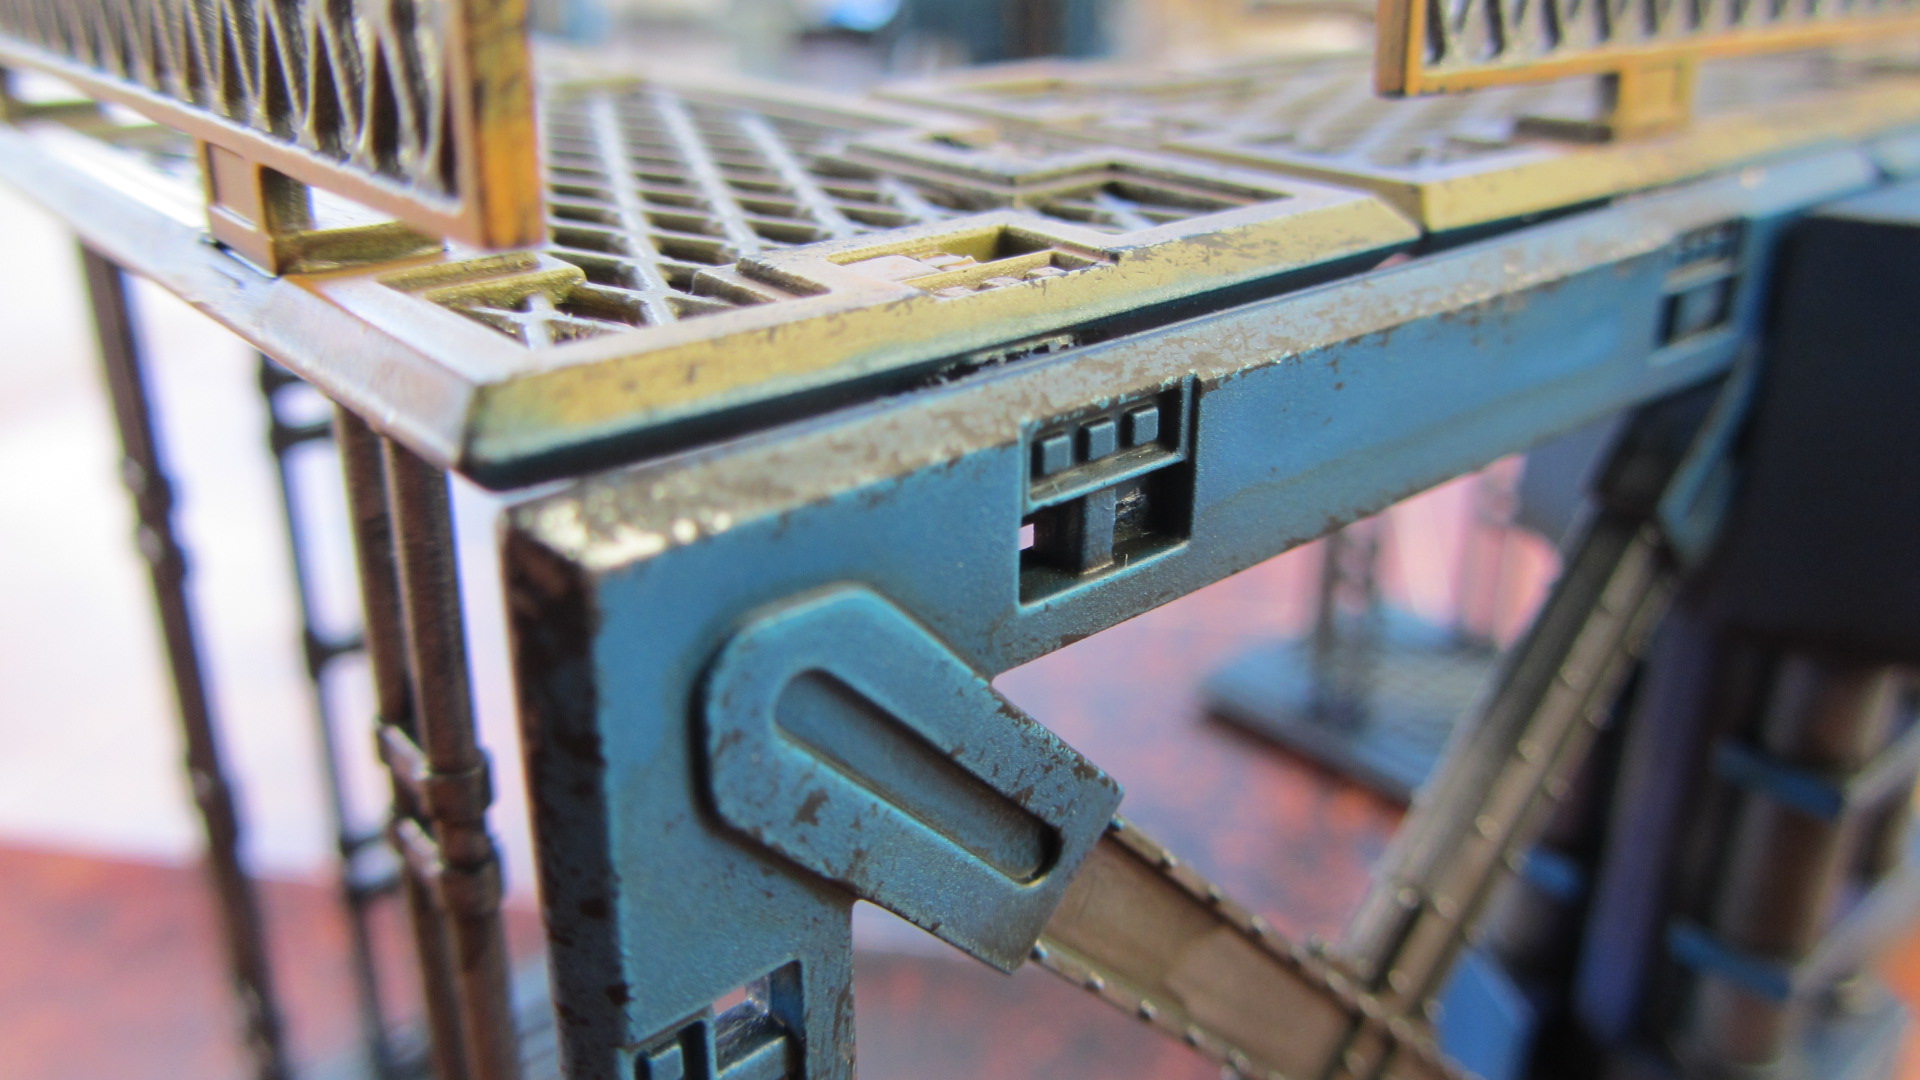
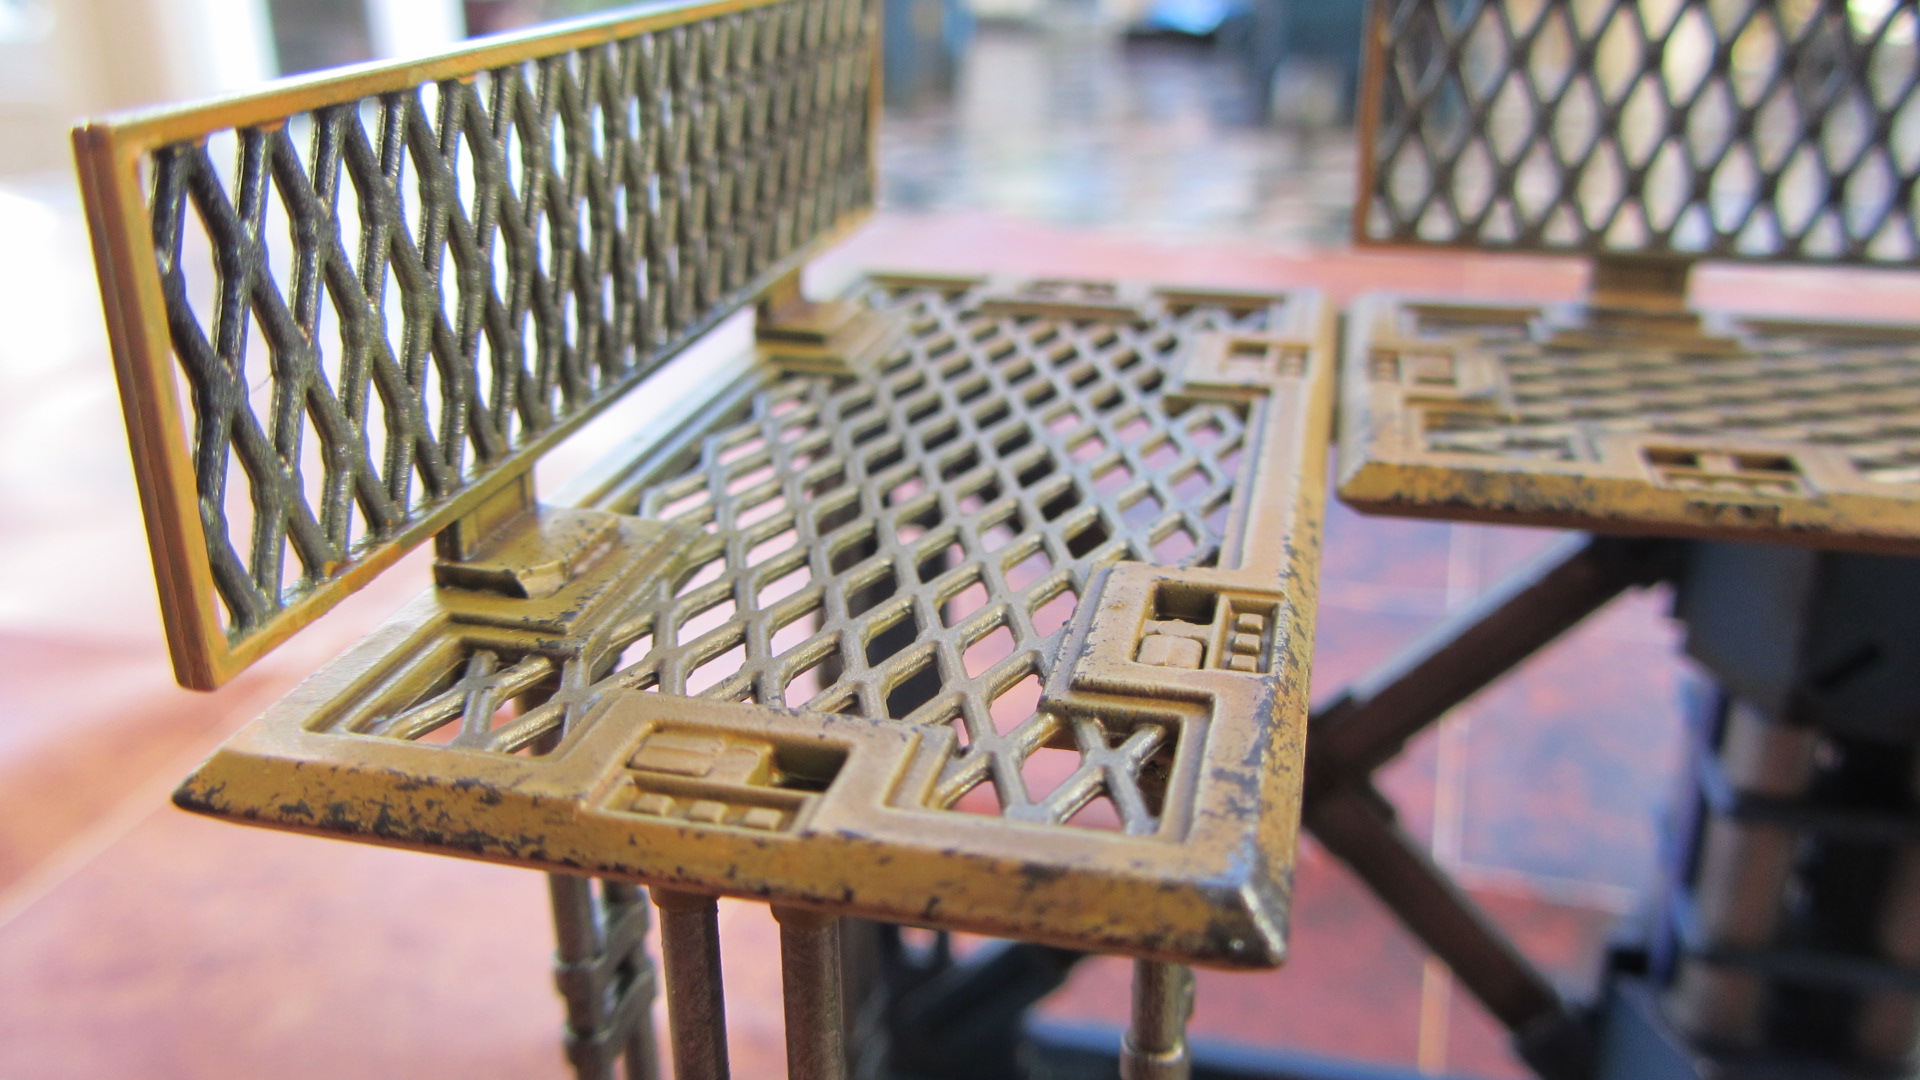
Lastly, here’s some assorted close ups showing the nice weathering effect that’s so easy to achieve using the edge-sponging technique:
Well, that’s been a long post. I hope you’ve enjoyed it and as always; thanks for reading! 🙂

Brilliant. I particularly like the power loader, consider that idea stolen. Also its good that the buildings look to have purpose, not just there to block L.O.S.
LikeLiked by 1 person
Hi,
Great terrain and board. I’m really looking forward to seeing it painted up.
Was this the same amount of terrain bags as the Lockdown pledge or double it?
LikeLiked by 1 person
Hi, this was the same amount of sprues as you get in a Lockdown pledge (two full Industrial Battlezones). Covers the standard gaming area just nicely 🙂
LikeLiked by 1 person
Nice stuff, thanks.
All this new scenery does not appear yet on the Mantic shop site
LikeLiked by 1 person
No, this scenery has only just been sent out to people who backed the Kickstarter. I haven’t seen any dates for a retail release yet, but I would guess later this Summer 🙂
LikeLike
Fantastic. I only got a Quarantine pledge, but I have plenty of the previous battlezone stuff saved up. I’ll be stealing liberally from this blog post. You’ve come up with some great stuff here. Thanks!!!
LikeLiked by 1 person
You’re welcome, Dan. Thanks for the kind words and I’m very pleased if I’ve helped to inspire your own Battlezone builds. 🙂
LikeLike
Thanks for the inspiration. I have already got the mine shaft used in a campaign I am writing. I will also be stealing some of your ideas 🙂 Thank you very much.
LikeLiked by 1 person
You’re welcome – glad I’ve been of help 🙂
LikeLike
Looking great,and I can’t wait to give it a try.
When I get round to painting mine I will be referencing this, I might also add some orange as a tribute to the printing press where I once worked.
LikeLiked by 1 person
Wow, amazing stuff! I’ve linked your work in our article about Battlezones: https://alkony.enerla.net/english/the-nexus/miniatures-nexus/miniature/miniature-scenery/futuristic-scenery-system-in-1-56-scale-battlezones-for-deadzone-from-mantic-games-miniature-scenery-review
LikeLiked by 1 person
Thank you very much, both for the compliment and the link! Wishing you all the best, Chris ‘The Other One’ Evans
LikeLiked by 1 person